Home   /  

PBX – Voice Library

PBX – Voice Library is a collection of pre-recorded audio messages, and IVR messages used by a Private Branch Exchange (PBX). It helps businesses create professional messages and use them for future use.

Also, user can update, enable/disable, delete these voice libraries.

Voice Library Setup

  1. Sign in to AgentFront CRM.
  2. From the top menu, choose PBX.
  3. The PBX – Dashboard opens by default.
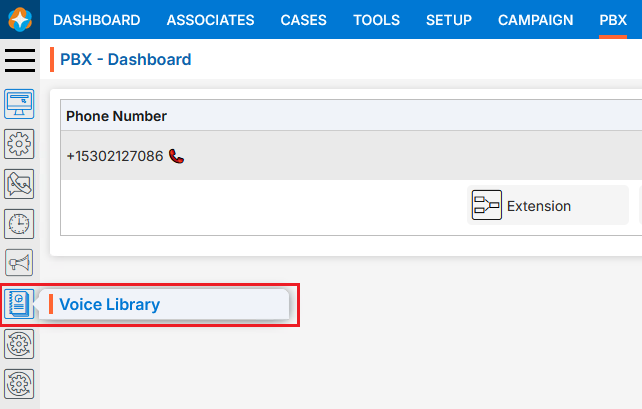
  4. In the left-side panel, select Voice Library.
  5. The Voice Library page will open.
  6. There will be following two tabs:
    • Voice Library
    • System/Default Messages
    • Voice Library
      • The Voice Library page opens with a list of existing Voice Libraries.
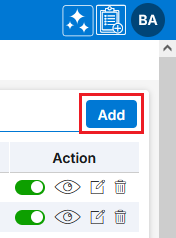
      • There is an Add button above the Action Column on the right panel to add new Voice Library.
      • There are options to Enable/Disable (/), View ( ), Edit ( ) and Delete ( ) the existing Voice Library under the Action column.

      • Add New Voice Library:
        • Click on Add button to add new Voice Library.
        • The Add Voice Library window will open, allowing the user to enter the required details to create a new Voice Library.
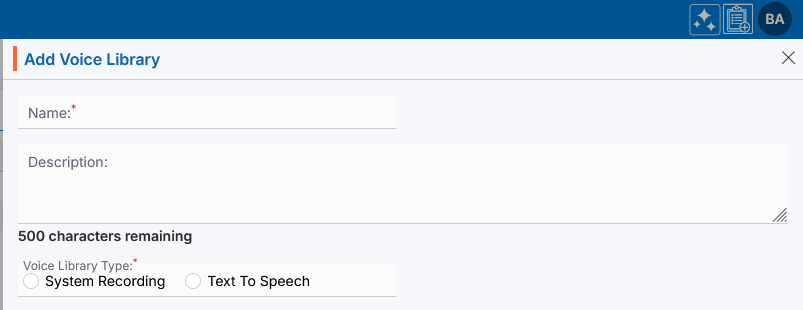
        • Name: Enter the clear, descriptive name.
        • Description: Optional explanation of the Voice Library’s description.
        • Voice Library Type: Select the option- System Recording or Text To Speech.
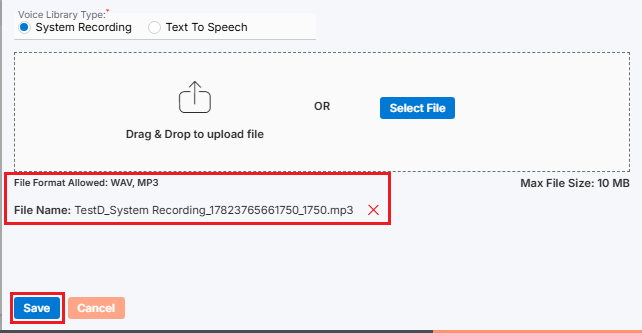
          • Steps to add System Recording file:
            • While using the System Recording option, the user can select any previously recorded file.
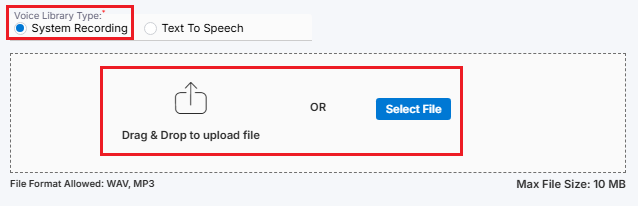
            • Select the file and click on Save.
            • The Voice Library is now listed and ready to use and displayed with its Voice Library Type. New Voice Library will be enabled by default.

          • Steps to add Text To Speech file:
            • While using the Text-to-Speech option, the Add Recording button will be enabled.
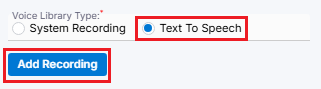
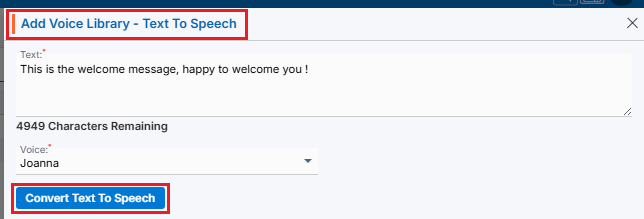
            • After clicking the Add Recording button, a new window titled “Add Voice Library – Text-to-Speech” will open.
            • Enter the following required fields:
              • Text: Enter the message you would like to convert into speech. Ensure that the message is clear and descriptive.
              • Voice: Select the desired name from the drop-down list.
            • Click on Convert Text To Speech.
            • The message entered will be converted into speech using the person selected from the drop-down menu.
            • Once setup is completed for Text To Speech, click on OK button.
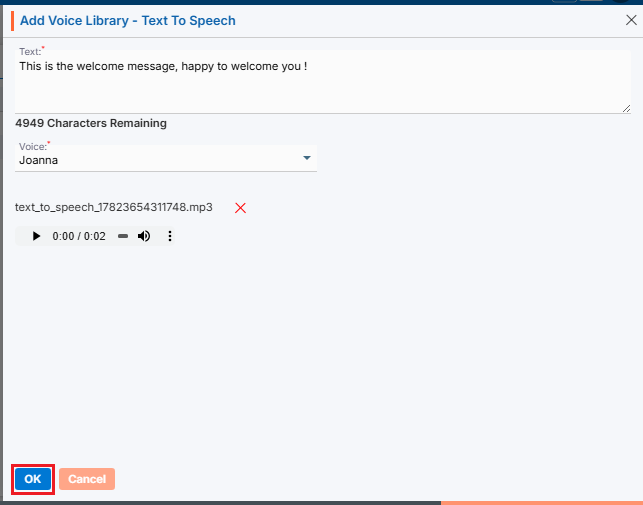
            • The recording file will be available on the Add Voice Library page.
            • Once all the details have been filled in and the selection is complete, click on Save button.
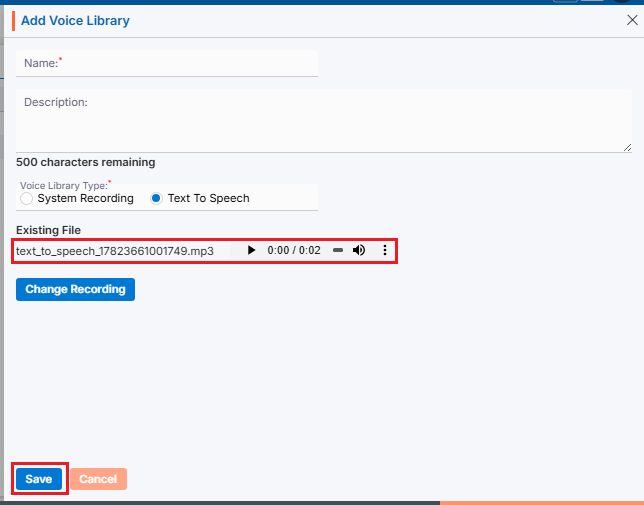
        • The Voice Libraries are now listed and ready to use and displayed with its Voice Library Type. New Voice Library will be enabled by default.

        • Enable/Disable Voice Library:
          • Click Enable ()icon from the Action Column for the Voice Library you want to Disable.
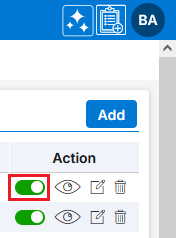
          • It will ask for confirmation popup, click on Disable () button as per the requirement otherwise click on Close button.
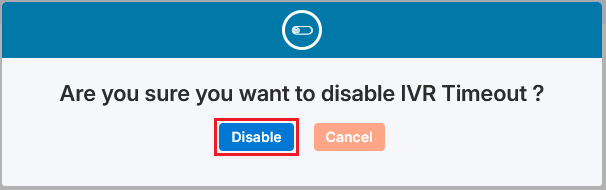
          • Click Disable () icon from the Action Column for the Voice Library you want to Enable.
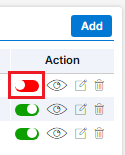
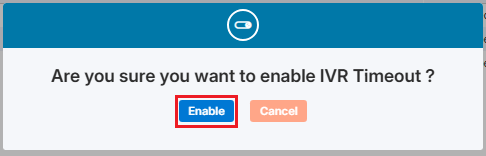
          • It will ask for confirmation popup, click on Enable () button as per the requirement otherwise click on Close button.
        • View Voice Library:
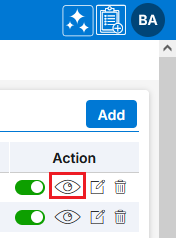
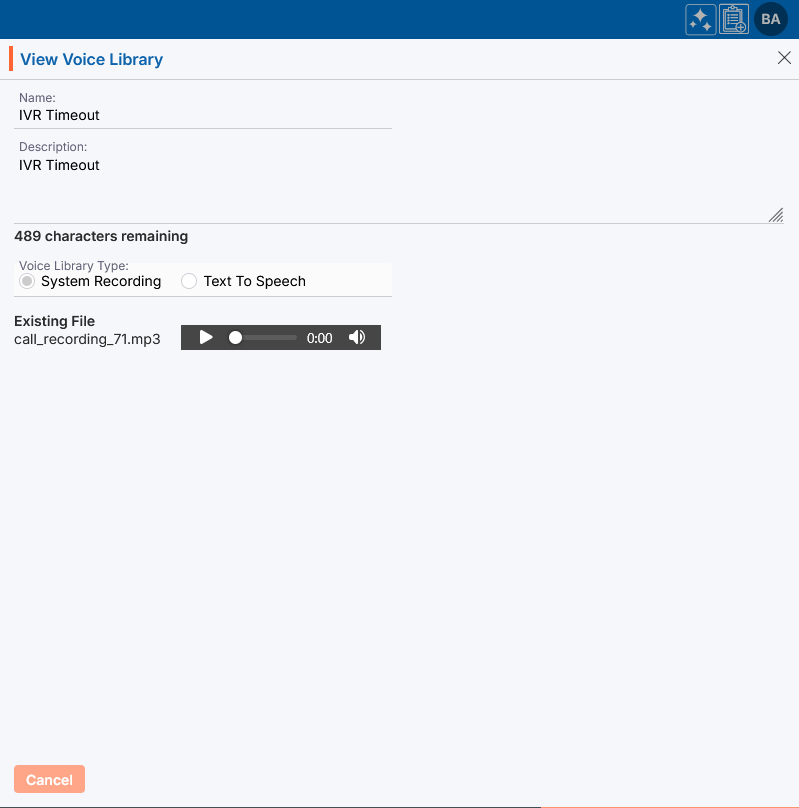
          • Click View () icon from the Action Column for the Voice Library you want to view details of Voice Library, new page will open with all details of Voice Library.
          • A new pop-up window will open, displaying all the Voice Library details in view only mode.
        • Edit/Update Voice Library:
          • To update the existing Voice Library from the available list, Click on Edit () icon from Action Column for the Voice Library you want to edit/update.
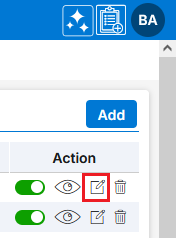
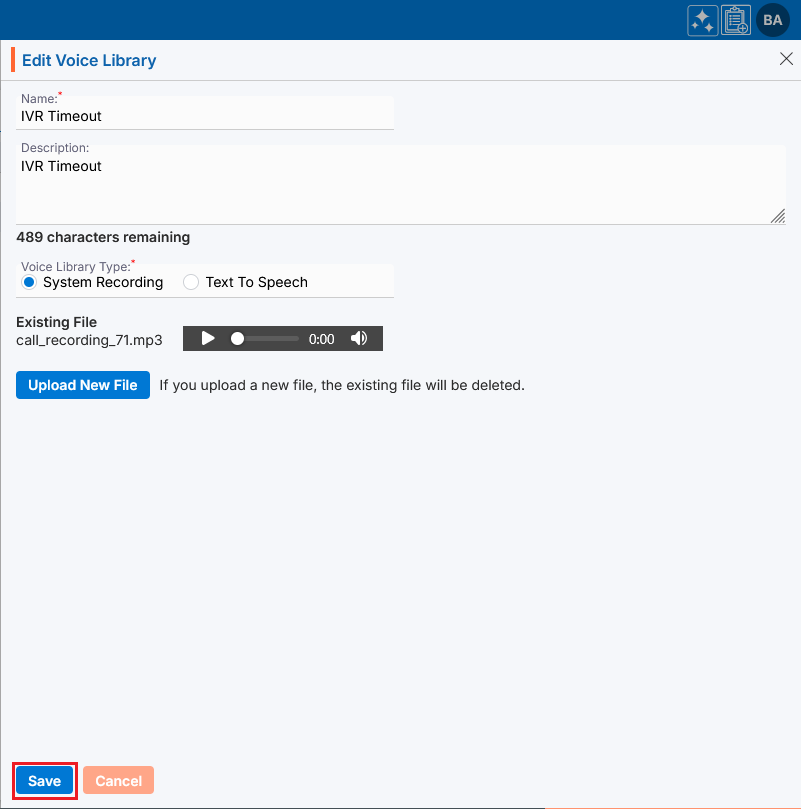
          • Clicking Edit () icon will open the selected Voice Library in edit mode with title Edit Voice Library. Update the required field and click Save.
        • Delete Voice Library:
          • To delete the existing Voice Library from the available list, click on Delete () icon from the Action Column for the Voice Library you want to delete.
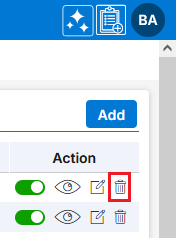
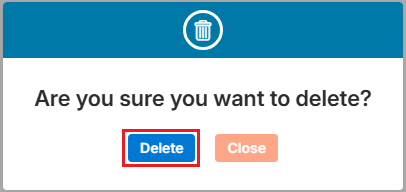
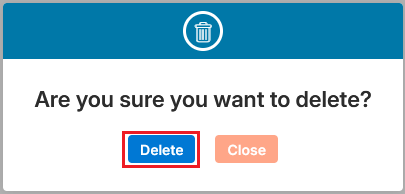
          • It will ask for confirmation popup, click on Deleted button to delete Voice Library otherwise click on Close button.
        • System/Default Messages
          • On the same page, a separate tab named “System/Default Messages” is available next to the “Voice Library” tab. Click on the “System/Default Messages” tab to proceed.
          • This tab will display the available System generated default messages list.
          • There is only Edit () option available for the existing System/Default Messages under the Action column.
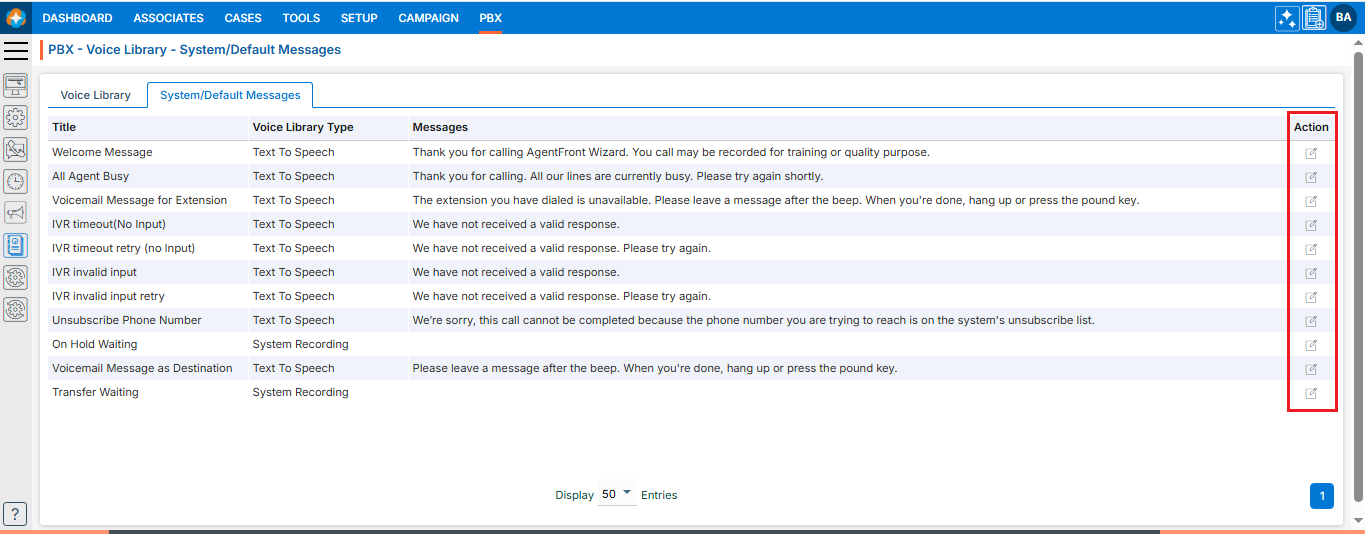
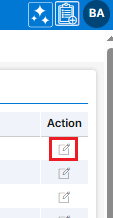
          • To update the any existing System/Default Message from the available list, Click on Edit () icon from Action Column for the System/Default Messages you want to edit/update.
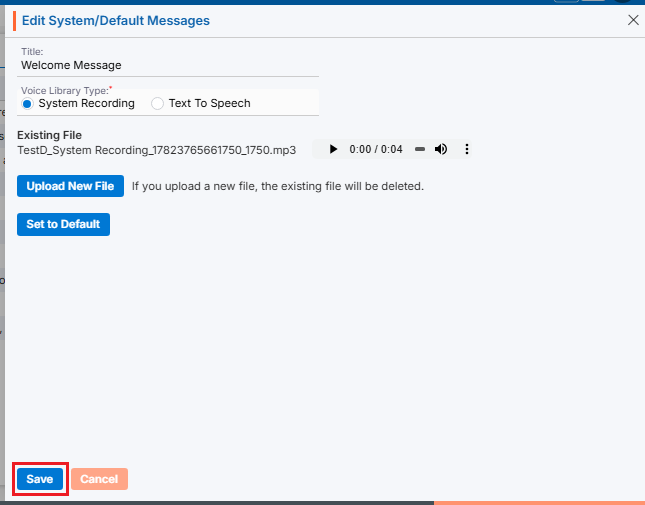
          • Clicking Edit () icon will open the selected Message in edit mode with title Edit System/Default Messages. It allows users to update the Voice Library Type only from System Recording to Text To Speech and Text to Speech to System Recording as required.
            For example, here we are updating Voice Library Type from “Text To Speech” to System Recording and click Save.
          • The updated Voice Library Type will be displayed in the listing.

0
0

PBX – Voice Mail

Voice Mail is a feature in a Private Branch Exchange (PBX) telephone system that allows callers to leave recorded voice messages when the recipient is unavailable or does not answer. Voice Mail are stored in the system and can be accessed later by the user. Users can listen to, manage, or download these recordings for follow-up

  1. Sign in to AgentFront CRM.
  2. From the top menu, select PBX.
  3. The PBX – Dashboard opens by default.
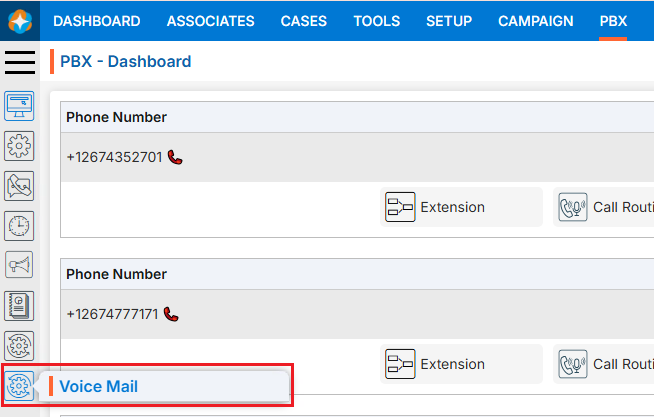
  4. Select Voice Mail from left side panel.
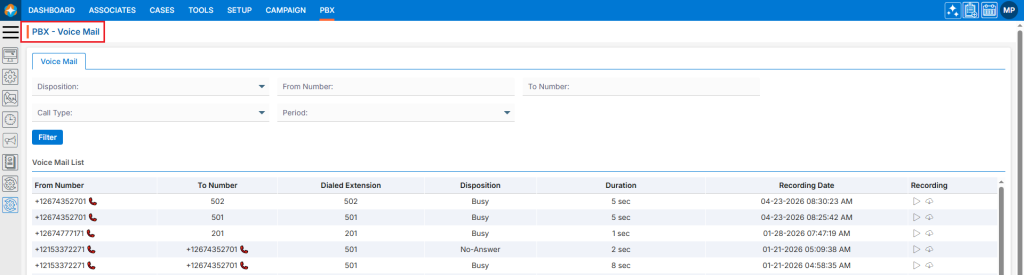
  5. The Voice Mail page will open.
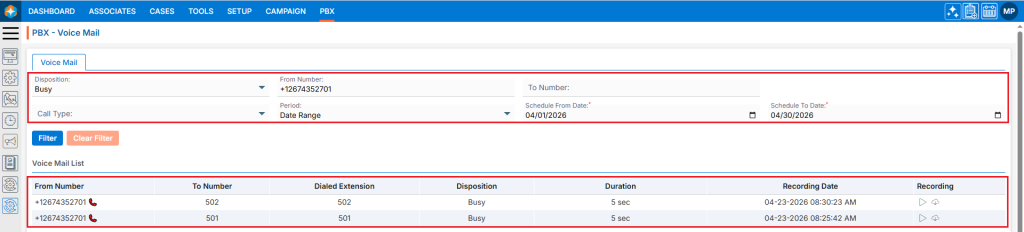
  6. This Voice Mail page will display all available Voice Mail logs by default.
  7. There is also a filter option to search for specific Voice Mails.

Voice Mail List Details:

  1. The Voice Mail page displays Voice Mail List in a structured list view
    • Each entry represents a Voice Mail List and includes:
      • From and To Phone number
      • Dialer Extension
      • Disposition
      • Duration
      • Recording Date
      • Recording with Play () and Download ()options:
        • The Play () icon is used to listen to recorded audio.
        • Download () icon is used to download and save the recorded audio file for future use.

Filter Voice Mail:

  1. Users can search for specific Voice Mail data using the filter option.
  2. Following fields are available to apply Filter:
    • Description
    • From Number
    • To Number
    • Call Type
    • Period
  3. Select the required field(s) and click on Filter.
  4. Based on the selected fields the Voice Mail results will be displayed.
0
0

PBX – Announcements

The PBX Phone Number List feature provides a centralized view of all phone numbers configured in the system. It allows users to view, search, and manage numbers used for internal extensions, inbound routing, and outbound calling. The list view displays details such as assigned users, created by and status for each number. Depending on user permissions, numbers can also be edited or reassigned.
In a PBX + CRM integration, an announcement refers to an automated audio message played to callers inside a phone system based on rules or data coming from the CRM.

Announcements Setup

  1. Sign in to AgentFront CRM.
  2. From the top menu, select PBX.
  3. The PBX – Dashboard opens by default.
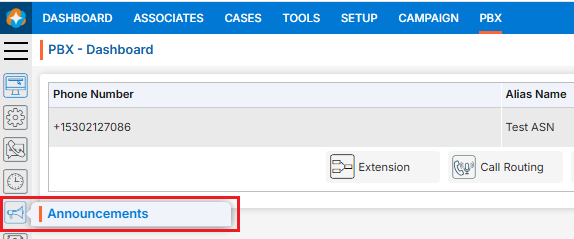
  4. Select Announcements from left side panel.
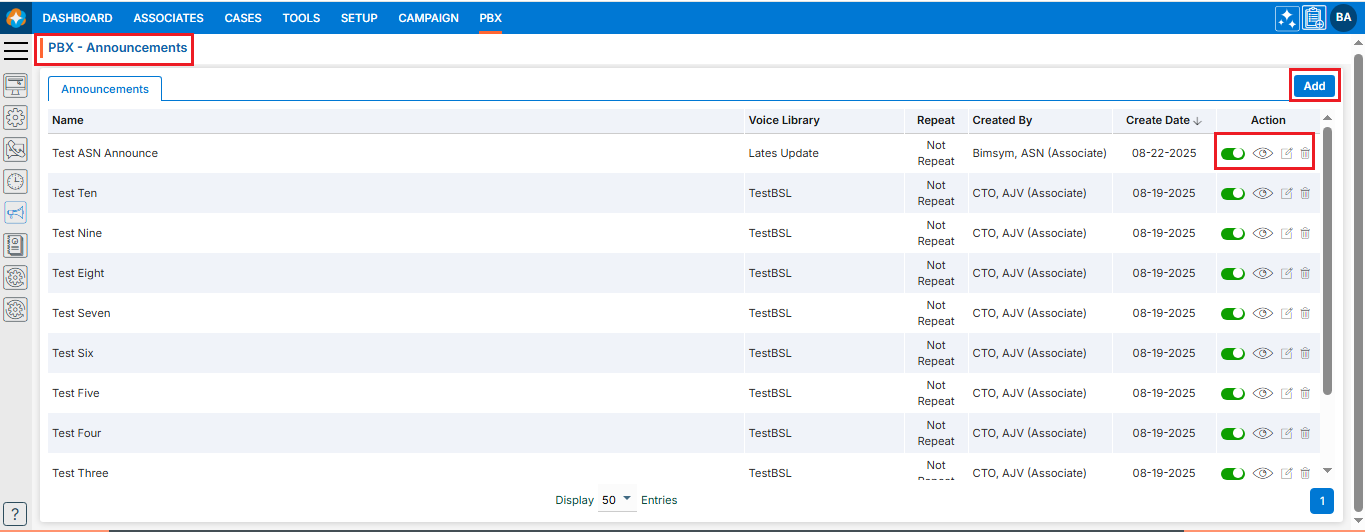
  5. The Announcements page will open and will display all available Announcements by default.
    • This page will display the following fields:
      • Announcements Name
      • Voice Library Name
      • Repeat
      • Created By
      • Create Date
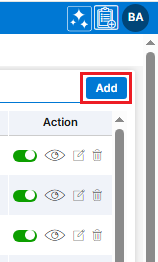
  6. There is Add button above the Action Column on the right side of the page.
  7. There are options to Enable/Disable (/), View ( ), Edit ( ) and Delete ( ) the existing Announcements under the Action column.

Action Column Functionalities:

Add Announcements:

  1. Click Add button to add new Announcements.
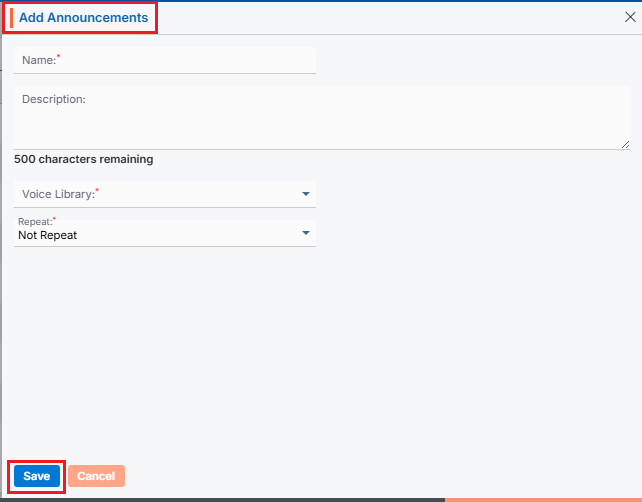
  2. A new pop-up window will open with tile Add Announcements and display all the fields to add new Announcements.
    • To add new Announcements, enter the following details:
      • Name: Enter the clear, descriptive name. This is what users can identify the purpose of Announcements.
      • Description: Optional explanation of the purpose of Announcements.
      • Voice Library: Choose option from the dropdown. This dropdown displays the list of voice libraries created under PBX > Voice Library.
      • Repeat: Choose option from the dropdown.
      • Once all the details have been filled in and the selection is complete, click Save.
      • The announcement is now listed and ready for use. New announcement will be enabled by default.

Enable/Disable Announcements:

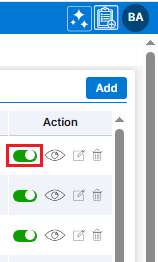
  1. Click Enable () icon from the Action Column for the Announcement you want to Disable.
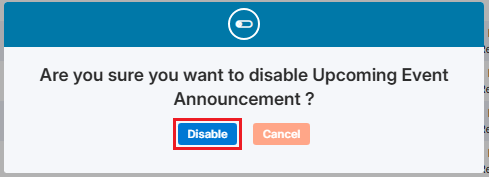
  2. It will ask for confirmation popup, click on Disable ( ) button as per the requirement otherwise click on Close button.
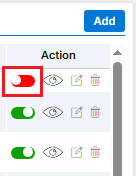
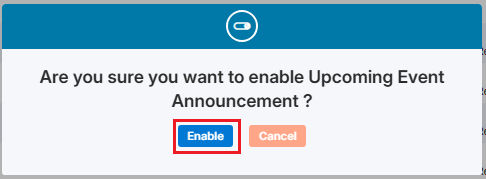
  3. Click Disable () icon from the Action Column for the Announcement you want to Enable.
  4. It will ask for confirmation popup, click on Enable () button as per the requirement otherwise click on Close button.

View Announcements:

  1. Click View () icon from the Action Column for the Announcement you want to view details of Announcements.
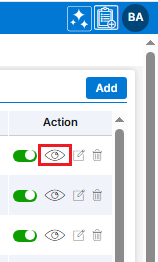
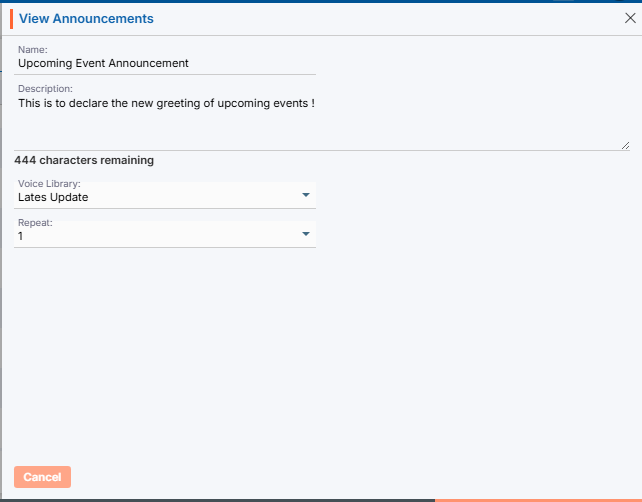
  2. A new pop-up window will open, displaying all the Announcement details in view only mode.

Edit/Update Announcement:

  1. To update the existing Announcement from the available list, Click on Edit () icon from Action Column for the Announcement you want to edit/update.
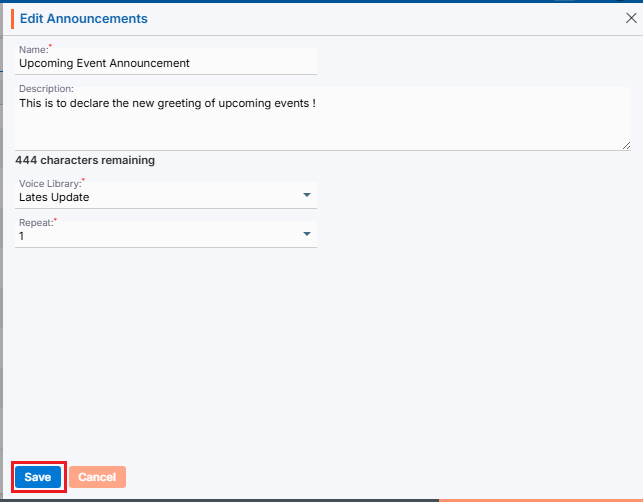
  2. Clicking Edit () icon will open the selected Announcement in edit mode with title Edit Announcement. Update the required field and click Save.

Delete Announcement:

  1. To delete the unwanted existing Announcement from the available list, click on Delete () icon from the Action Column for the Announcement you want to delete.
  2. It will ask for confirmation popup, click on Deleted button to delete the Announcement otherwise click on Close button.

0
0

PBX – Call History

A PBX receives incoming calls, identifies the destination extension or department, and routes the call accordingly. It manages internal communication between users and connects outgoing calls to external phone networks while providing features like call transfer, voicemail, and call forwarding.
In a CRM that includes PBX (phone system) integration, the Call History feature under the PBX tab is essentially a detailed log of all phone activity tied to contacts, leads, and accounts.

  1. Sign in to AgentFront CRM.
  2. From the top menu, select PBX.
  3. The PBX – Dashboard opens by default.
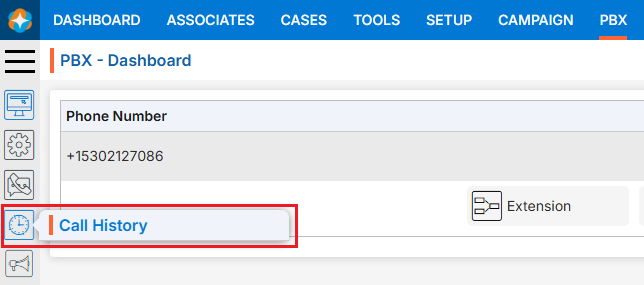
  4. Select Call History from left side panel.
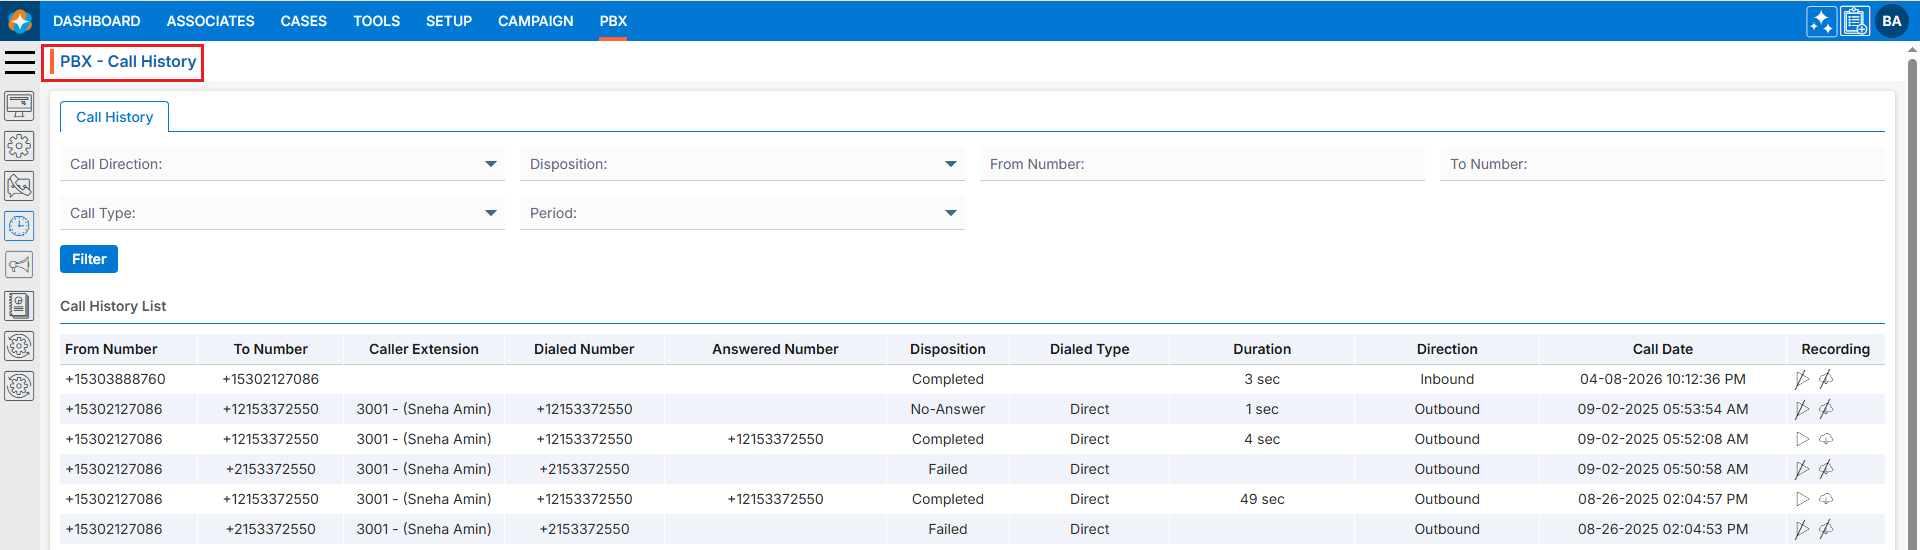
  5. The Call History page will open.
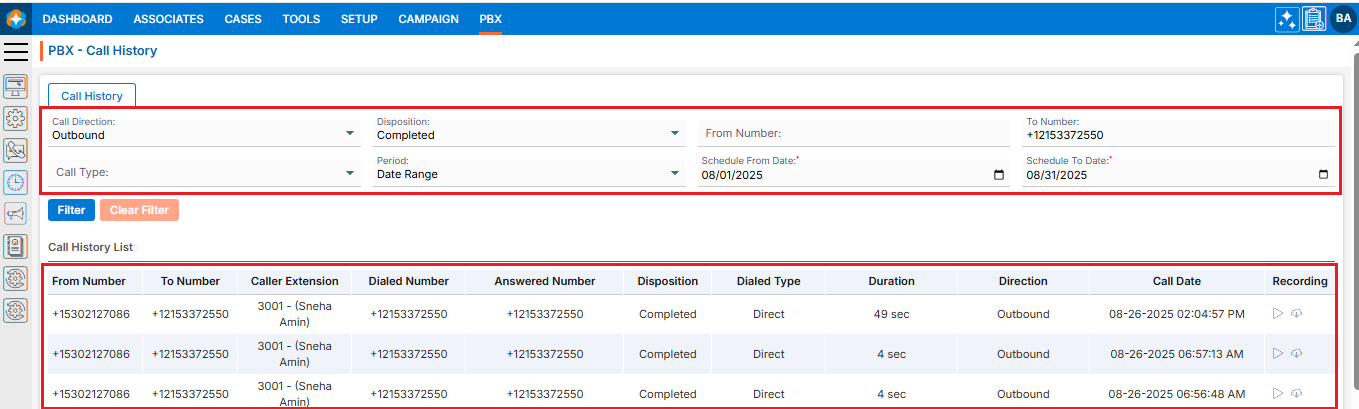
  6. This Call History page will display all available call history logs by default.
  7. There is also a filter option to search for specific history records.

History Details:

  1. The Call History page displays call history records in a structured list view.
    • Each entry represents a call record and includes:
      • From and To Phone number.
      • Caller Extension.
      • Dialed Number
      • Answered Number
      • Disposition (Call status)
      • Dialed Type
      • Duration
      • Direction
      • Call Date and Time
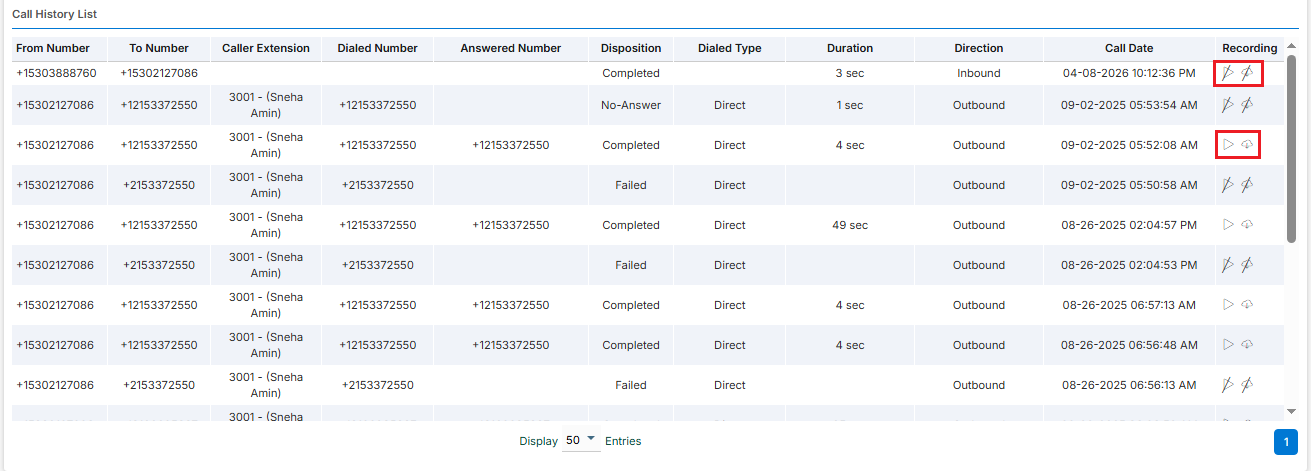
      • Call Recorded Audio with Play ()/Download ( ) and No Play ( )/No Download ( ) options:
        • The Play ()and Download ( ) icons will be enabled only for records where communication was successfully executed.
        • There will be No Play () and No Download () icons for records where communication was not successfully executed.

Filter Call History:

  1. Users can search for specific call history data using the filter option.
  2. Following fields are available to apply Filter:
    • Call Direction
    • Disposition
    • From Number
    • To Number
    • Call Type
    • Period
  3. Select the required field(s) and click on Filter.
  4. Based on the selected fields the call history results will be displayed.

0
0

PBX – Dashboard

A PBX receives incoming calls, identifies the destination extension or department, and routes the call accordingly. It manages internal communication between users and connects outgoing calls to external phone networks while providing features like call transfer, voicemail, and call forwarding.

A PBX dashboard gives administrators a centralized place to configure and monitor the phone system.

Dashboard Setup

  1. Sign in to AgentFront CRM.
  2. From the top menu, select PBX.
  3. The Dashboard opens by default.
  4. There is Add New Phone button above the Action Column on the right side of the page.
  5. There are sub-functionalities of PBX: Extension, Call Routing, IVR, Inbound Routes, Outbound Routes and Time Condition.
  6. There are options to Enable/Disable (/), View ( ), Edit ( ) and Delete ( ) the existing Phone Number under the Action column.

Action Column Functionalities:

    Enable/Disable Phone Number:

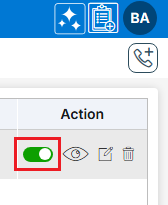
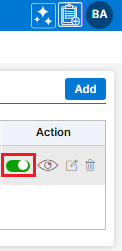
    1. Click Enable/Disable (/ )icon from the Action Column for the Phone Number you want to Enable/Disable.
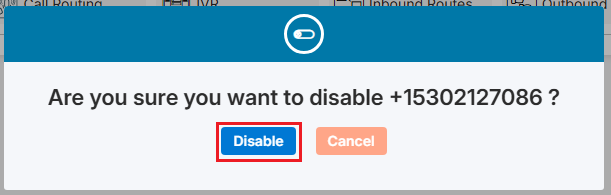
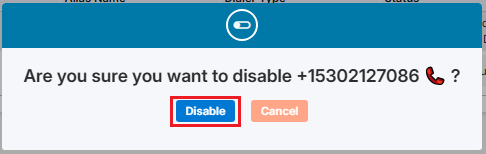
    2. It will ask for confirmation popup, click on Enable/Disable (/ ) button as per the requirement otherwise click on Close button. If the status is Enable ( ), user can Disable the status and if the status is Disable ( ), user can enable the status.

    View Phone Number:

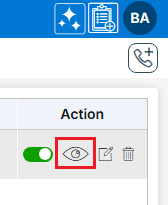
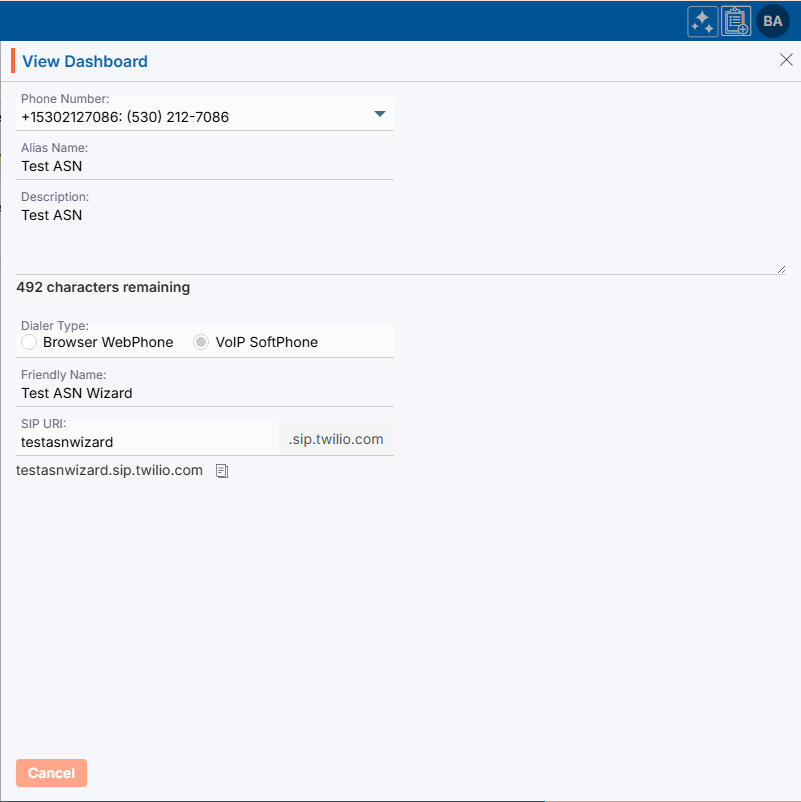
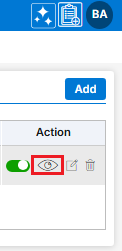
    1. Click View () icon from the Action Column for the Phone Number you want to view details of Phone Number.
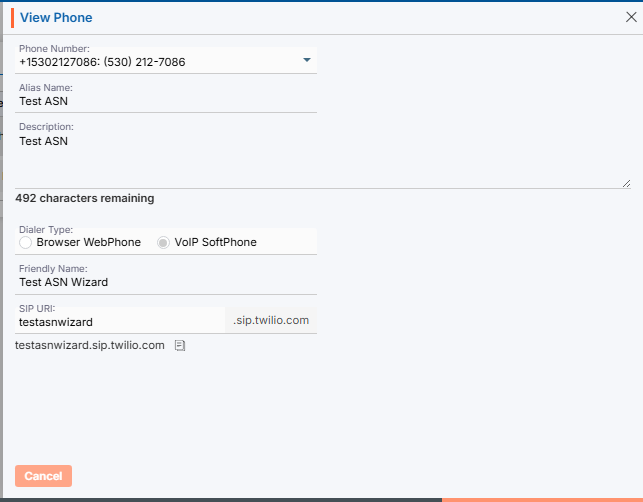
    2. A new pop-up window will open, displaying all the Phone Number details in view only mode.

    Edit/Update Phone Number:

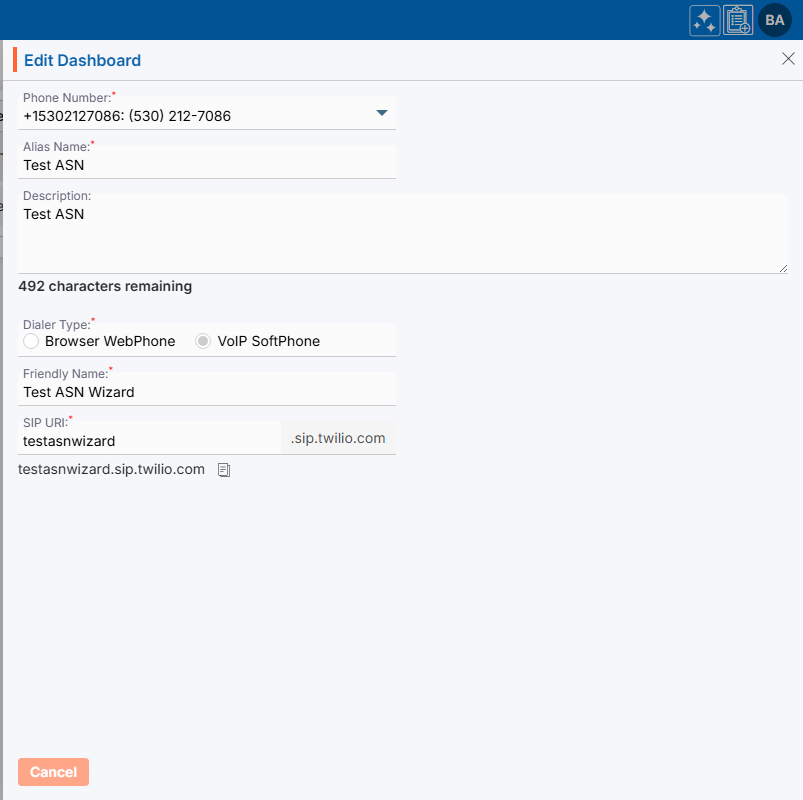
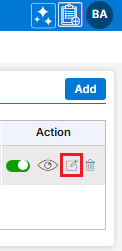
    1. To update the existing Phone Number from the available list, Click on Edit () icon from Action Column for the Phone Number you want to edit/update.
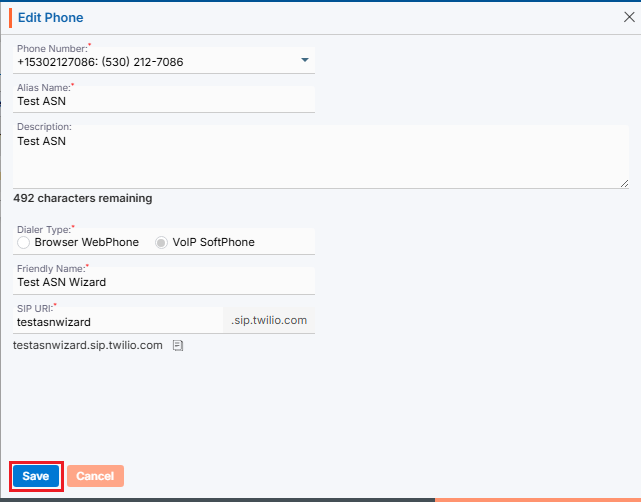
    2. Clicking Edit () icon will open the selected Phone Number in edit mode with title Edit Phone Number. Update the required field and click Save.

    Delete Phone Number:

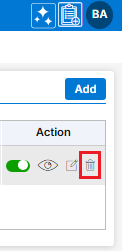
    1. To delete the unwanted existing Phone Number from the available list, click on Delete () icon from the Action Column for the Phone Number you want to delete.
    2. It will ask for confirmation popup, click on Deleted button to delete the Phone Number otherwise click on Close button.

    • On the same page there are following functionalities available:
      • Extension: A unique internal number assigned to a user or device within the PBX system for internal communication. (More Info… Click Here)
      • Call Routing: The process of directing incoming or outgoing calls to the appropriate extension, department, or destination. (More Info… Click Here)
      • IVR: An automated menu system that lets callers choose options using keypad inputs or voice commands. (More Info… Click Here)
      • Inbound Routes: Rules that determine how incoming calls are handled and where they are directed within the PBX.  (More Info… Click Here)
      • Outbound Routes: Rules that define how outgoing calls are sent through available phone lines or service providers.  (More Info… Click Here)
      • Time Condition: A feature that routes call differently based on predefined schedules, such as business hours, weekends, or holidays. (More Info… Click Here)
    0
    0

    PBX – Phone List

    The PBX Phone Number List feature provides a centralized view of all phone numbers configured in the system. It allows users to view, search, and manage numbers used for internal extensions, inbound routing, and outbound calling. The list view displays details such as assigned users, created by and status for each number. Depending on user permissions, numbers can also be edited or reassigned.

    Phone Number Setup

    1. Sign in to AgentFront CRM.
    2. From the top menu, select PBX.
    3. The PBX – Dashboard opens by default.
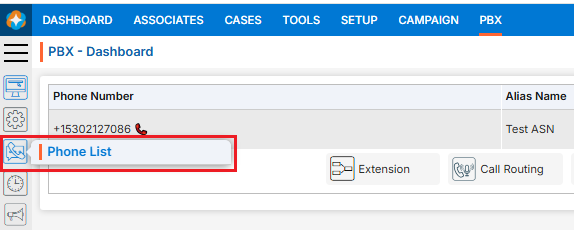
    4. Select Phone List from left side panel.
    5. The Phone List page will open.
    6. There is Add New Phone button above the Action Column on the right side of the page.
    7. There are sub-functionalities of PBX: Extension, Call Routing, IVR, Inbound Routes, Outbound Routes and Time Condition.
    8. There are options to Enable/Disable (/), View ( ), Edit ( ) and Delete ( ) the existing Phone Number under the Action column.

    Action Column Functionalities:

    Add Phone Number:

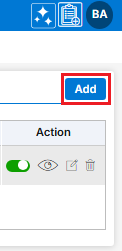
    1. Click Add button to add new Phone Number.
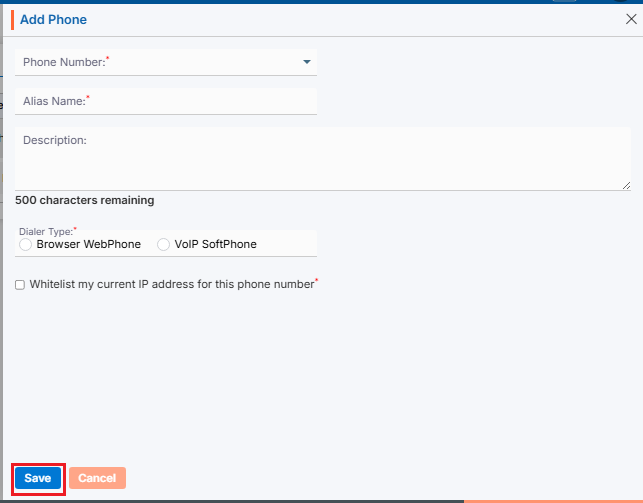
    2. A new pop-up window will open with tile Add Phone and display all the fields to add new Phone Number.
      • To add new Phone Number, enter the following details:
        • Phone Number: Choose phone number from the drop-down. This is what users can use for dashboard setup.
        • Allias Name: Enter the clear, descriptive name. This is what users can identify the name of person related to Phone Number.
        • Description: Optional explanation of the phone number purpose.
        • Dialer Type: Choose option Browser WebPhone or VoIP SoftPhone.
        • Mark check box for Whitelist my current IP address for this phone number field.
        • Once all the details have been filled in and the selection is complete, click Save.
        • The phone number is now listed and ready for use.

    Enable/Disable Phone Number:

    1. Click Enable/Disable (/ )icon from the Action Column for the Phone Number you want to Enable/Disable.
    2. It will ask for confirmation popup, click on Enable/Disable (/ ) button as per the requirement otherwise click on Close button. If the status is Enable ( ), user can Disable the status and if the status is Disable ( ), user can enable the status.

    View Phone Number:

    1. Click View () icon from the Action Column for the Phone Number you want to view details of Phone Number.
    2. A new pop-up window will open, displaying all the Phone Number details in view only mode.

    Edit/Update Phone Number:

    1. To update the existing Phone Number from the available list, Click on Edit () icon from Action Column for the Phone Number you want to edit/update.
    2. Clicking Edit () icon will open the selected Phone Number in edit mode with title Edit Phone Number. Update the required field and click Save.

    Delete Phone Number:

    1. To delete the unwanted existing Phone Number from the available list, click on Delete () icon from the Action Column for the Phone Number you want to delete.
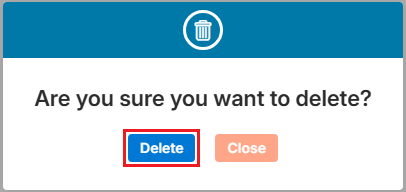
    2. It will ask for confirmation popup, click on Deleted button to delete the Phone Number otherwise click on Close button.

    • On the same page there are following functionalities available:
      • Extension: A unique internal number assigned to a user or device within the PBX system for internal communication. (More Info… Click Here)
      • Call Routing: The process of directing incoming or outgoing calls to the appropriate extension, department, or destination. (More Info… Click Here)
      • IVR: An automated menu system that lets callers choose options using keypad inputs or voice commands. (More Info… Click Here0
      • Inbound Routes: Rules that determine how incoming calls are handled and where they are directed within the PBX.  (More Info… Click Here)
      • Outbound Routes: Rules that define how outgoing calls are sent through available phone lines or service providers.  (More Info… Click Here)
      • Time Condition: A feature that routes call differently based on predefined schedules, such as business hours, weekends, or holidays. (More Info… Click Here)
    0
    0