 - Knowledge Base
 In a PBX integrated with CRM, a Time Group is a set of predefined working hours that tells the PBX when a particular call-handling rule should apply. A Time Group is a feature that controls when users can receive calls, preventing calls from being delivered during the specific days or time periods configured in the system. The schedule is defined by the user according to business requirements. A Time Group defines the days and time periods during which a business or department is considered to be open, closed, or operated under a specific schedule.
Below two concepts are used together here:
Standard Working Schedule
- Defines the normal weekly working hours.
- Customer calls → PBX checks Time Group → Business is open → Call is routed to the support queue → CRM displays customer information to the agent.
Special Hours/Holiday
- Defines an exception where the business operates at different hours and defines exceptions to the normal schedule.
- Customer calls → PBX checks Time Group → Business is closed → PBX plays an after-hours announcement → Call goes to voicemail or a queue.
So the logic can be represented as:
Standard Working Schedule → Check Special Holiday/Special Hours → Determine Final Schedule → Route the Call
Time Group Setup:
- Sign in to AgentFront CRM.
- From the top menu, choose PBX.
- The PBX – Dashboard opens by default.

- Select Setup > Time Groups from left side panel.
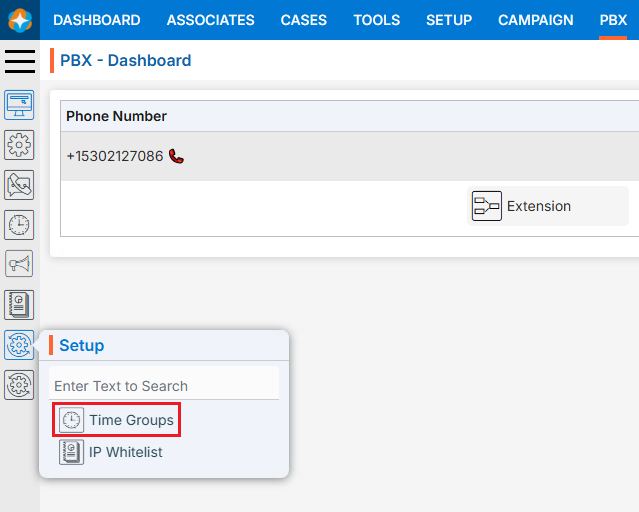
- The PBX – Time Groups page will open and display a list of existing Time Groups.
This page will display the following fields:- Time Group Name
- Description
- Created By
- Created Date
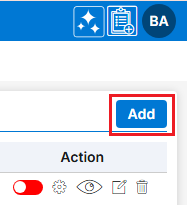
- There is an Add button above the Action Column on the right side of the page to add new Time Group.
- There are options to Enable/Disable (
 /
/  ), Manage (
 ), View (
 ), Edit (
 ) and Delete (
 ) the existing Time Group under the Action column.

Add New Time Group:
- Click on Add button to add new Time Group.
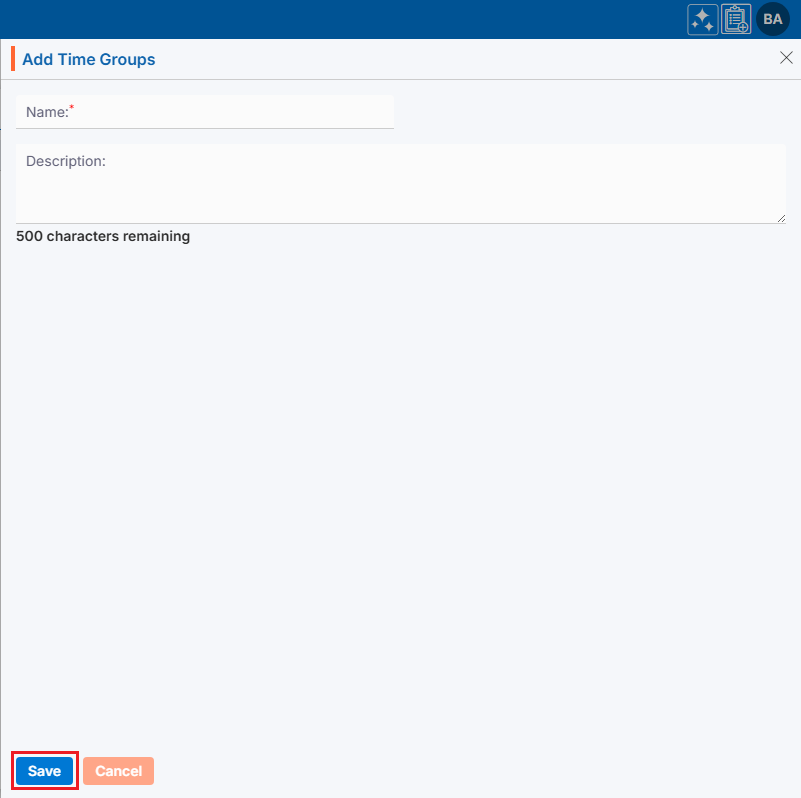
- The new pop-up window will open with title Add Time Groups and display all the fields to add new Time Groups.
To add new Time Groups, enter the following details:- Name: Enter the clear, descriptive name.
- Description: Optional explanation of the Time Group’s description.
- Once all the details have been filled in, Click Save button.
- The Time Group is now listed. New Time Group will be Disabled () by default.
Note: A Time Group will be enabled automatically once at least one configuration has been set up. Until a configuration is set up, the Time Group cannot be enabled.
Manage Time Groups:
- Click Manage () icon in the Action column for the newly added Time Group to configure and manage its settings.
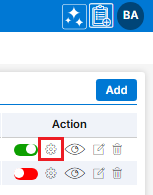
- A new page will open, displaying the following two tabs:
- Standard Working Hours (opens by default)
- Special Hours/Holiday
- Standard Working Hours (opens by default):
- The Standard Working Hours tab is used to configure the organization’s regular business operating schedule. This schedule defines the normal days and hours during which the business is open and available to handle incoming calls.
- In this tab, user can:
- Configure the working days (for example, Monday through Friday).
- Define one or more working time slots for each day (for example, 9:00 AM – 1:00 PM and 2:00 PM – 6:00 PM).
- Set different working hours for different days of the week, if required.
- Configure multiple time intervals in a single day to accommodate lunch breaks or split shifts.
- When an incoming call is received during the configured standard working hours, the PBX processes the call according to the Business Hours call handling rules, such as routing the call to an IVR, ring group, queue, or extension.
- This page displays all days of the week, with each day Disable () by default. Enable () the required days to configure the organization’s standard working hours.
- There is Back button also on the top of the right side of the page.
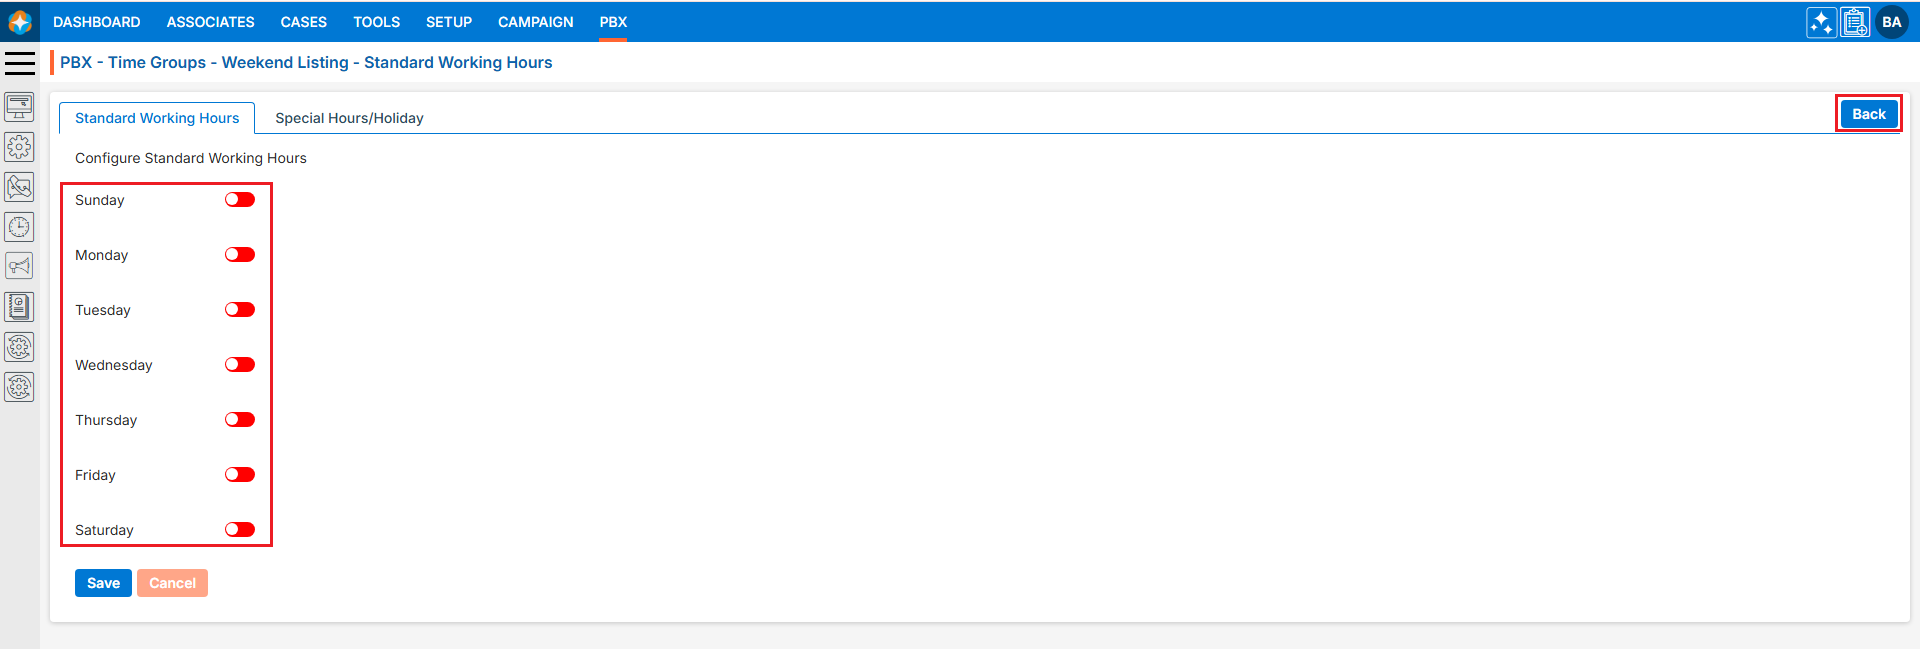
- Click the Disable () for the required day to enable it.
- Once enabled, you can configure the working hours for that day. After clicking the Disable () button for the selected day(s), the corresponding day(s) will be enabled, and a time slot will be displayed, allowing you to configure the working hours.
- Use the plus (
 ) icon to add and configure one or more working time slots for the selected day.
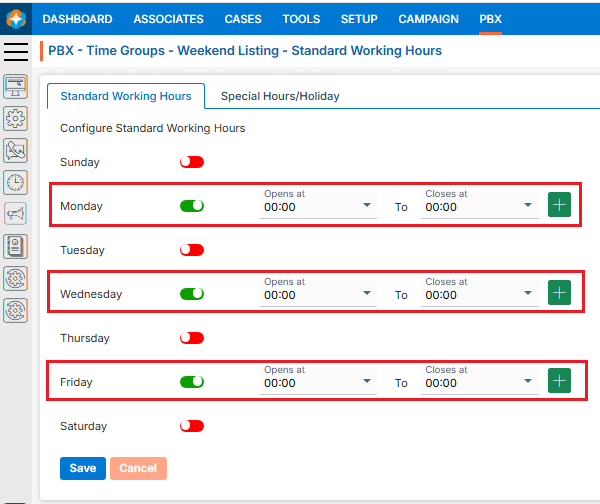
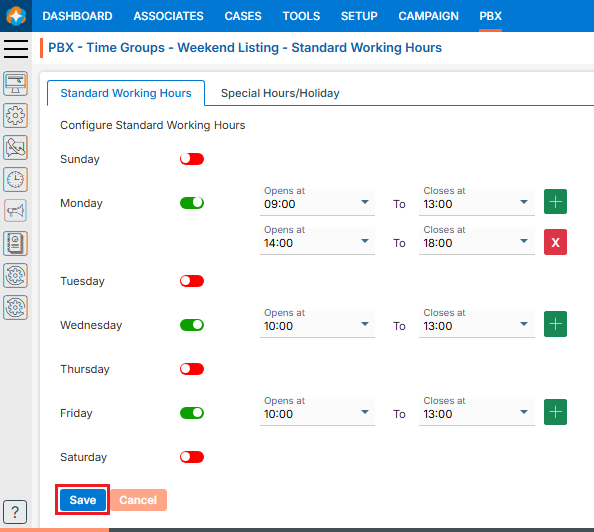
- Select the required time slot(s) for the selected day(s) based on the working schedule.
- Use the Cross (
 ) icon to remove any unwanted time slot(s) from the selected day(s).
 - Once the time slots are configured, click the Save button.
- The configured time slots will be saved, and the PBX will operate according to the defined time slots.
- Special Hours/Holiday:
- The Special Hours/Holiday tab is used to configure exceptions to the regular working schedule. These exceptions temporarily override the standard working hours for specific dates or date ranges.
- This tab is used to configure:
- Public holidays
- Company holidays
- Festivals
- Office closures
- Maintenance periods
- Training sessions
- Half-day operations
- Special business events
- Any other temporary changes to the normal schedule
- For each special schedule, user can:
- Specify a single date or a range of dates.
- Define custom operating hours for that date (for example, 10:00 AM – 2:00 PM).
- Mark the entire day as a holiday if the business will remain closed.
- Add multiple special schedules for different occasions throughout the year.
- When a configured special date matches the current date, the PBX gives priority to the Special Hours/Holiday settings and ignores the standard working hours for that period. Incoming calls are then processed according to the configured Holiday or Special Hours call routing, such as playing a holiday greeting, directing callers to voicemail, or routing calls to an emergency or on-call extension.
- This allows administrators to manage temporary schedule changes without modifying the organization’s regular working hours.
- This page displays Back, Import Holidays and Add button and available list of special holiday list if available.
- Click the Add button to create a Special Hours/Holiday timing setup. This configuration applies only to the selected date and is not recurring.

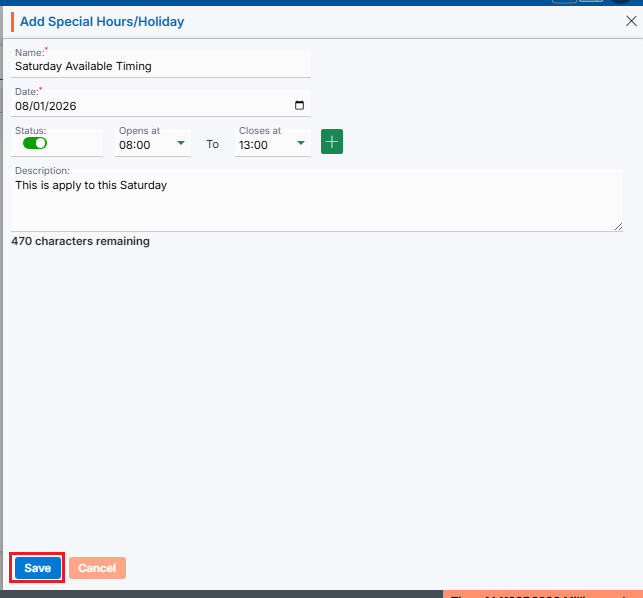
- Clicking on Add button new page will open titled Add Special Hours/Holiday.
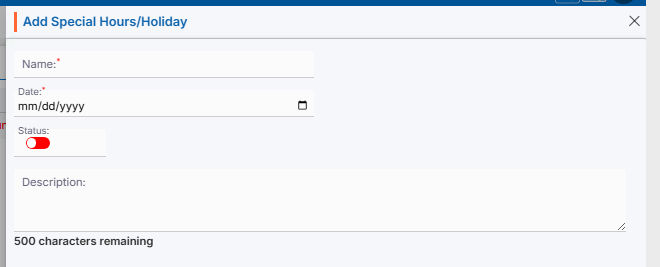
- Fill the following details on this page:
- Name: Enter the clear, descriptive name. This is what users can identify the purpose of Special Hour/Holiday.
- Date: Choose the date for which you want to set a specific time.
- Status: By default, this option is disabled. Click the Disable () icon to enable it and configure the timing. Once enabled, the time slots will also be enabled, allowing you to set the desired timing.
- Use the plus () icon to add and configure one or more working time slots for the selected date.
- Use the Cross () icon to remove any unwanted time slot(s) from the selected date.
- Use the plus (
- Description: Optional explanation of the purpose of Special Holiday Setup.
- Once all the details have been filled in and the selection is complete, click Save.
- The special hours/holiday setup are now listed. There will be View (), Edit () and Delete () options available for listed all special hours/holiday setup. Users can view, edit, and delete existing special hour timing configurations as needed.

- Click the Import Holiday List button to import and override multiple scheduled holiday configurations.
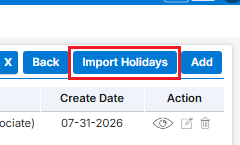
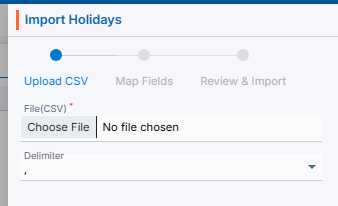
- A new pop-up window will open with title Import Holidays and display all the fields and stages to Import the multiple holidays.
- There will be 3 steps to Import Data:
- Upload CSV,
- Map Fields, and
- Review & Import
- Upload CSV:
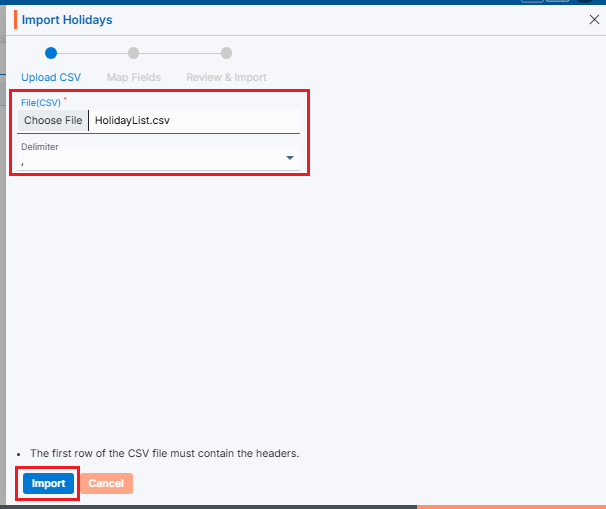
- Select the file containing the data of holidays setup you want to import into the application.
- Select Delimiter option from the drop-down. (The selected file format must match the selected delimiter option.)
- Click the Import button to proceed to the next step, Map Fields.
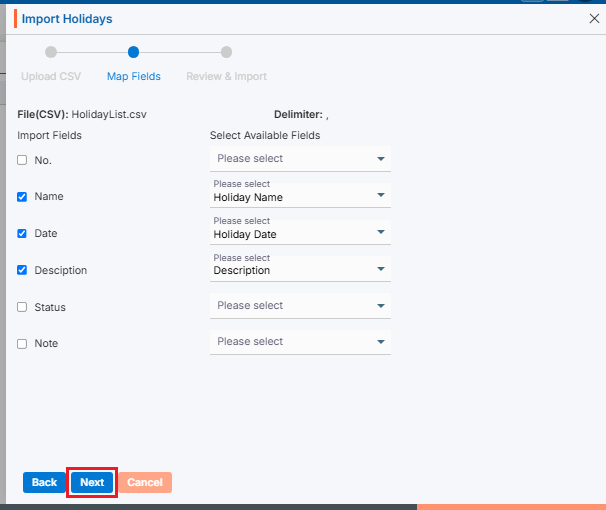
- Map Fields:
- On the same page next step is for Map Fields.
- Selected file name and delimiter will be displayed on this page.
- Needs to map the fields.
- On the left side the system shows the header row from the uploaded CSV file.
- The “Available Fields” section displays required fields from the application. Select the appropriate fields.
- Map the appropriate fields for each field from the dropdown.
- You can deselect unwanted fields by unchecking the checkbox before field name.
- Once fields selection is done, click the Next button.
- Review & Import
- On the same page next step is for Review & Import the data.
- Review page will display the counts of records with issues and without issues.
- The system generates a CSV file link containing the records with issues.
- Click “Click here” to download and review the file.
- Even records can be imported which are shown without any issues.
- Click on Import Data if you want to Import records which are shown without issues.
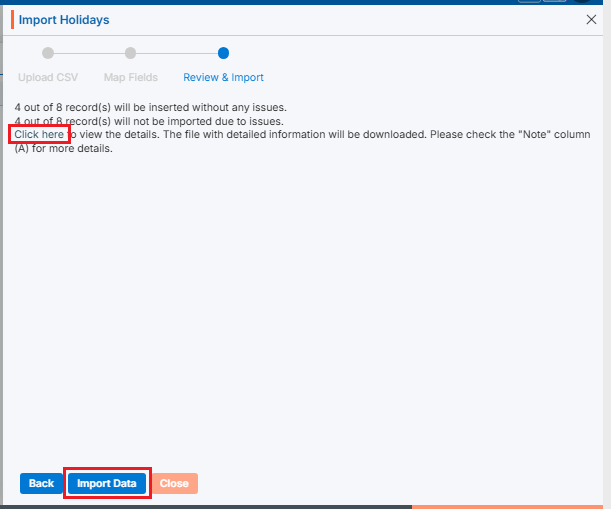
- If you want to correct all the records and then import them together, check the records in the downloaded file, correct the information, and then re-import them.
Note: System will check each field’s validation for all records and display issue message in Column A. Here, DOB is incorrect for record #3.
- Once all records have been corrected, click Import Data.
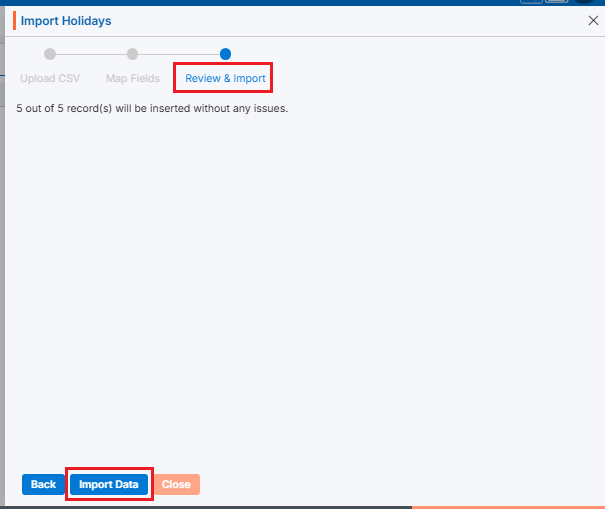
- The special holiday records will be imported and listed.
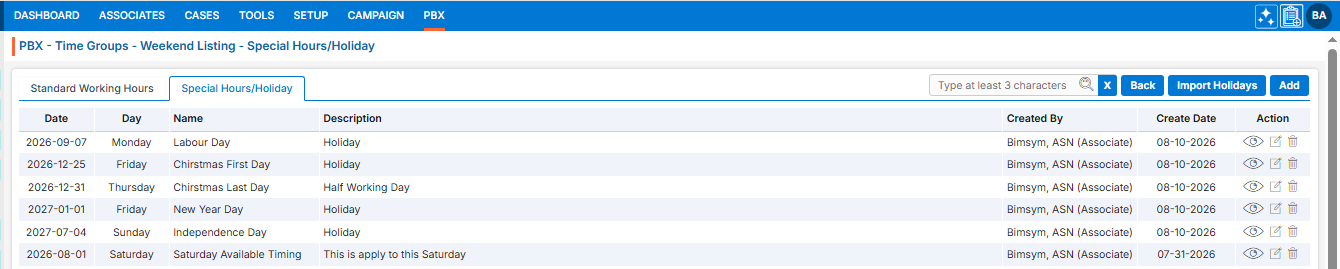
- There are options to View (), Edit () and Delete () the record for the Special Hours/Holiday under the Action column. User can view, edit, or delete records for Special Hours/Holiday schedule.
- To implement this Special Hours/Holiday schedule to standard working hours required to make it Enable ().
- Click on Edit () icon to implement for required Special Hours schedule.
- Clicking on edit will open new window and status of this Special Hours schedule will be disabled by default.
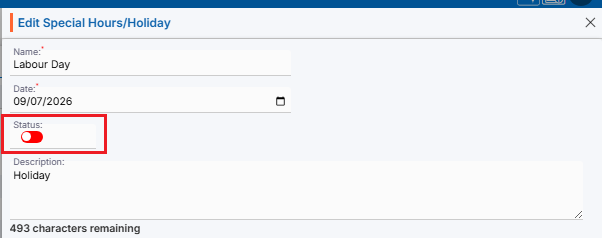
- Click the Disable () button to Enable () the special hours entry.
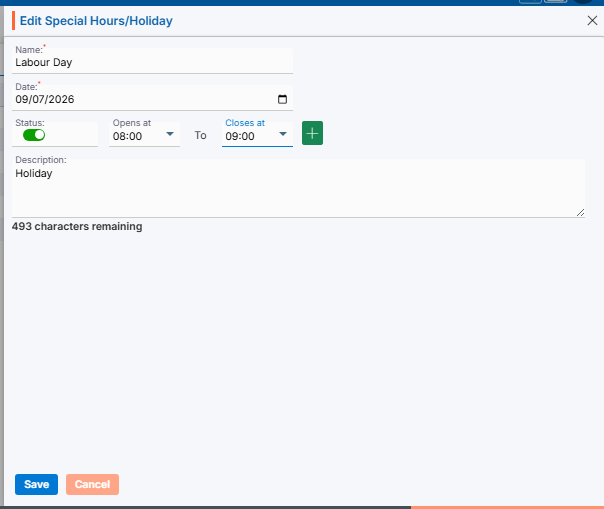
- Once enabled, the Enable Timing Slot option will become available.
- Set the Opening Time and Closing Time for the special hours.
- Once all required parameters have been configured, click Save.
- Only the enabled special holiday entries will override the Standard Working Schedule for the specified dates.
- Click on Back button to view the Time Group Setup.

- There will be 3 steps to Import Data:
View Time Groups:
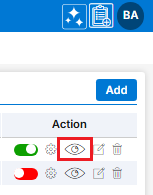
- Click View () icon from the Action Column for the Time Groups you want to view details of Time Groups.
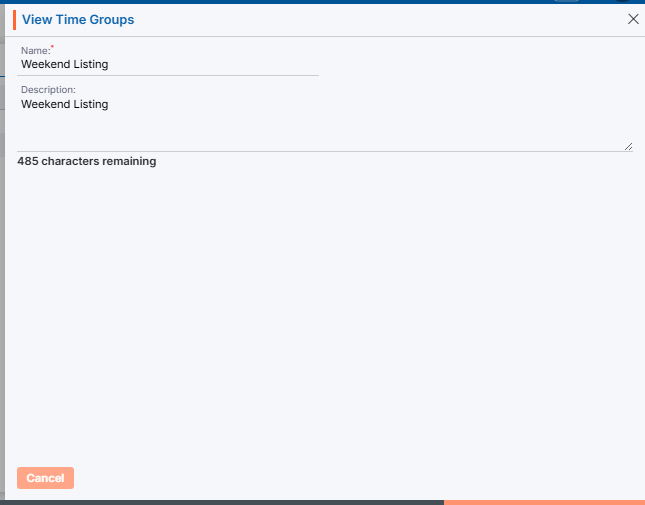
- A new pop-up window will open, displaying all the Time Groups details in view only mode.
Edit/Update Time Groups:
- To update the existing Time Groups from the available list, Click on Edit () icon from Action Column for the Time Groups you want to edit/update.
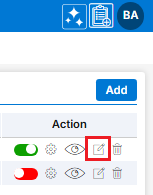
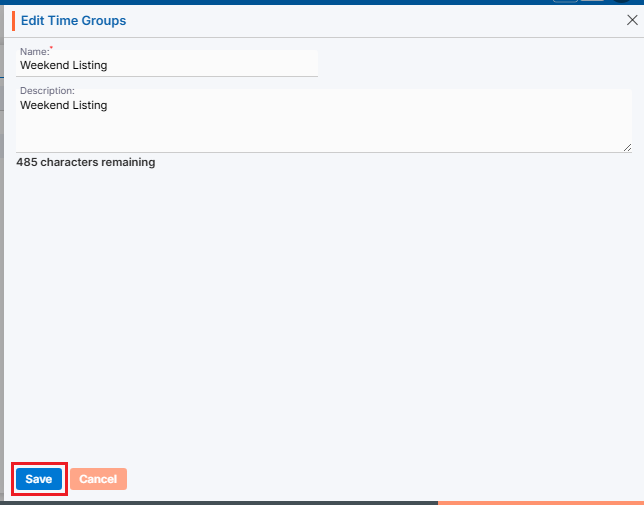
- Clicking Edit () icon will open the selected Time Group in edit mode with title Edit Time Groups. Update the required field and click Save.
Delete Time Group:
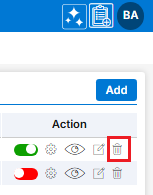
- To delete the unwanted existing Time Group from the available list, click on Delete () icon from the Action Column for the Time Group you want to delete.
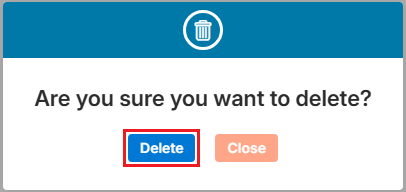
- It will ask for confirmation popup, click on Deleted button to delete the Time Group otherwise click on Close button.
 0
0
 0
0