Letter Templates let you store frequently used letters in a single, reusable format. Once created, the same letter template can be used in system to ensure consistent wording and style.
You can use Letter Templates in (Base on the access rights):
- Case > Print Letters
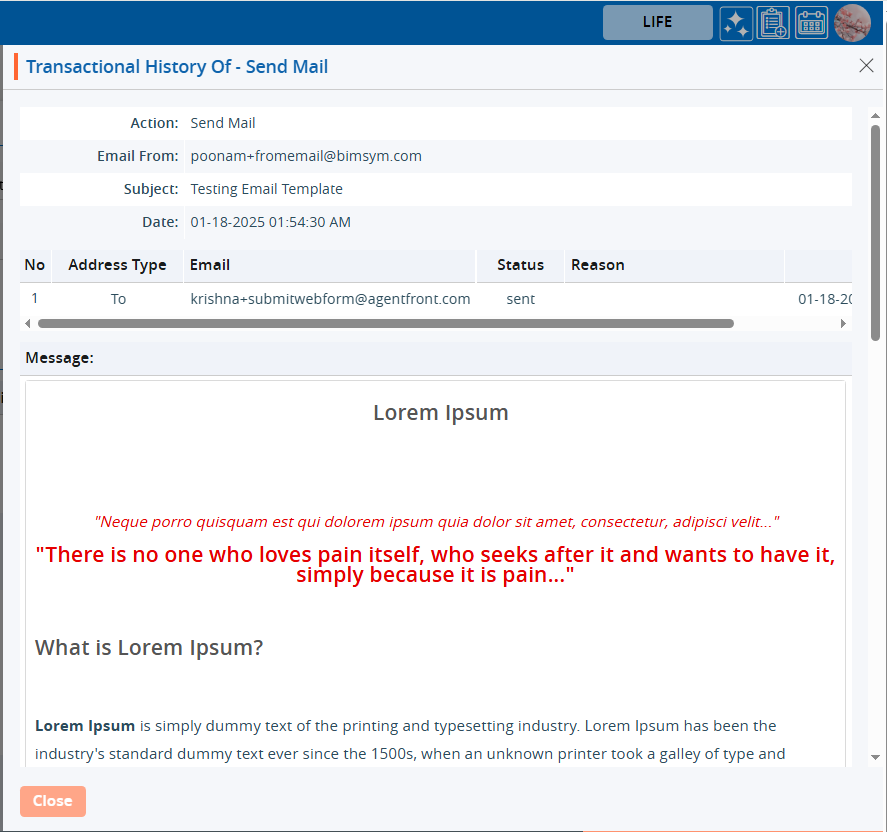
- Case > Send Email
Create Letter Template:
- Sign in to AgentFront CRM.
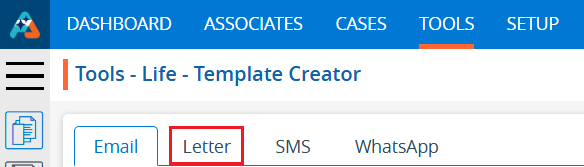
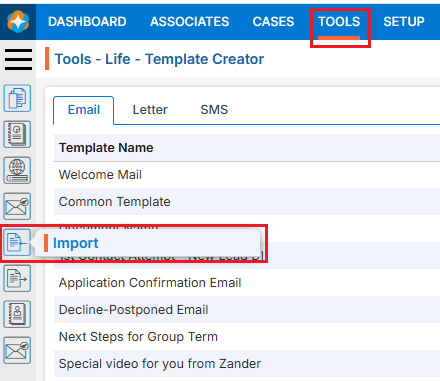
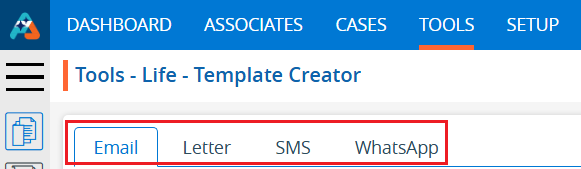
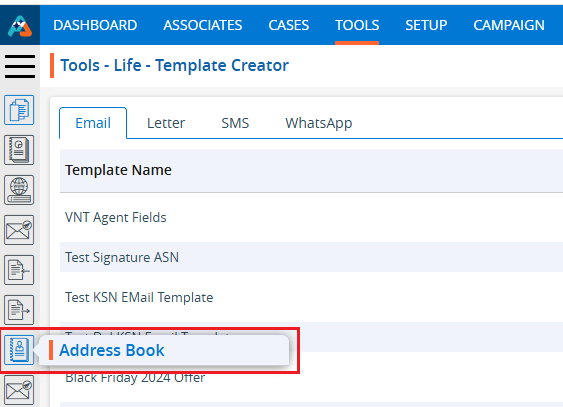
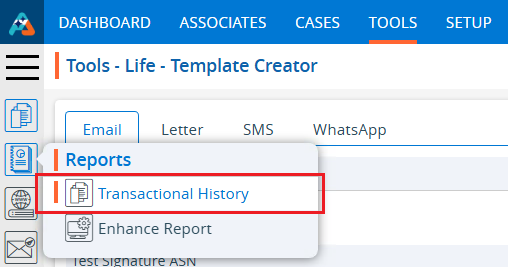
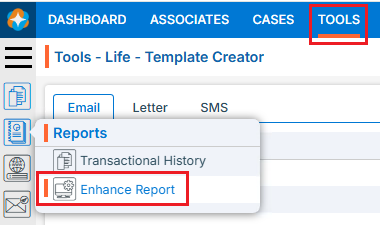
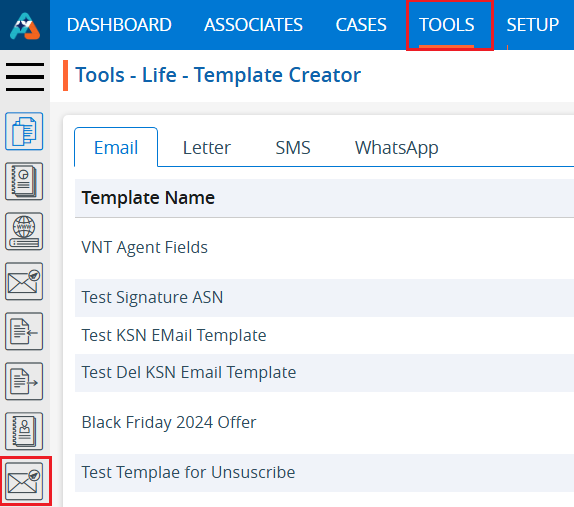
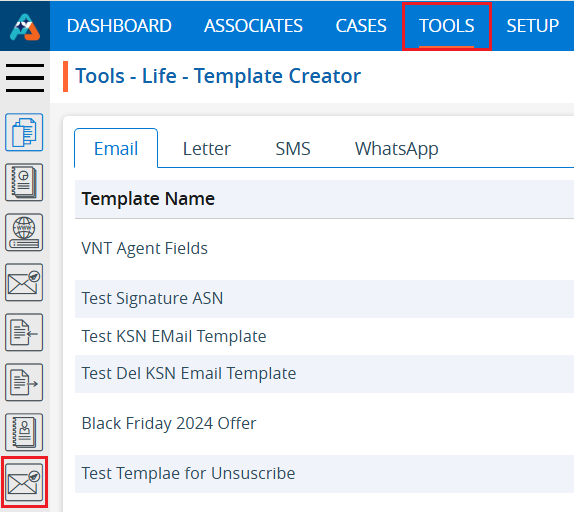
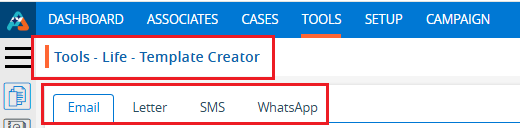
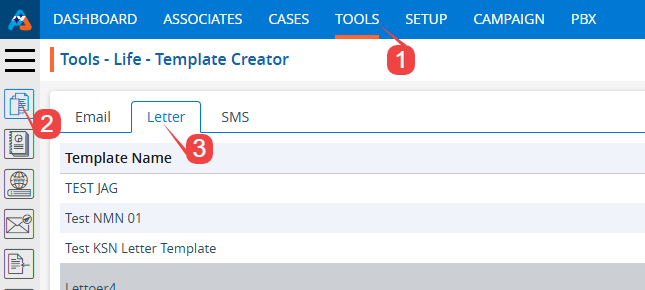
- From the top menu, choose Tools.
- In the left sidebar, select Template Creator.
- It will open Template Creator with multiple tab (Based on the access rights)
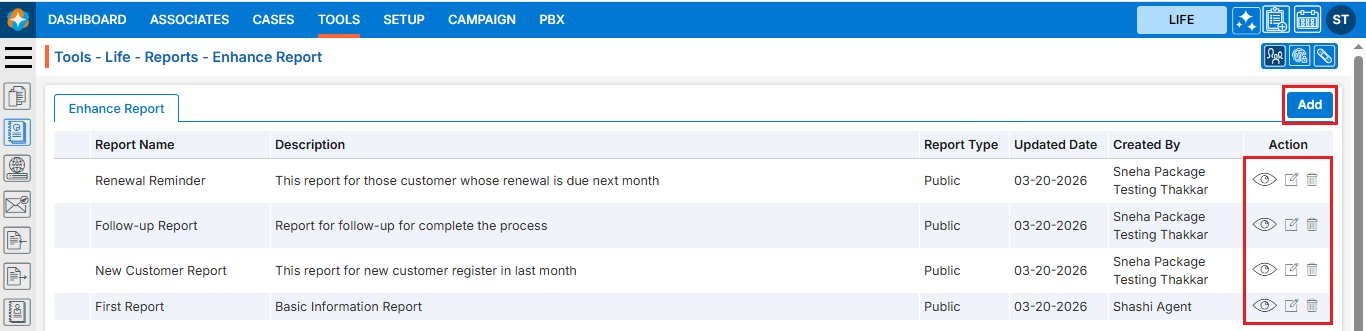
- Click on Letter tab

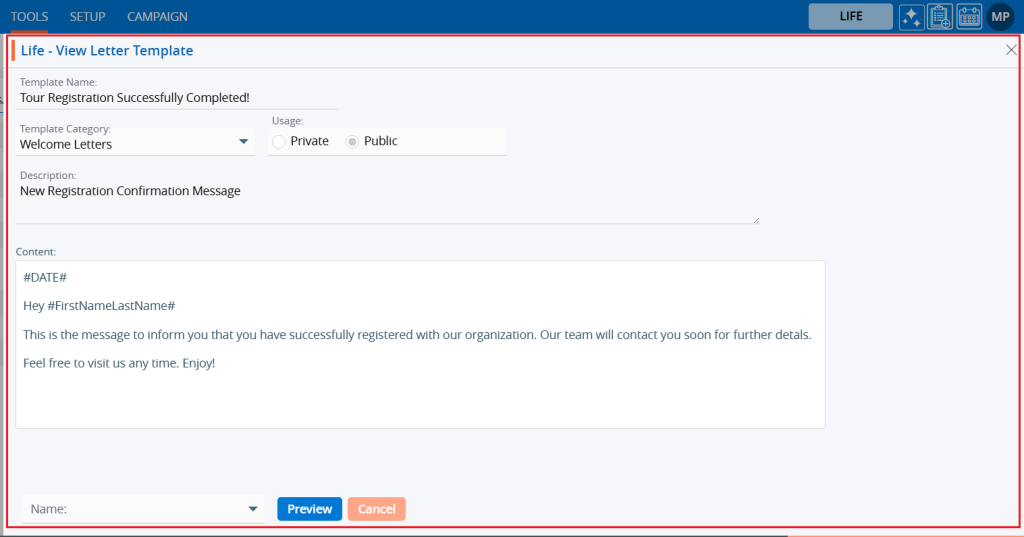
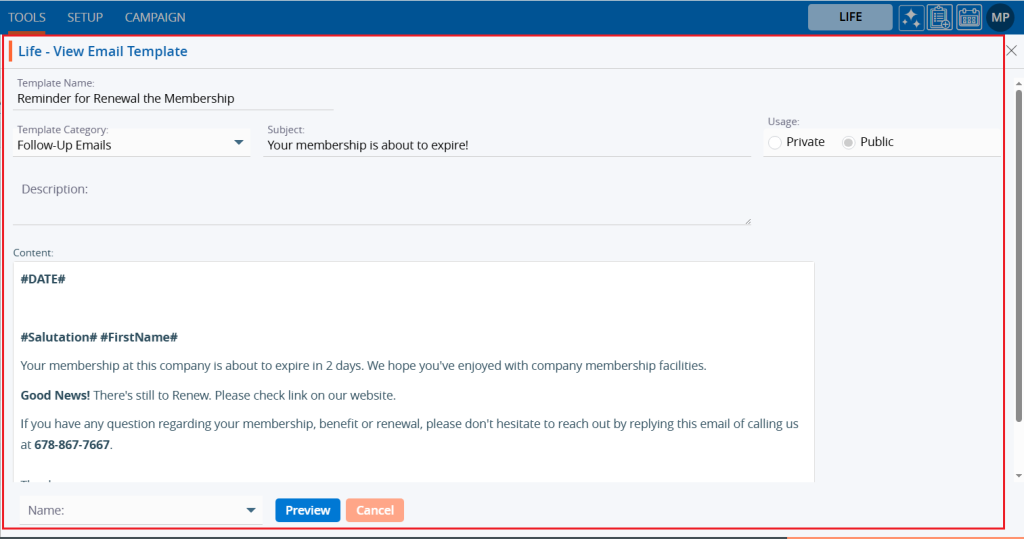
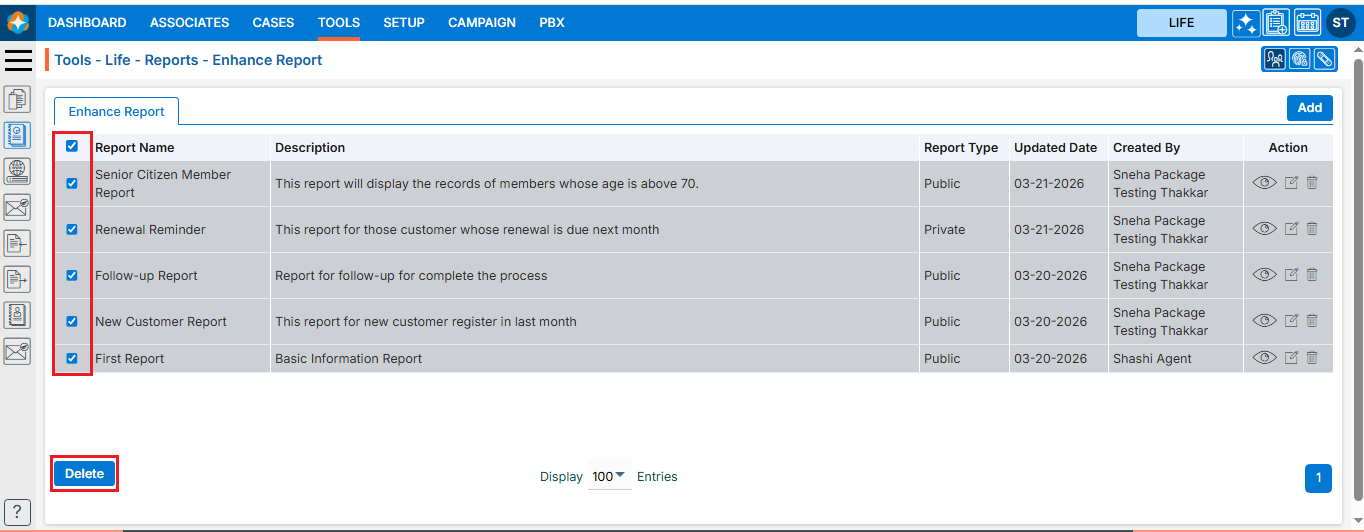
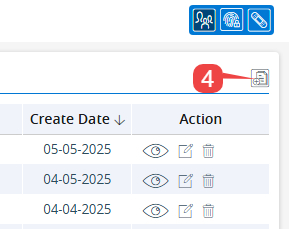
- It displays the list of available/created Lettes.
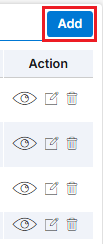
- Click on ‘Create Template Creator’ icon from the Top Right side of the list.
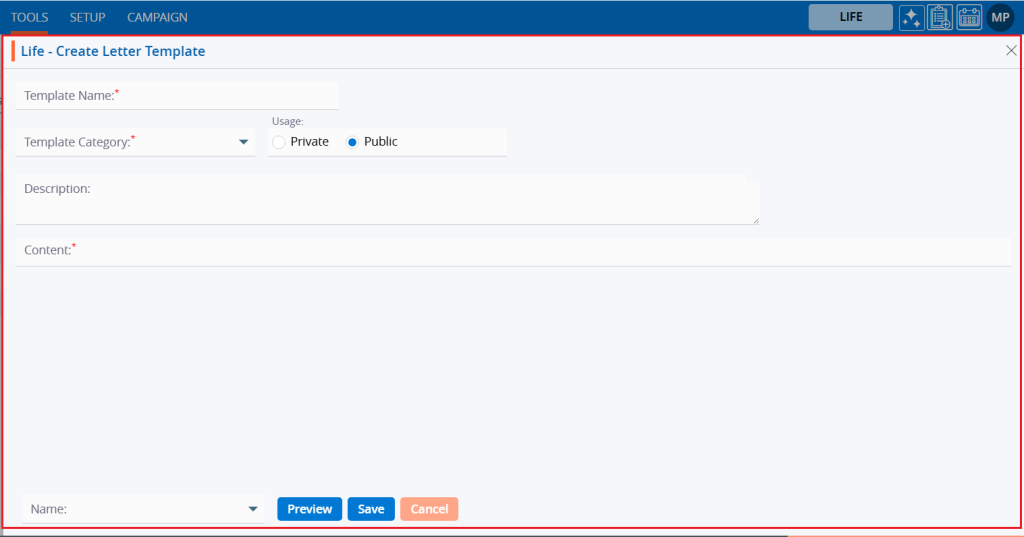
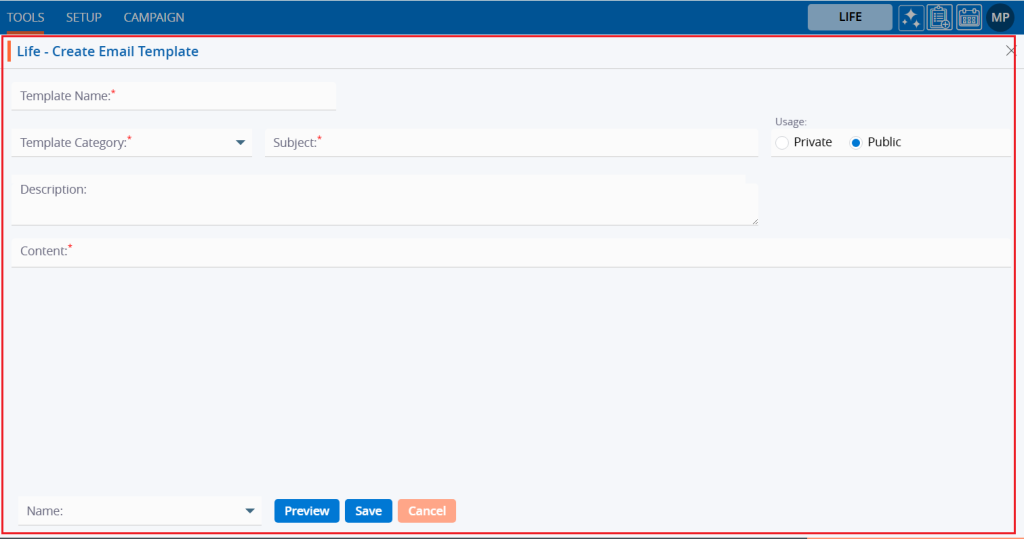
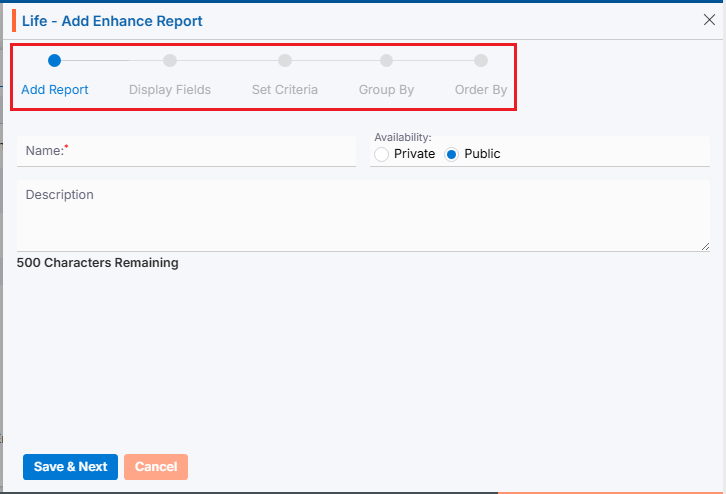
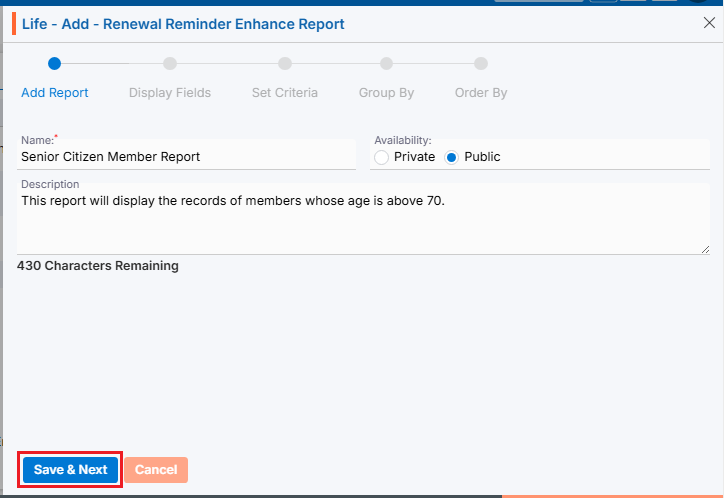
- It will open page to create new letter template
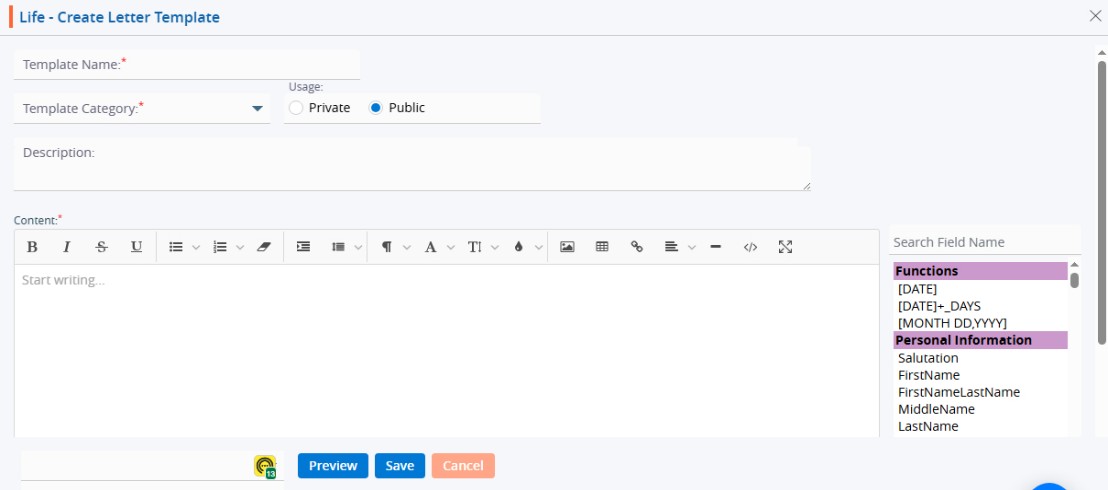
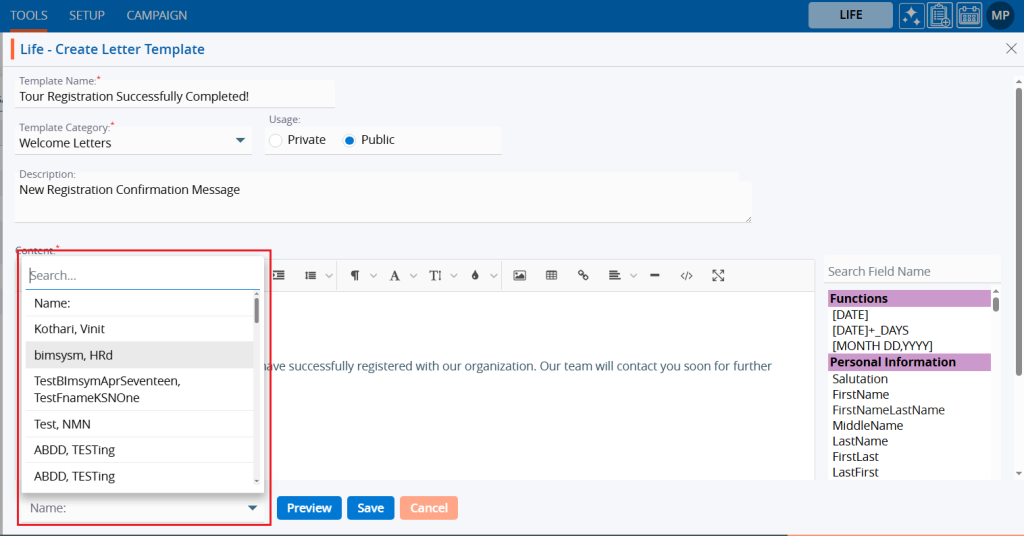
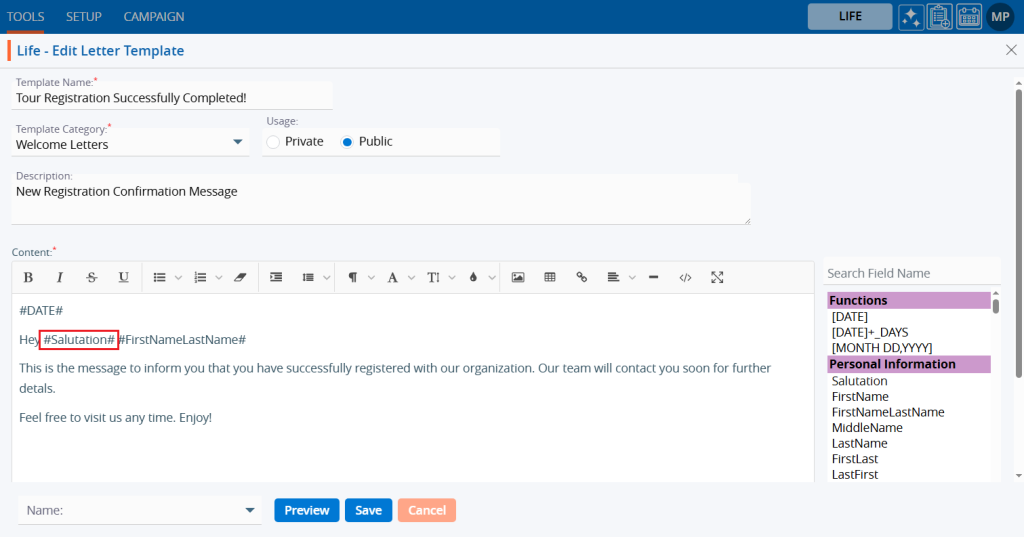
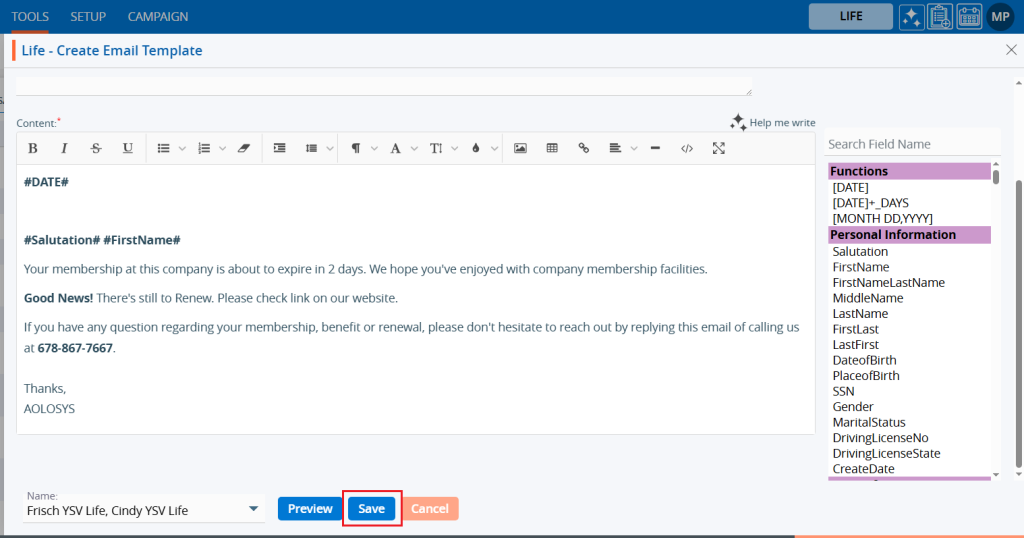
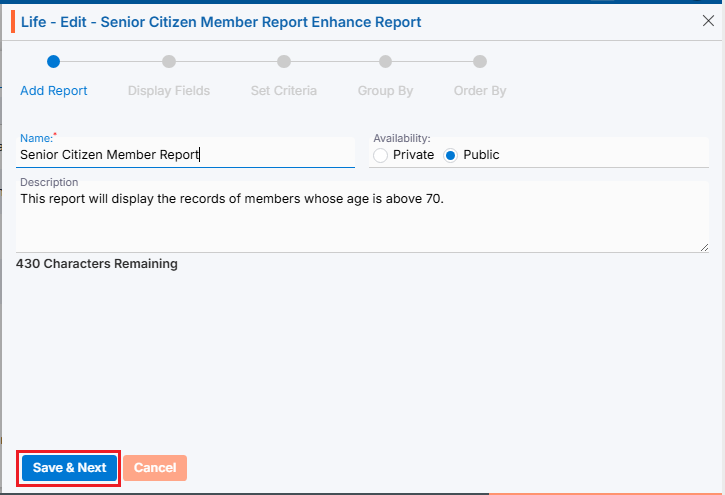
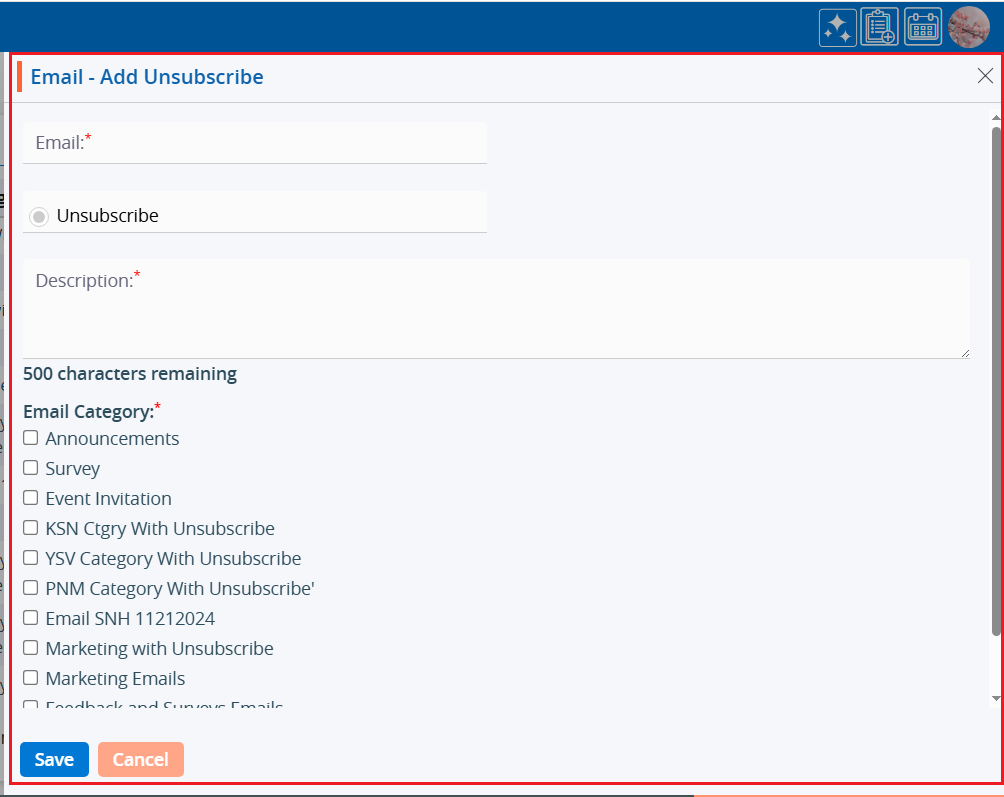
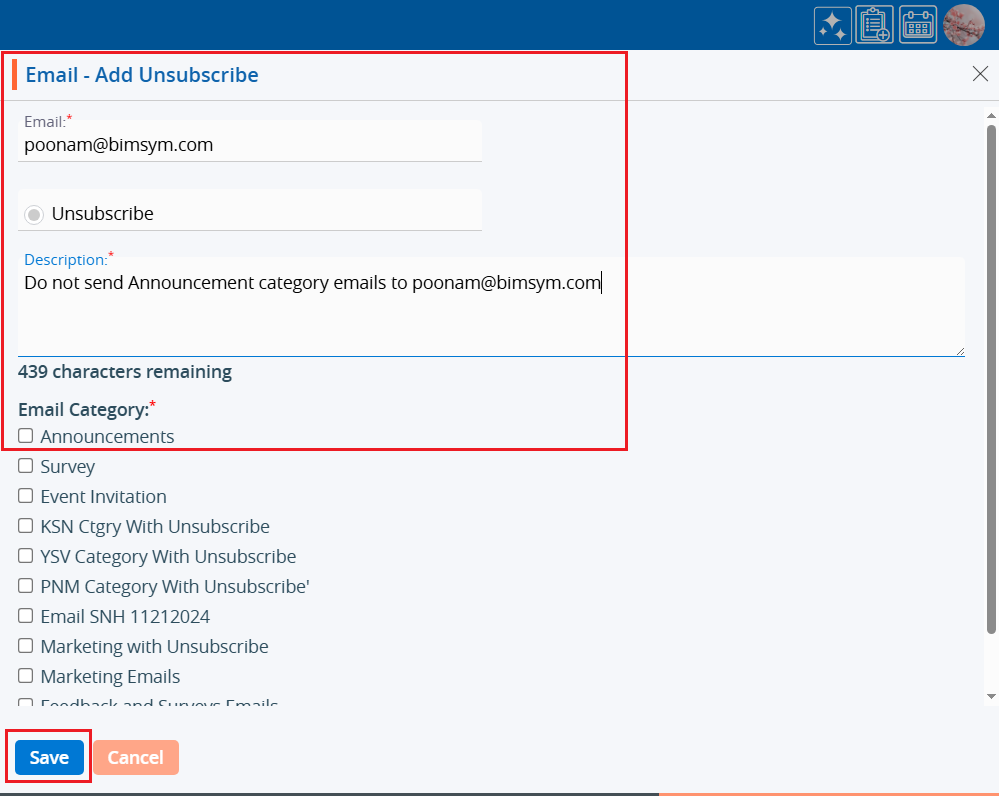
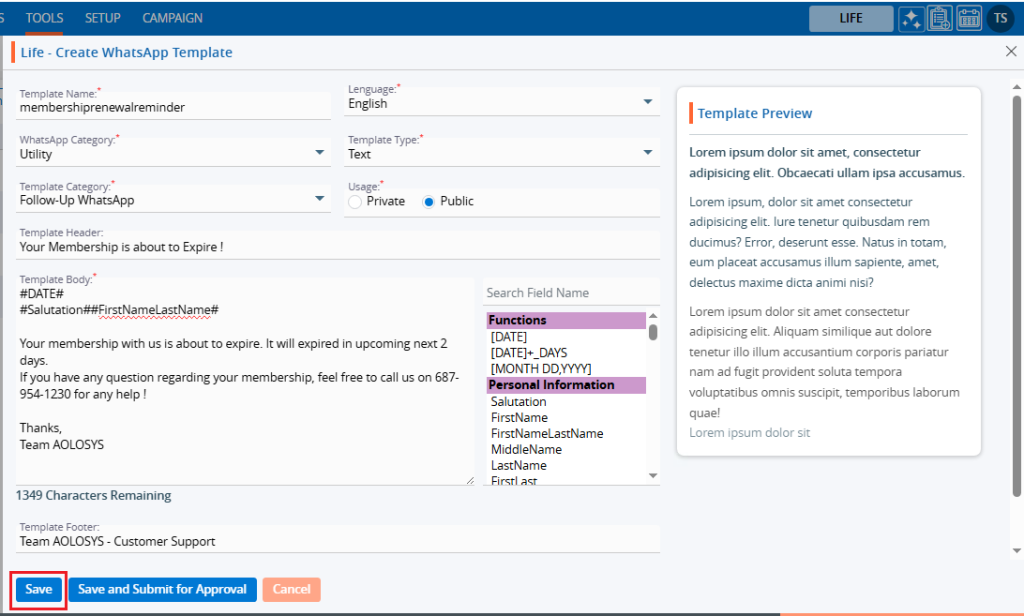
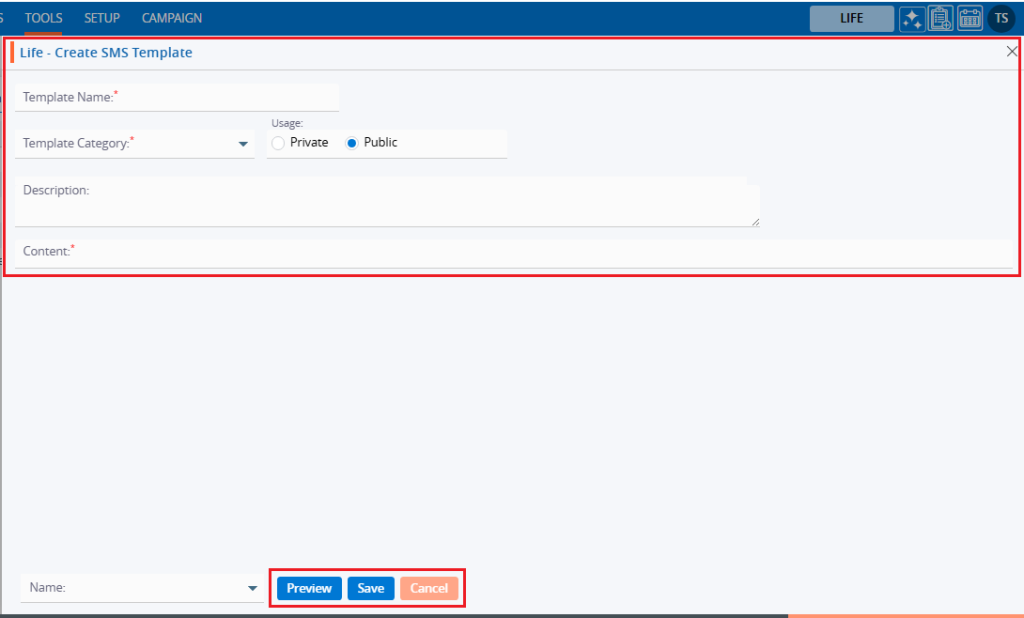
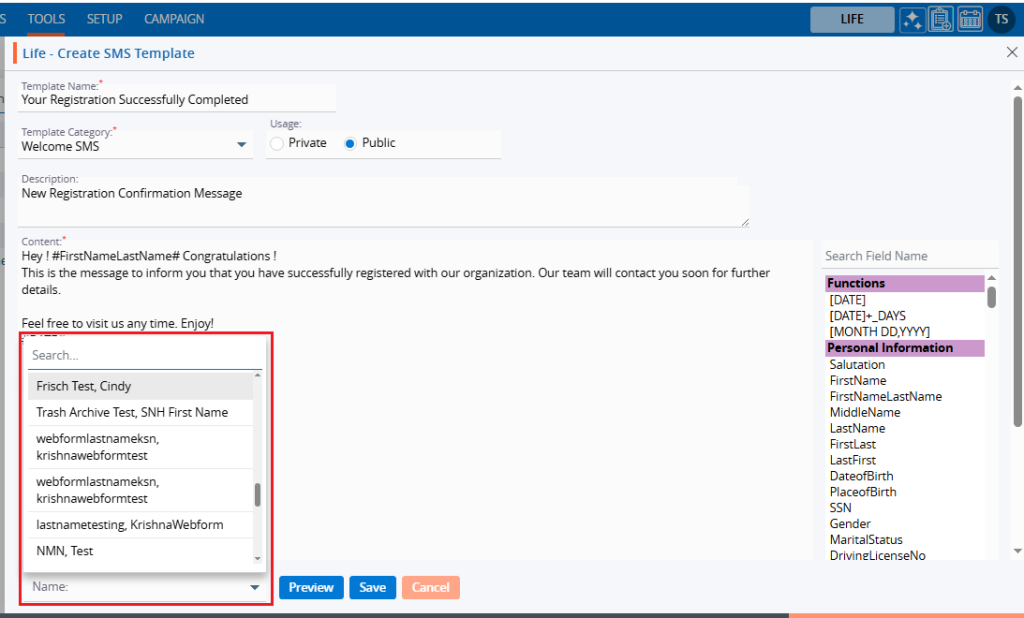
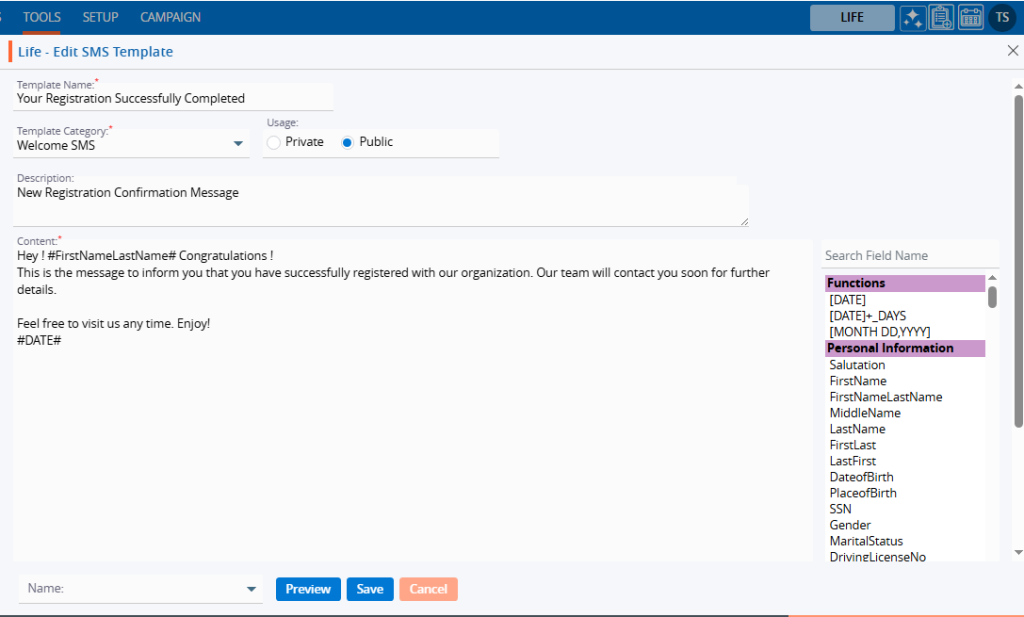
- To create new letter template, enter the following details:
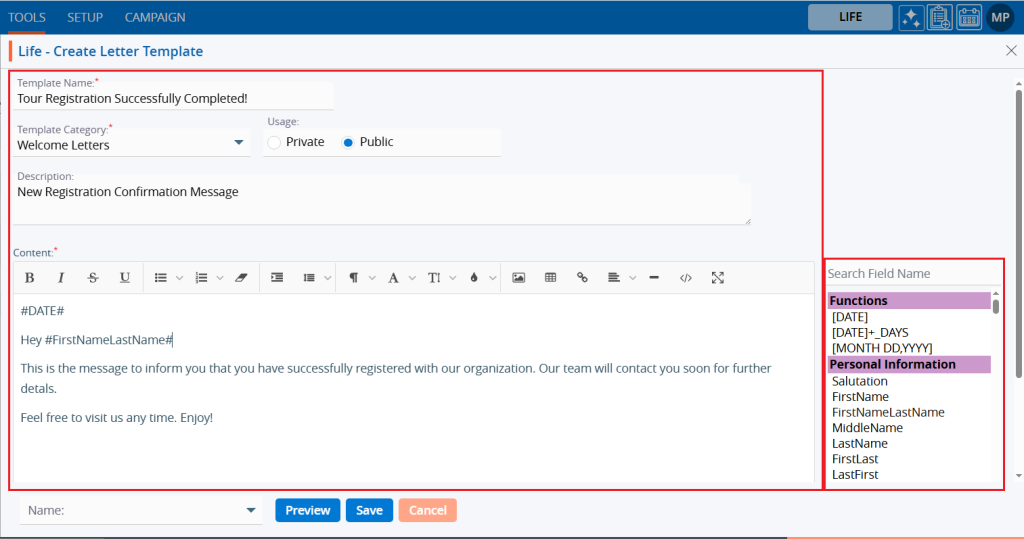
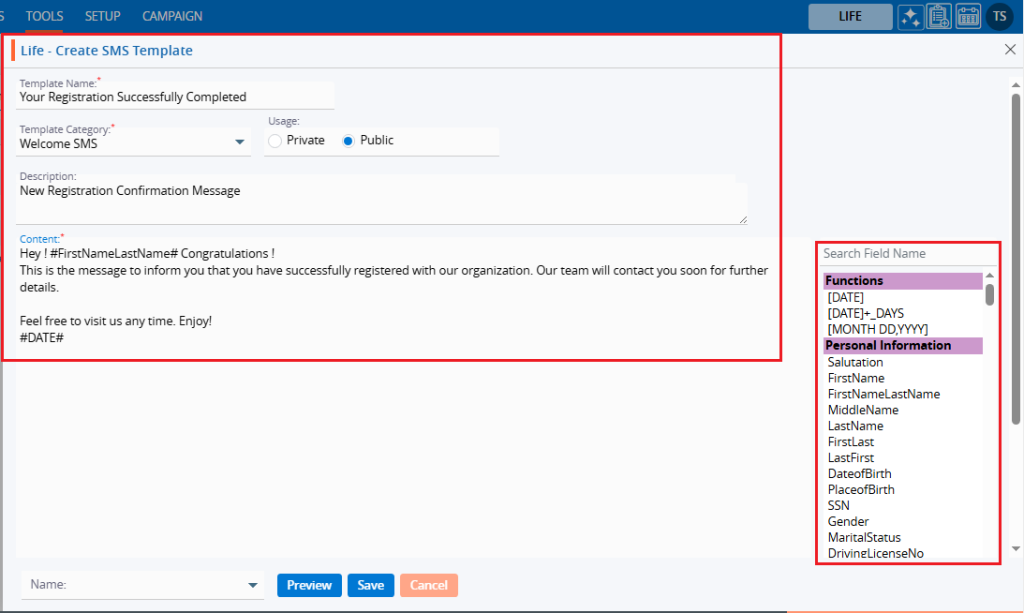
- Template Name: Enter clear, descriptive name. This is what users will see when they select a letter template from other places of the application.
- Template Category: Choose from the drop-down list. (Categories can be managed in Setup → System Setup → Template Category.)
- Usage: Option to select Public/Private. (Default will be Public).
- Public: Visible to anyone with access.
- Private: Visible only to the creator.
- Description: Optional explanation of the template’s purpose.
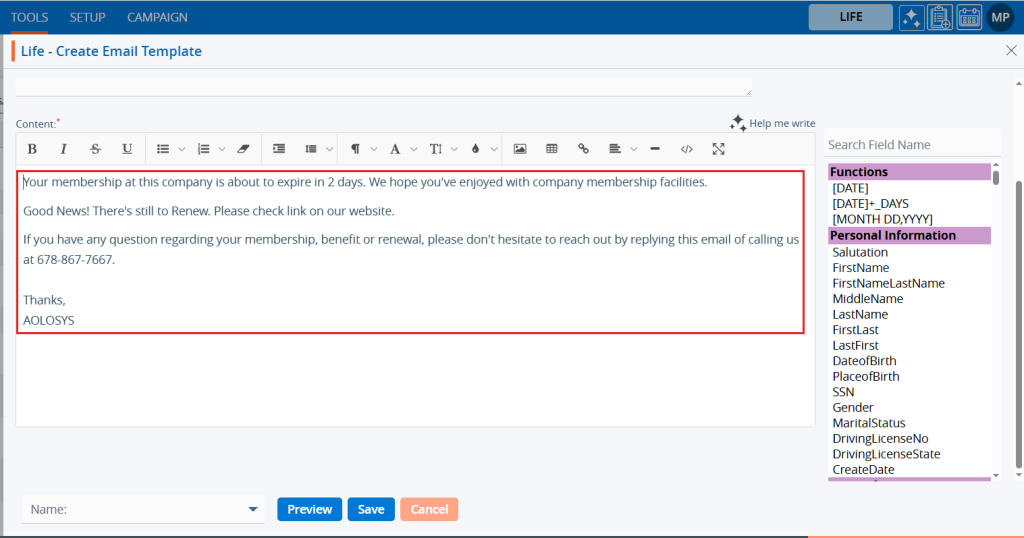
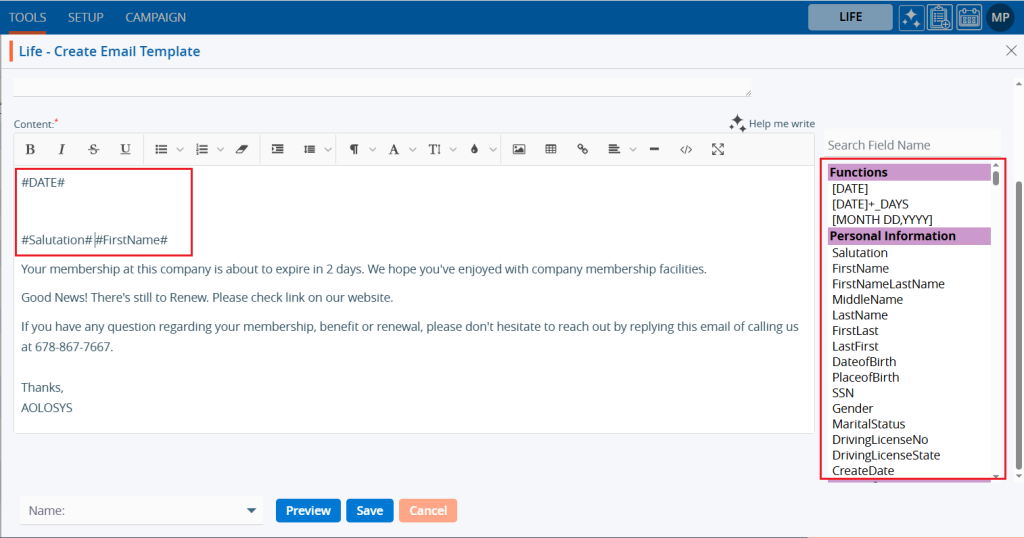
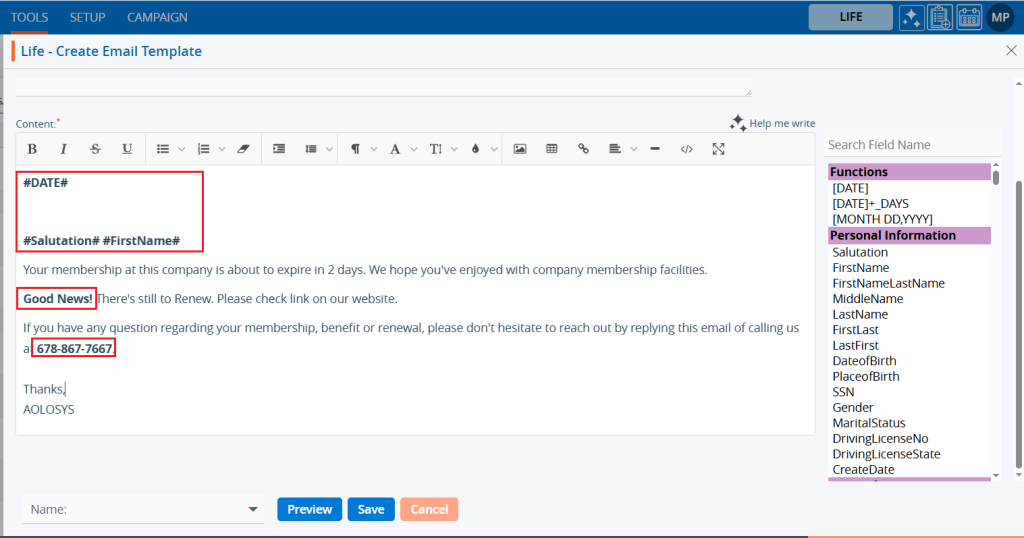
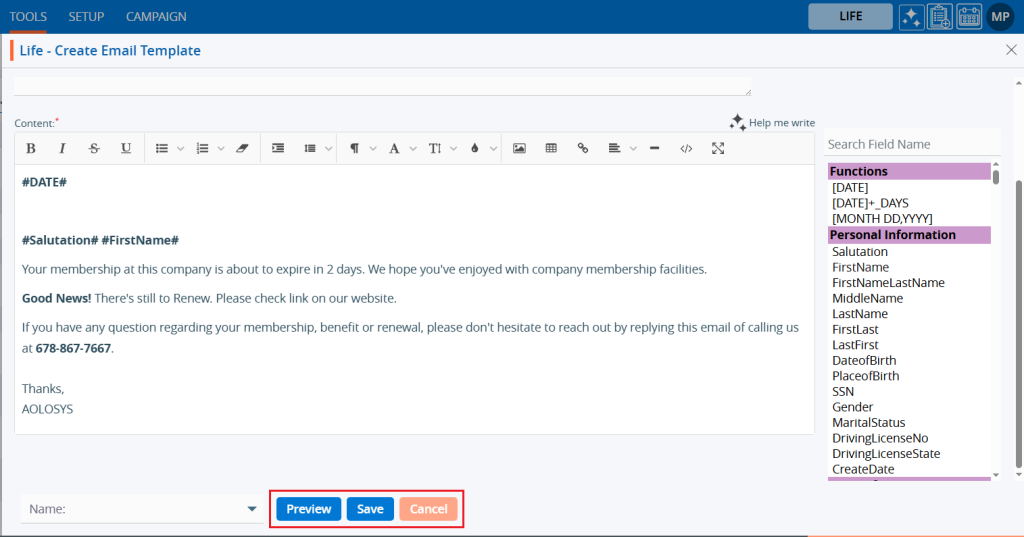
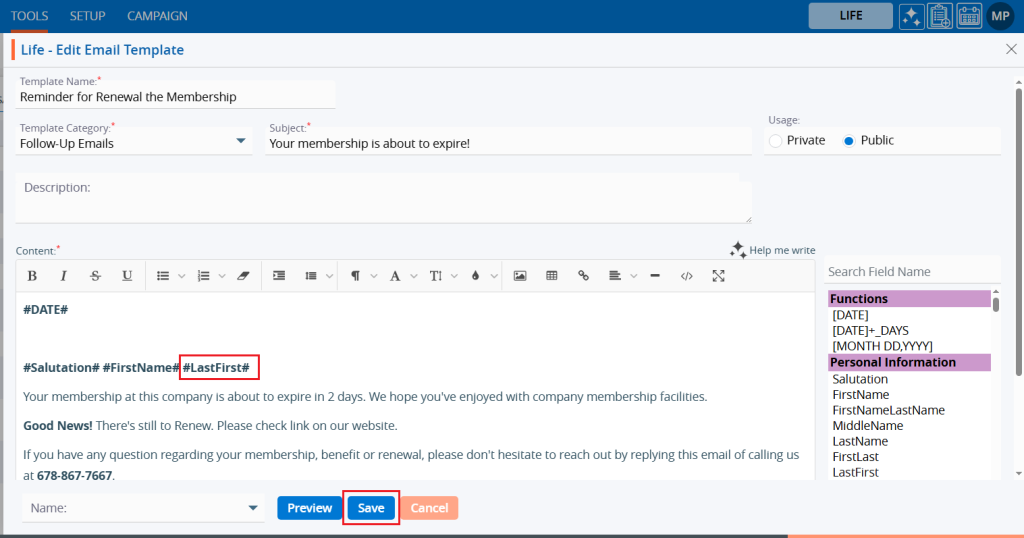
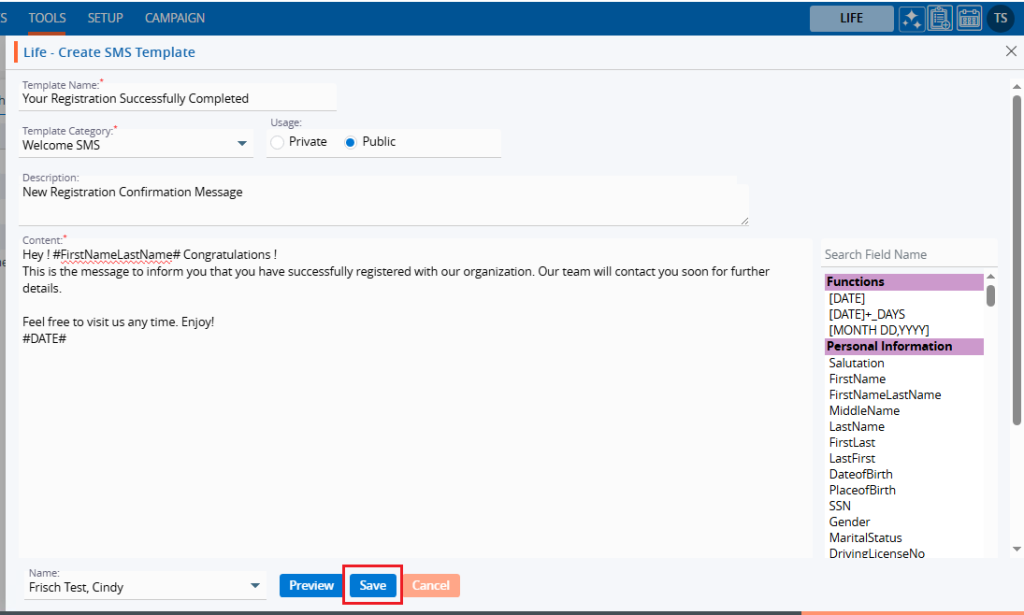
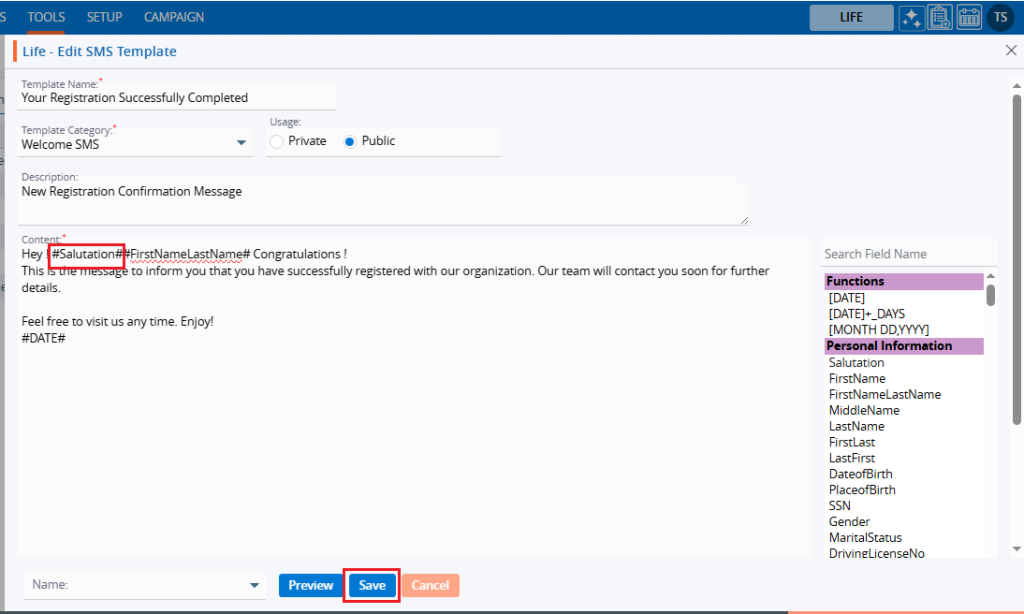
- Content: Write or paste the letter text. A rich-text editor appears when you click in the box. Use placeholders from the panel on the right to insert dynamic data—place the cursor where the value should appear, then click the required field.
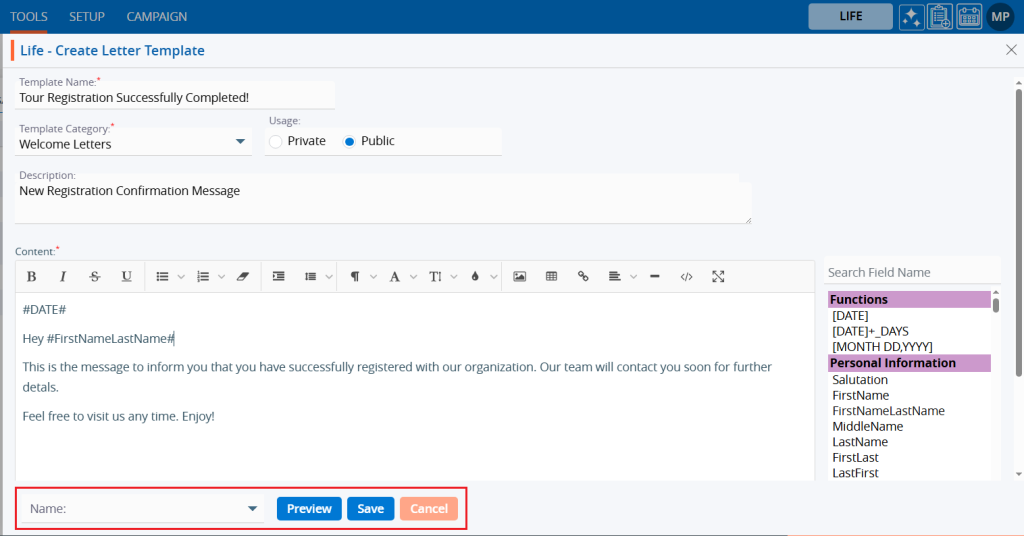
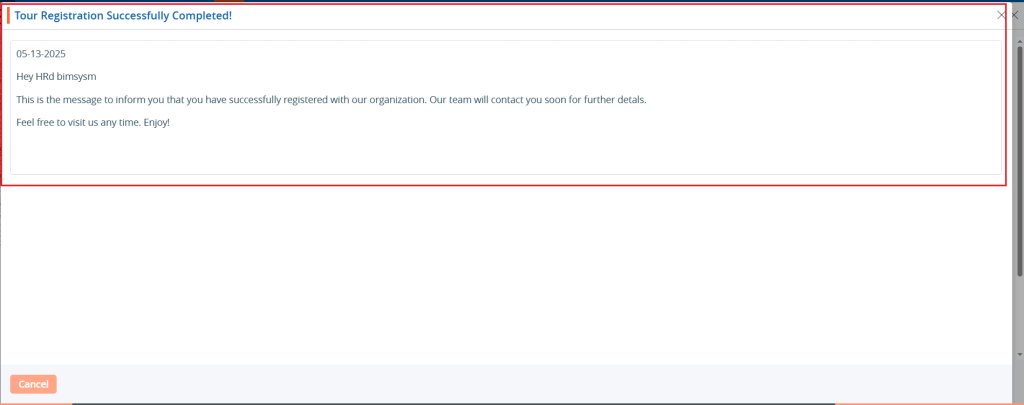
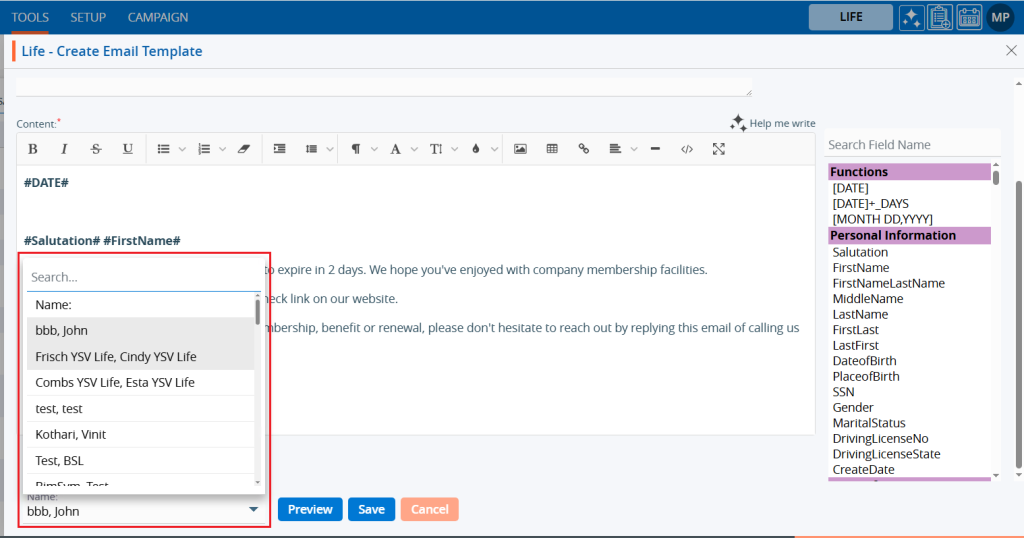
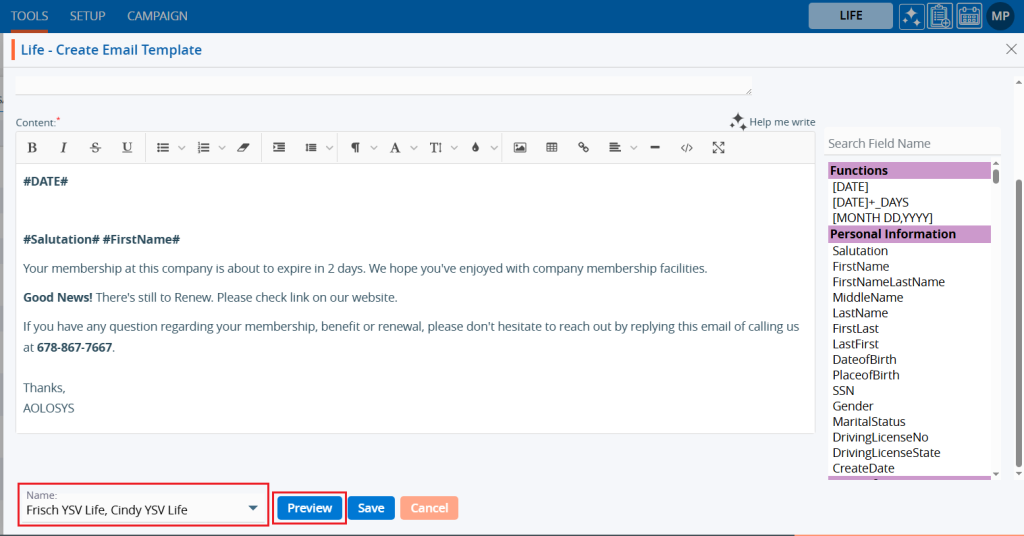
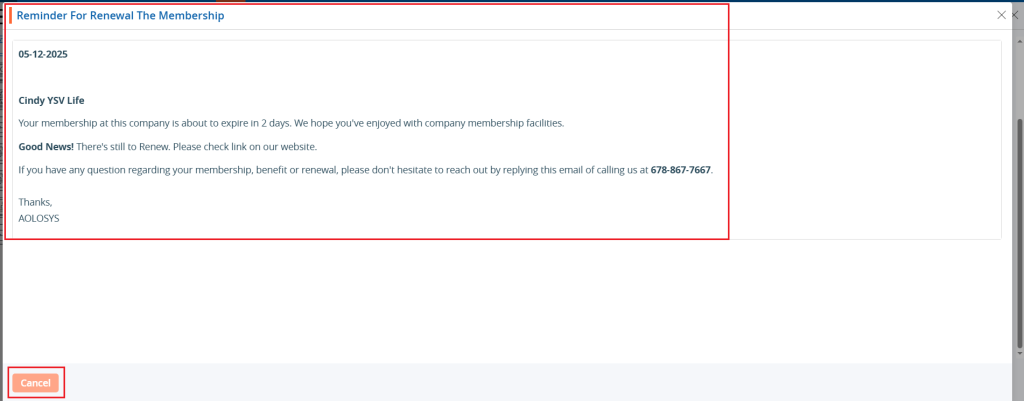
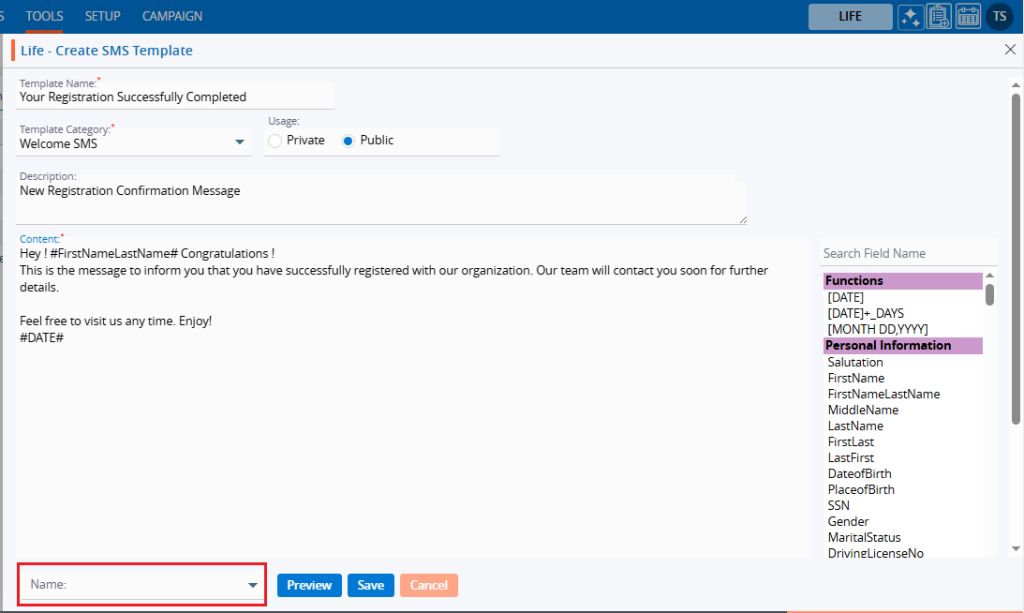
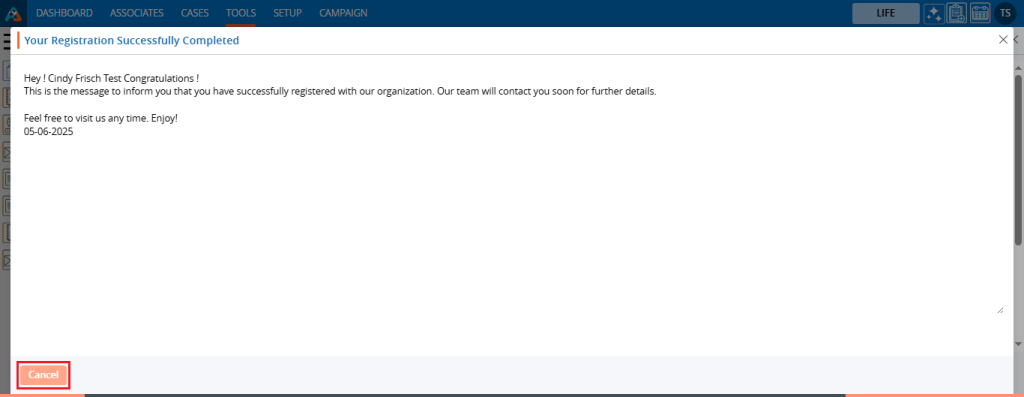
- Preview the letter: choose a sample person, then click Preview to verify that letter format and placeholders resolve correctly.
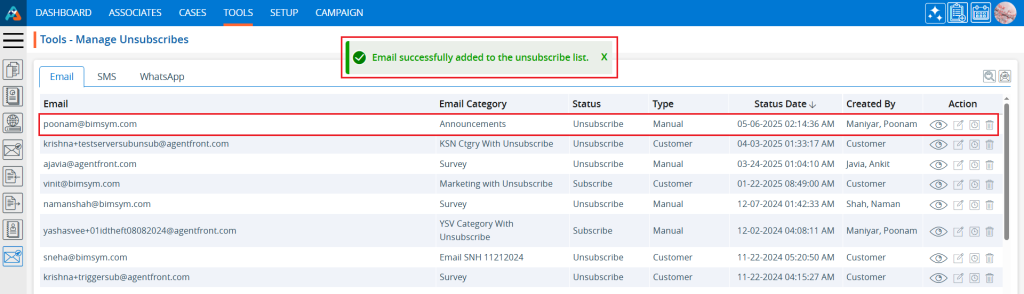
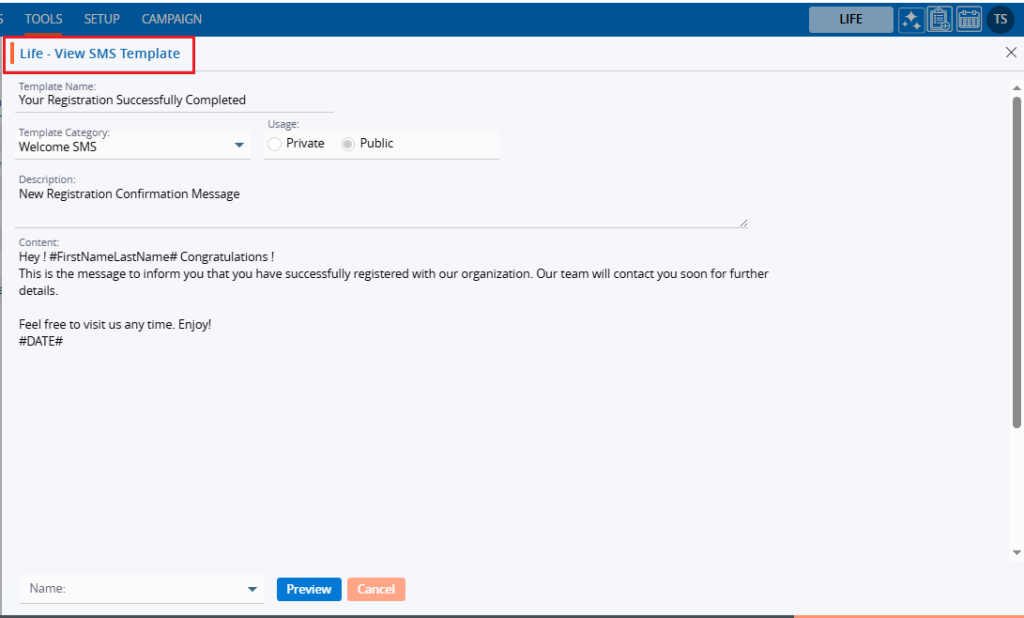
- Click Save. The template is now listed and ready for use.
Update Letter Template:
- Sign in to AgentFront CRM.
- From the top menu, choose Tools.
- In the left sidebar, select Template Creator.
- It will open Template Creator with multiple tab (Based on the access rights)
- Click on Letter tab
- It displays the list of available/created Lettes.
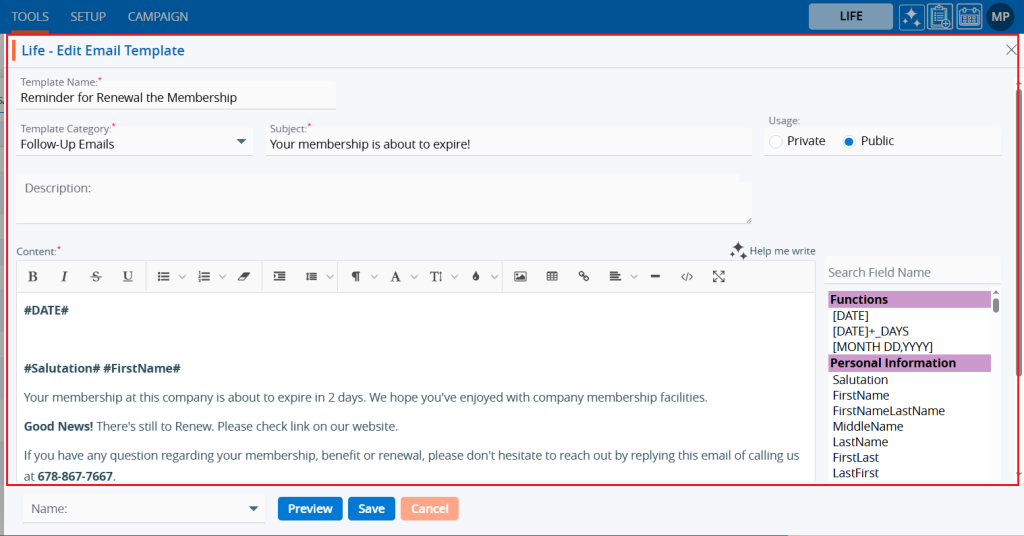
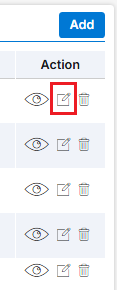
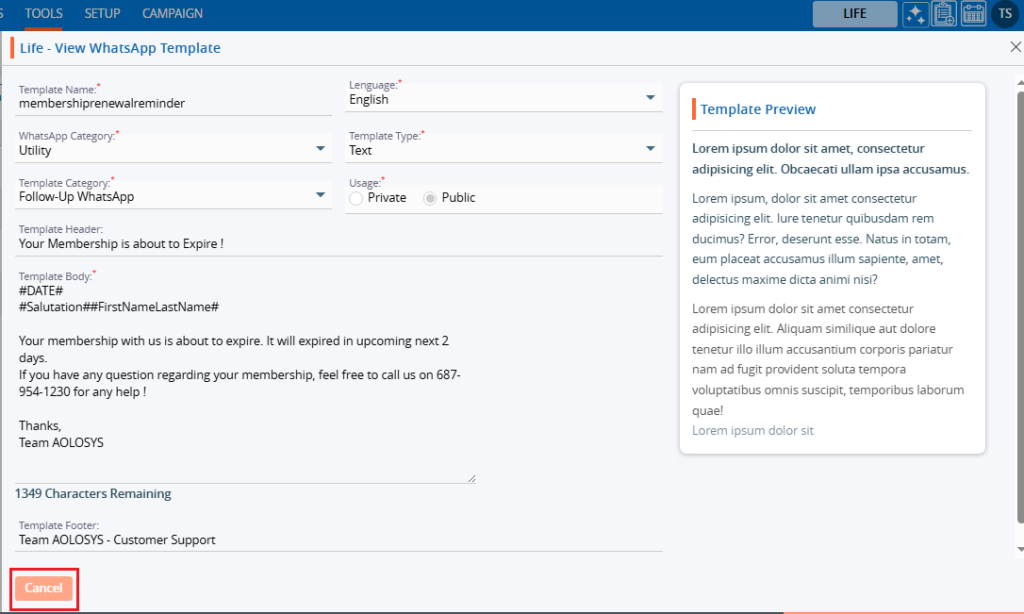
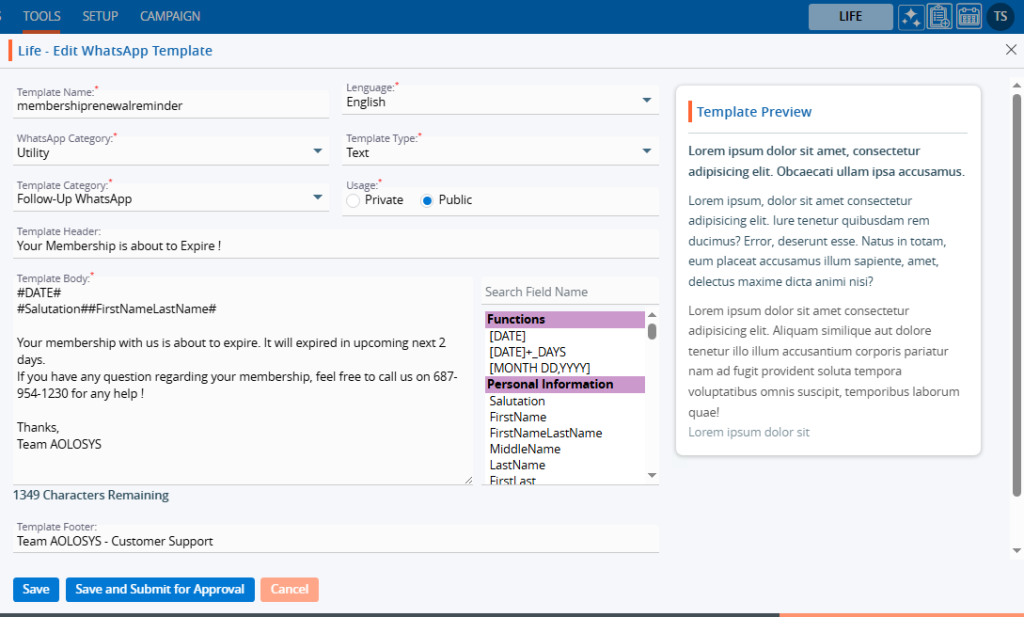
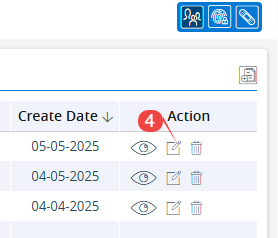
- From the list click on Edit () icon from the Action column for the letter you want to edit/change
- It will open the selected letter in edit mode.
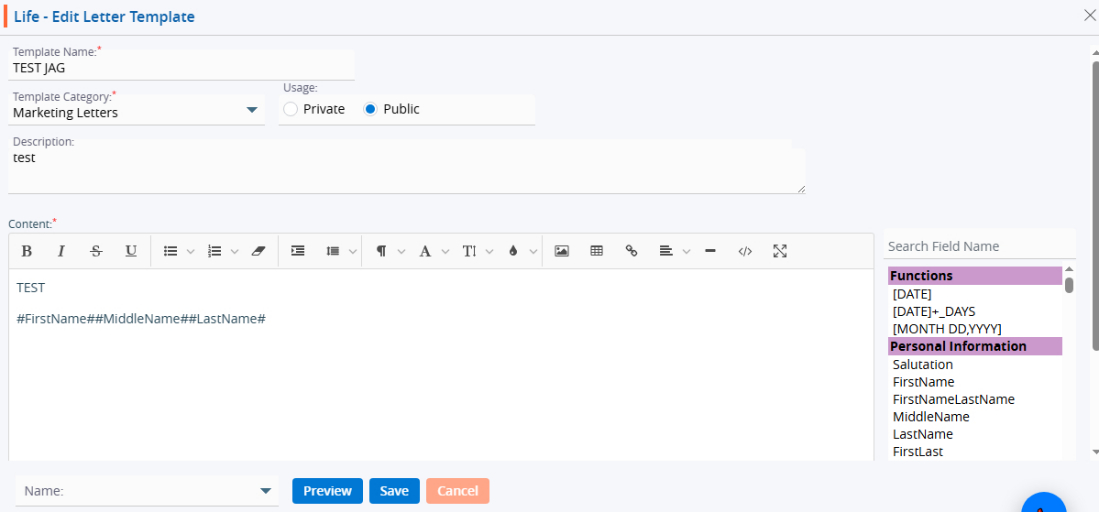
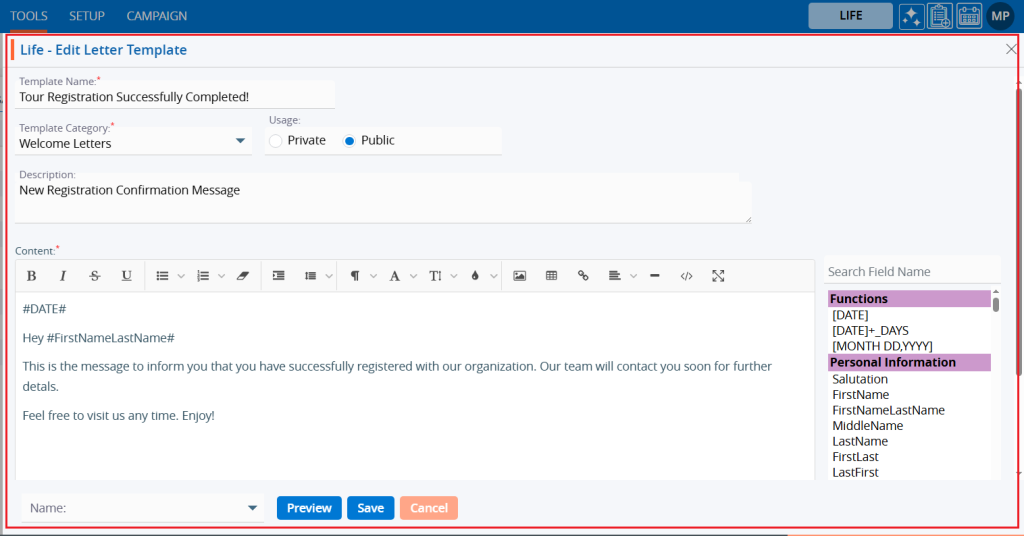
- You can make the require edit in the below fields values of the open letter templates
- Template Name: Enter clear, descriptive name. This is what users will see when they select a letter template from other places of the application.
- Template Category: Choose from the drop-down list. (Categories can be managed in Setup → System Setup → Template Category.)
- Usage: Option to select Public/Private. (Default will be Public).
- Public: Visible to anyone with access.
- Private: Visible only to the creator.
- Description: Optional explanation of the template’s purpose.
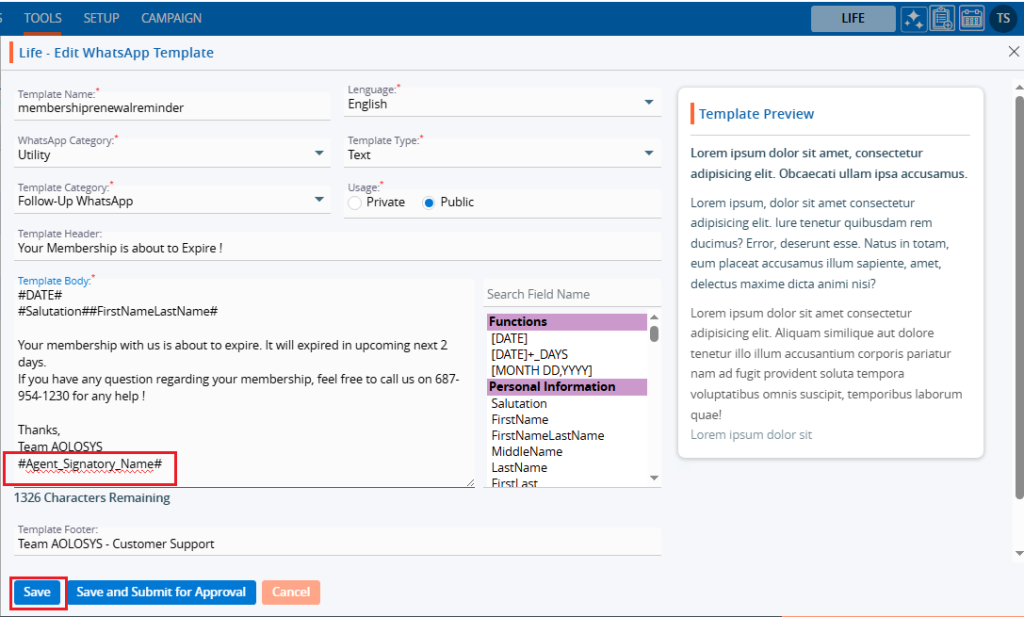
- Content: Write or paste the letter text. A rich-text editor appears when you click in the box. Use placeholders from the panel on the right to insert dynamic data—place the cursor where the value should appear, then click the required field.
- Preview the letter: choose a sample person, then click Preview to verify that letter format and placeholders resolve correctly.
- Click Save. The template is now updated and ready for use.
Delete Letter Template:
- Sign in to AgentFront CRM.
- From the top menu, choose Tools.
- In the left sidebar, select Template Creator.
- It will open Template Creator with multiple tab (Based on the access rights)
- Click on Letter tab
- It displays the list of available/created Lettes.
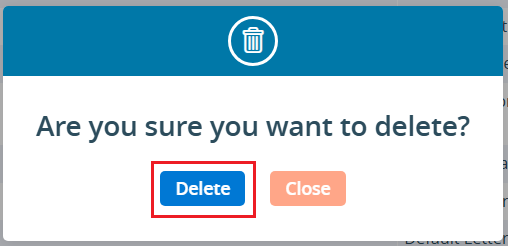
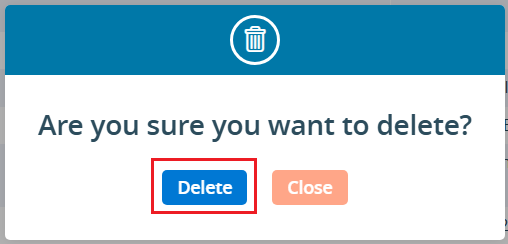
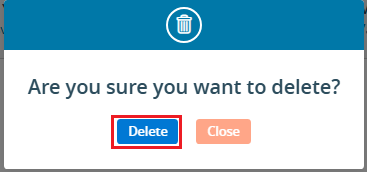
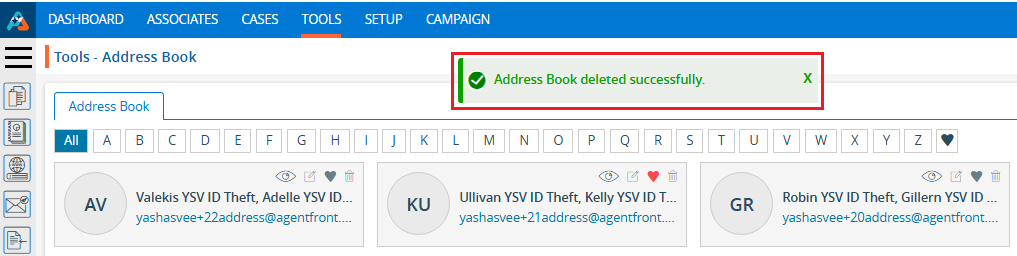
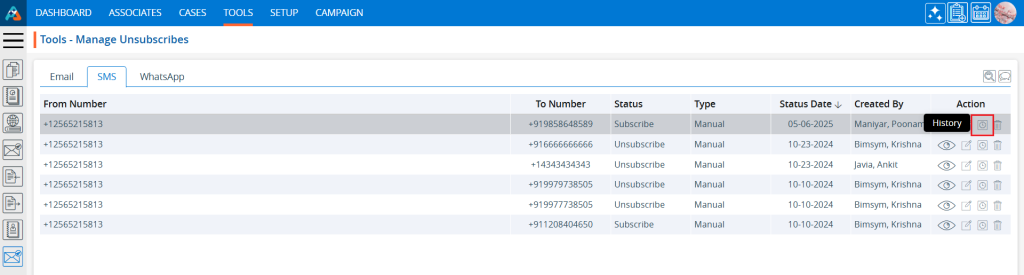
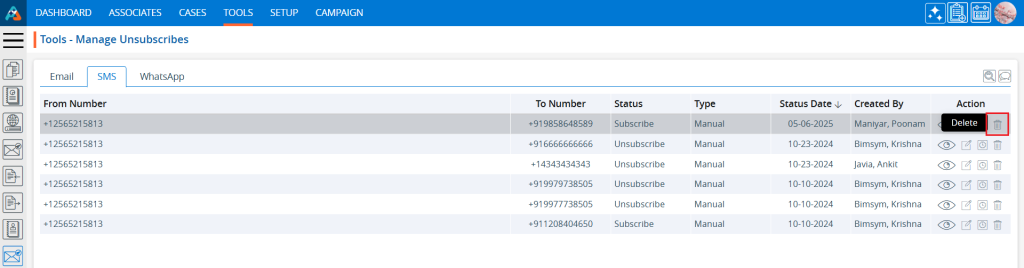
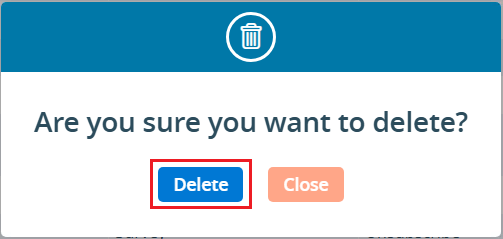
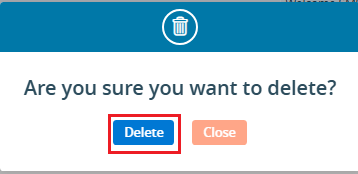
- From the list click on Delete () icon from the Action column for the letter you want to delete.
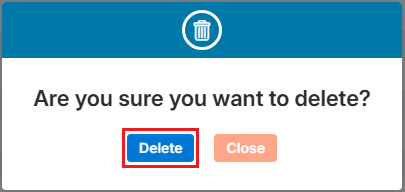
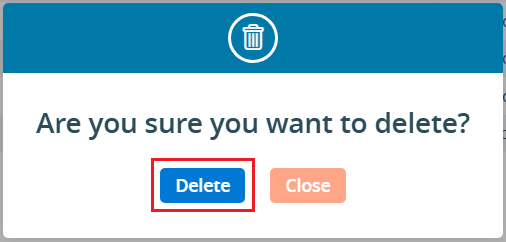
- It will ask for confirmation in popup, click on Delete button to delete letter otherwise click on Close button.
- Important: If the template is referenced elsewhere (for example, in a Trigger), deletion is blocked until those references are removed.
Multi-product tip
If your login has access to multiple products, be sure to select the correct product from the product icons in the top-right corner before creating, editing, or deleting templates.