The Import feature in CRM refers to the ability to upload and integrate external data into the system. This feature allows users to bring customer data into the CRM using spreadsheets, streamlining data management, avoiding manual entry, and ensuring accurate records. Import files must contain specific data in CSV format with delimiters, which will then be displayed in the CASES list.
Steps to Import Multiple Records
- Sign in to AgentFront CRM.
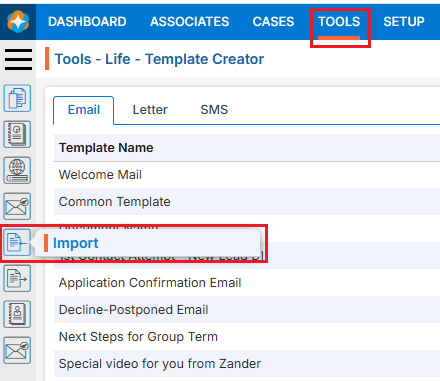
- From the top menu, choose Tools.
- In the left-side panel, select Import.
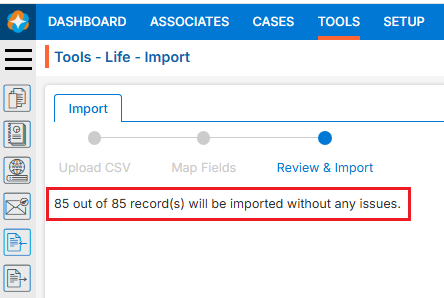
- A new page titled ‘Tools – Life – Import‘ will open, featuring the ‘Import’ tab with three steps to complete the process.
- There will be 3 steps to Import Data:
- Upload CSV,
- Map Fields, and
- Review & Import
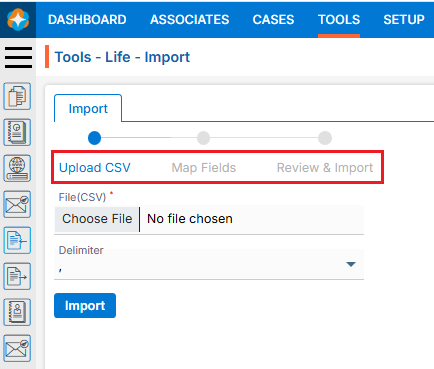
- Upload CSV:
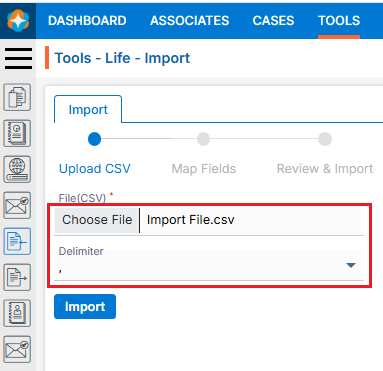
- Select the file containing the data you want to import into the application.
- Select Delimiter option from the drop-down. (The selected file format must match the selected delimiter option.)
- Click the Import button to proceed to the next step, Map Fields.
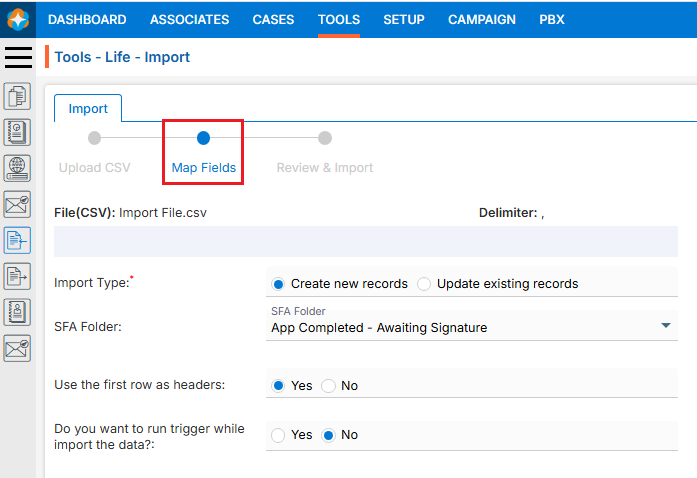
- Map Fields:
- On the same page next step is for Map Fields.
- Selected file name and delimiter will be displayed on this page.
- There are 2 sections on this step:
- First section: Selection of the options
- Second section: Map the fields
- First Section: Following options need to be selected on this page:
- Import Type: There are 2 following options:
- Create new records: All records will be imported as new records.
- Update existing records: Existing records will be updated. (A unique Case ID must be included in the file to update existing records)
- SFA Folder: Select SFA in which you want to import the data.
- Use the first row as headers: Select Yes/No. If Yes is selected, then first row will be considered as header and if No selected then first row will not be considered as header.
- Do you want to run trigger while import the data?: Select Yes/No. If Yes is selected, then trigger will be run as per created from Setup > System Setup > Trigger Action and if No selected then no trigger will be run.
- Import Type: There are 2 following options:
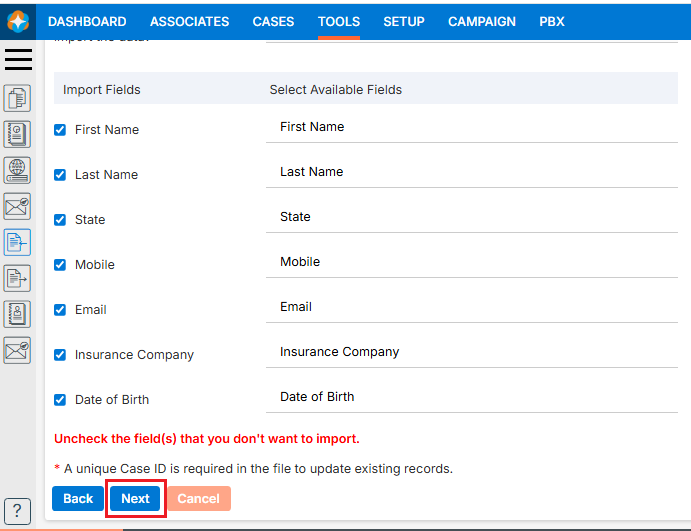
- Second Section: Needs to map the fields.
- On the left side the system shows the header row from the uploaded CSV file as we have selected Yes for ‘Use the first row as headers’.
- The “Available Fields” section displays all fields available in the application. Select the appropriate fields.
- Map the appropriate fields for each field from the dropdown. (Unique Case ID field is required if you selected ‘Update existing records’ option for ‘Import Type’).
- You can deselect unwanted fields by unchecking the checkbox before field name.
- Click Next.
- Review & Import
- On the same page next step is for Review & Import the data.
- Review page will display the counts of records with issues and without issues.
- The system generates a CSV file link containing the records with issues.
- Click “Click here” to download and review the file.
- Even records can be imported which are shown without any issues.
- Click on Import Data if you want to Import records which are shown without issues.
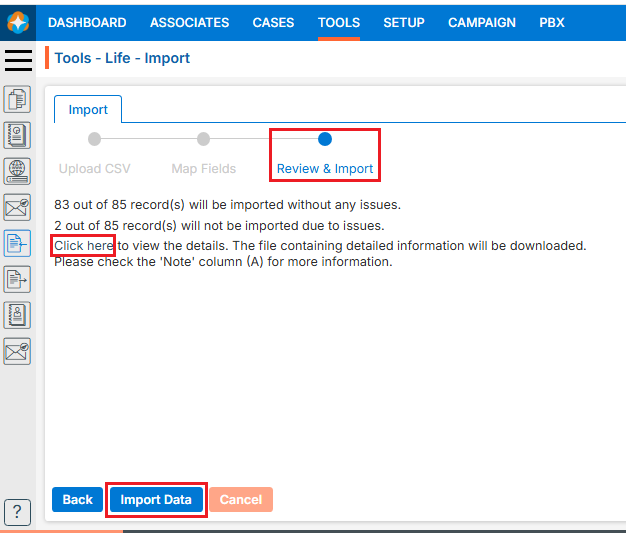
- If you want to correct all the records and then import them together, check the records in the downloaded file, correct the information, and then re-import them.
Note: System will check each field’s validation for all records and display issue message in Column A. Here, DOB is incorrect for record #1, and the first name is incorrect for record #4.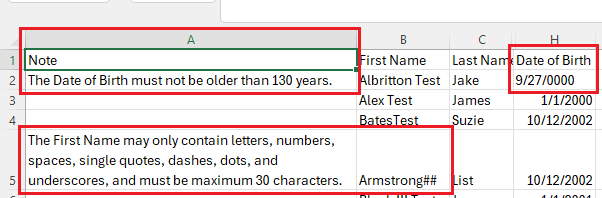
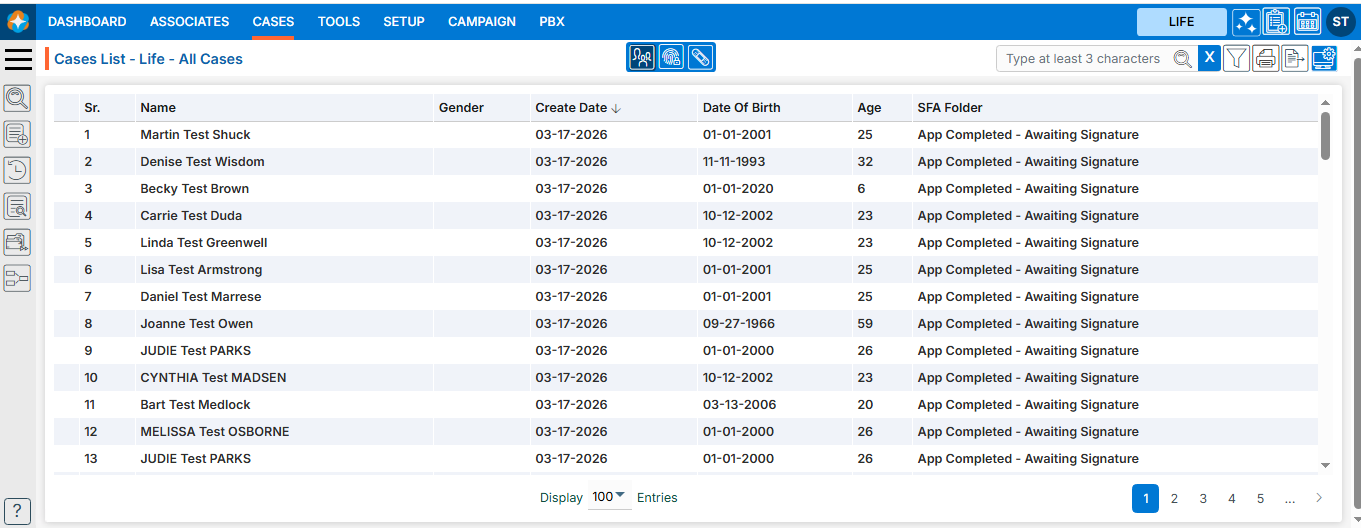
- Once all records are corrected click Import Data. Data will be imported and shown in the selected SFA Folder.
- All records will be shown under Cases and selected SFA Folder tab.