The PBX Phone Number List feature provides a centralized view of all phone numbers configured in the system. It allows users to view, search, and manage numbers used for internal extensions, inbound routing, and outbound calling. The list view displays details such as assigned users, created by and status for each number. Depending on user permissions, numbers can also be edited or reassigned.
In a PBX + CRM integration, an announcement refers to an automated audio message played to callers inside a phone system based on rules or data coming from the CRM.
Announcements Setup
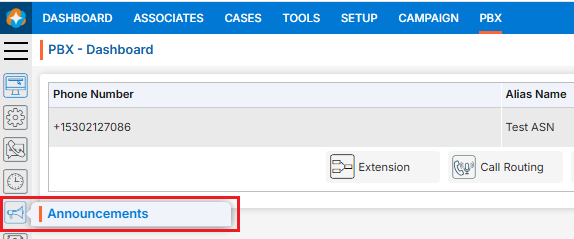
- Sign in to AgentFront CRM.
- From the top menu, select PBX.
- The PBX – Dashboard opens by default.

- Select Announcements from left side panel.
- The Announcements page will open and will display all available Announcements by default.
- This page will display the following fields:
- Announcements Name
- Voice Library Name
- Repeat
- Created By
- Create Date
- This page will display the following fields:
- There is Add button above the Action Column on the right side of the page.
- There are options to Enable/Disable (
 /
/ ), View (
  ), Edit (
 ) and Delete (
 ) the existing Announcements under the Action column.
Action Column Functionalities:
Add Announcements:
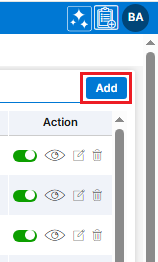
- Click Add button to add new Announcements.
- A new pop-up window will open with tile Add Announcements and display all the fields to add new Announcements.
- To add new Announcements, enter the following details:
- Name: Enter the clear, descriptive name. This is what users can identify the purpose of Announcements.
- Description: Optional explanation of the purpose of Announcements.
- Voice Library: Choose option from the dropdown. This dropdown displays the list of voice libraries created under PBX > Voice Library.
- Repeat: Choose option from the dropdown.
- Once all the details have been filled in and the selection is complete, click Save.
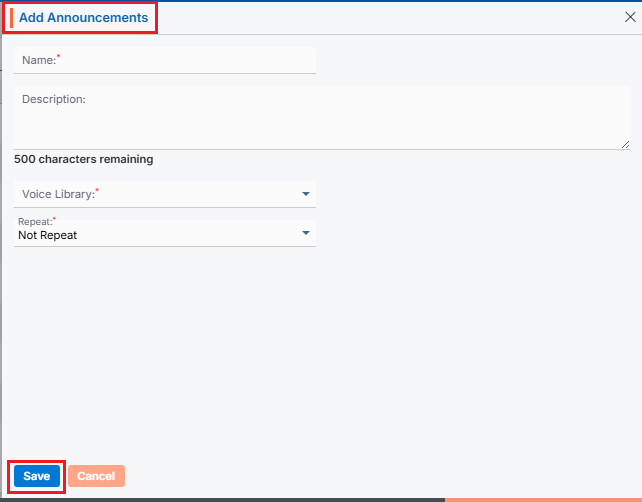
- The announcement is now listed and ready for use. New announcement will be enabled by default.

- To add new Announcements, enter the following details:
Enable/Disable Announcements:
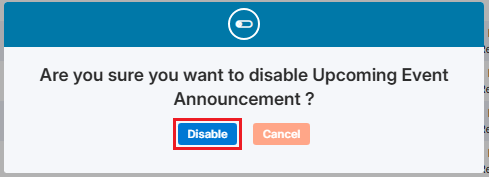
- Click Enable () icon from the Action Column for the Announcement you want to Disable.
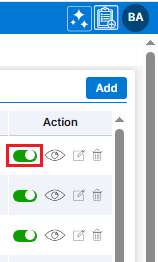
- It will ask for confirmation popup, click on Disable ( ) button as per the requirement otherwise click on Close button.
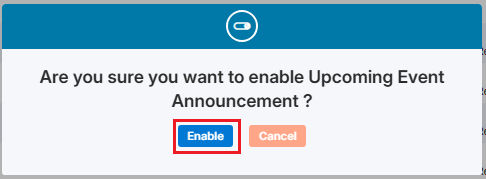
- Click Disable () icon from the Action Column for the Announcement you want to Enable.
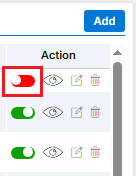
- It will ask for confirmation popup, click on Enable () button as per the requirement otherwise click on Close button.
View Announcements:
- Click View (
 ) icon from the Action Column for the Announcement you want to view details of Announcements.
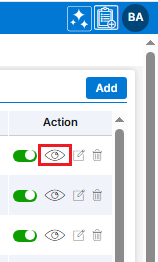
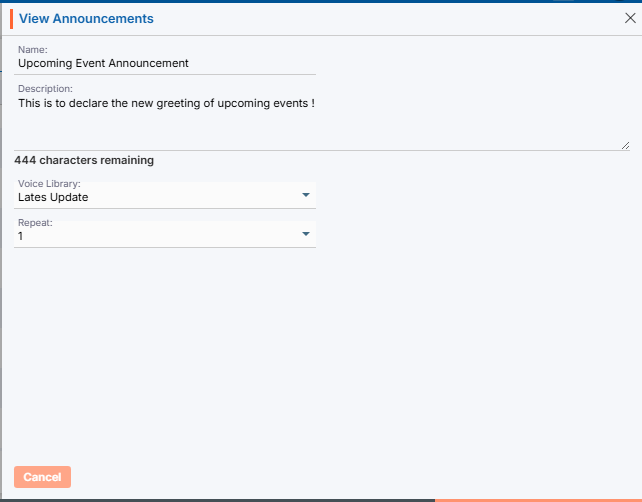
- A new pop-up window will open, displaying all the Announcement details in view only mode.
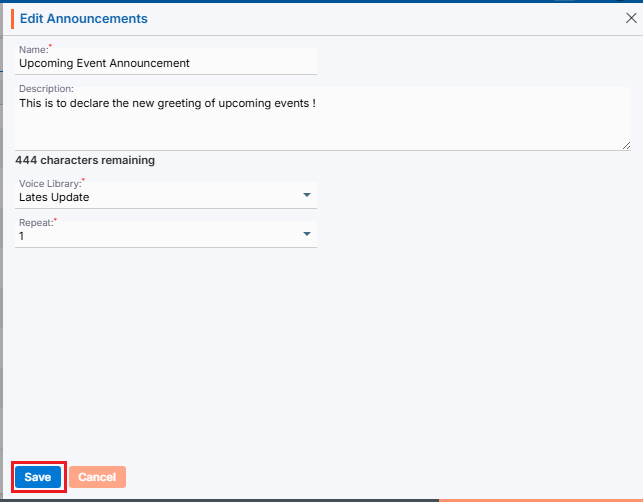
Edit/Update Announcement:
- To update the existing Announcement from the available list, Click on Edit () icon from Action Column for the Announcement you want to edit/update.
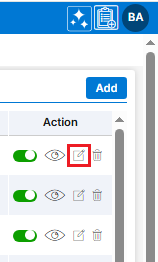
- Clicking Edit () icon will open the selected Announcement in edit mode with title Edit Announcement. Update the required field and click Save.
Delete Announcement:
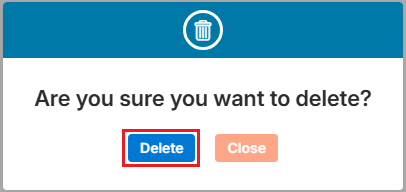
- To delete the unwanted existing Announcement from the available list, click on Delete () icon from the Action Column for the Announcement you want to delete.
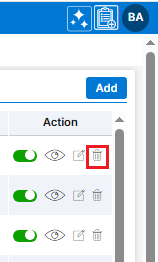
- It will ask for confirmation popup, click on Deleted button to delete the Announcement otherwise click on Close button.