Trigger Action – A trigger action refers to an event or condition that causes a specific action to occur automatically. These triggers are typically used to automate processes or workflows based on certain criteria.
The following are the steps to manage Trigger Action:
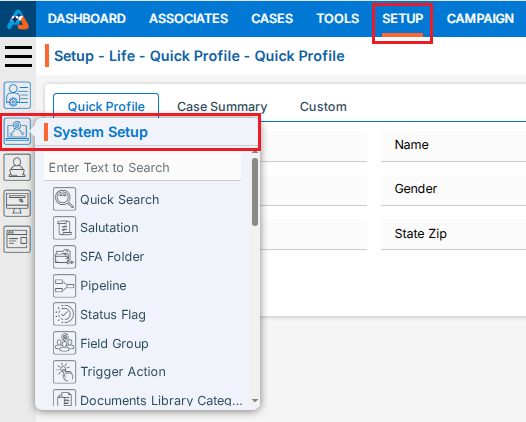
1. Navigate to the ‘SETUP’ tab and click on ‘System Setup’ in the left-side panel.
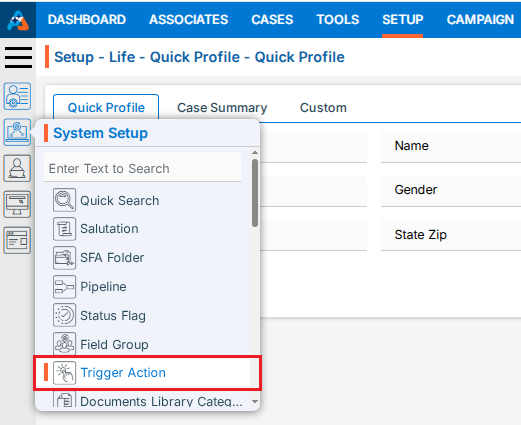
2. Click on the ‘Trigger Action’ option in the System Setup menu.
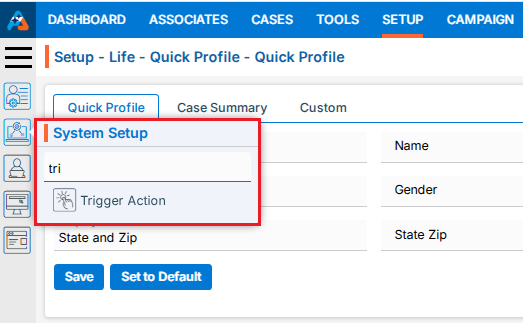
3. Users can search for the Trigger Action option by typing in the search area.
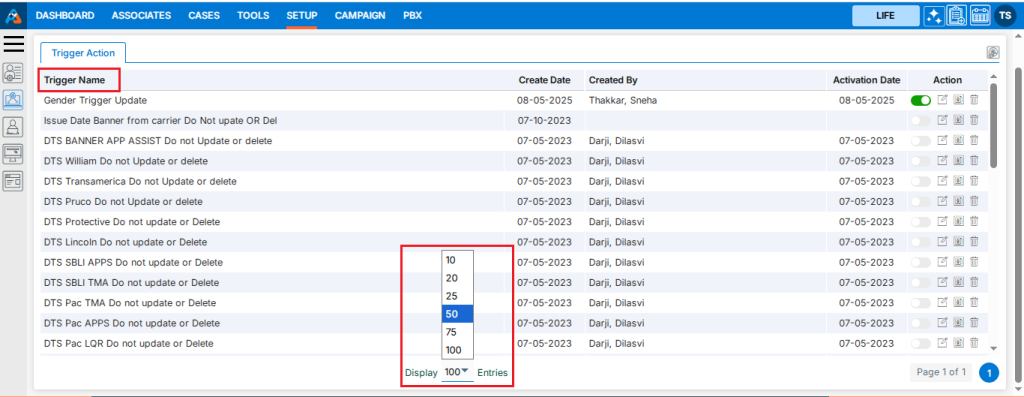
4. A new page titled ‘Setup – Life – System Setup – Trigger Action’ will open, displaying the existing Triggers along with field details such as Trigger Name, Created Date, Created By, Activation Date and Actions under the ‘Trigger Action’ tab.

5. Click the ‘Add Trigger Action’ icon on the right side of the window to add a new Trigger Action.

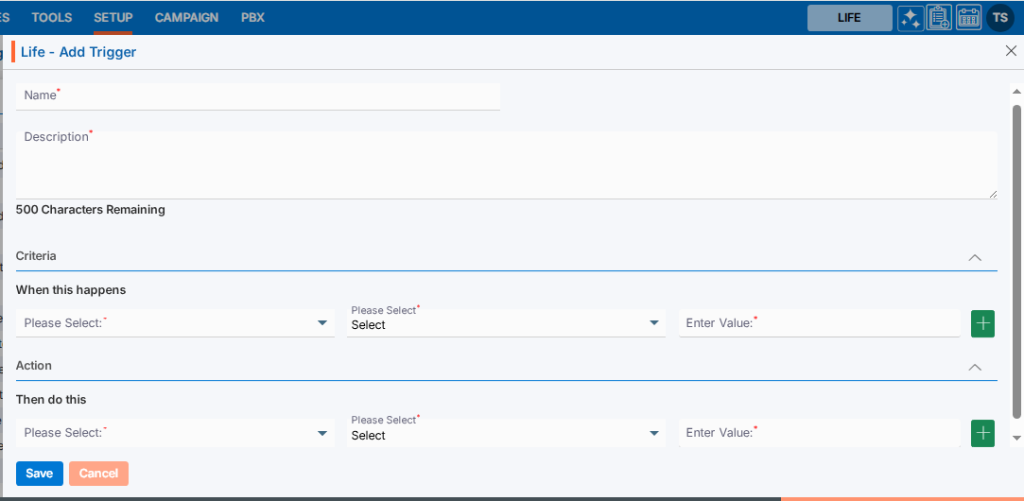
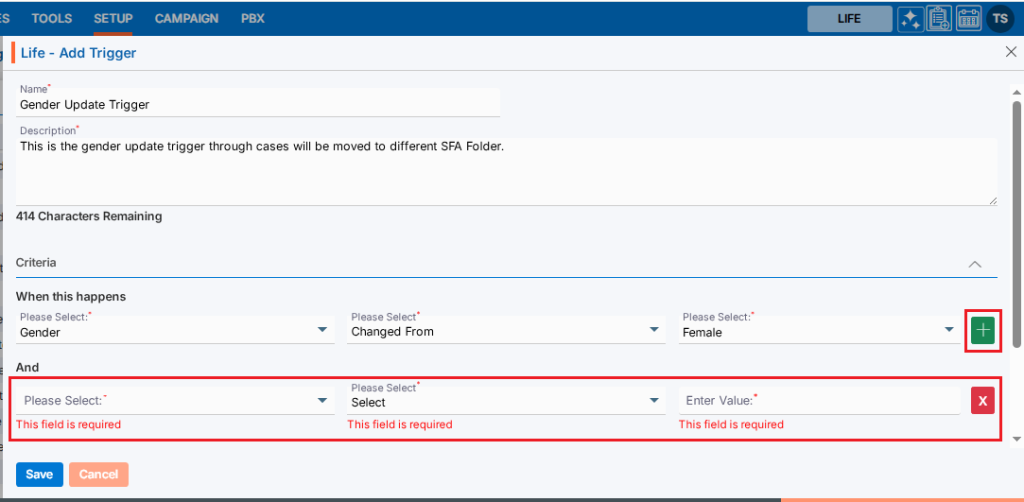
6. A pop-up window titled ‘Life – Add Trigger’ will open, containing fields for ‘Name’ and ‘Description’, along with sections for ‘Criteria’ and ‘Action’. The Save and Cancel buttons are also available on the same page.
● Fields with an ‘*’ sign are mandatory. In this case, Trigger Name, Description, all fields of Criteria section and all fields of Action section are mandatory fields.
7. Please fill in the details on the pop-up page.
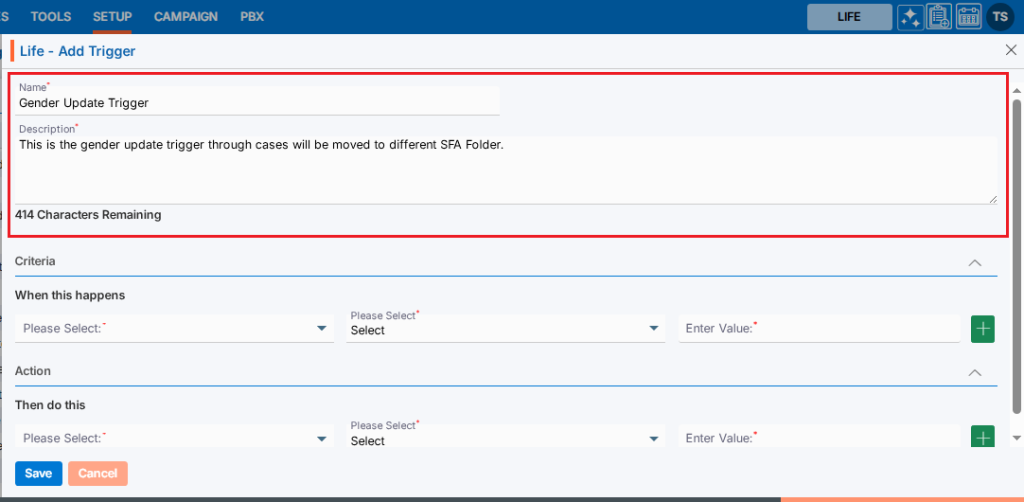
● Name: Enter the desired Trigger Action name. [Trigger Name field allows alphabet, number, space and following symbol: -_’& only] and (Limit is a maximum of 50 characters)
● Description: A description for the Trigger Action needs to be added in accordance with the Trigger Action name. (Limit is a maximum of 500 characters)
8. Users need to set criteria for the trigger.
● Criteria are the conditions that define when and how the trigger should be activated. These conditions can be based on predefined events or data.
● There is a separate section under the header ‘When this happens’, which includes different fields such as:
i. First Drop Down: This dropdown will display a list of available fields in the system from the parent forms under both tabs in Cases: Information > Default and Information > Custom Fields. (This dropdown will not include the fields of parent forms through which more than one entry of data can be saved). [If a non-date-related field is selected from the first dropdown, two additional options need to be selected from the second and third/fourth dropdowns. If a date-related field is selected, three additional options must be selected from the second, third, and third/fourth dropdowns.]
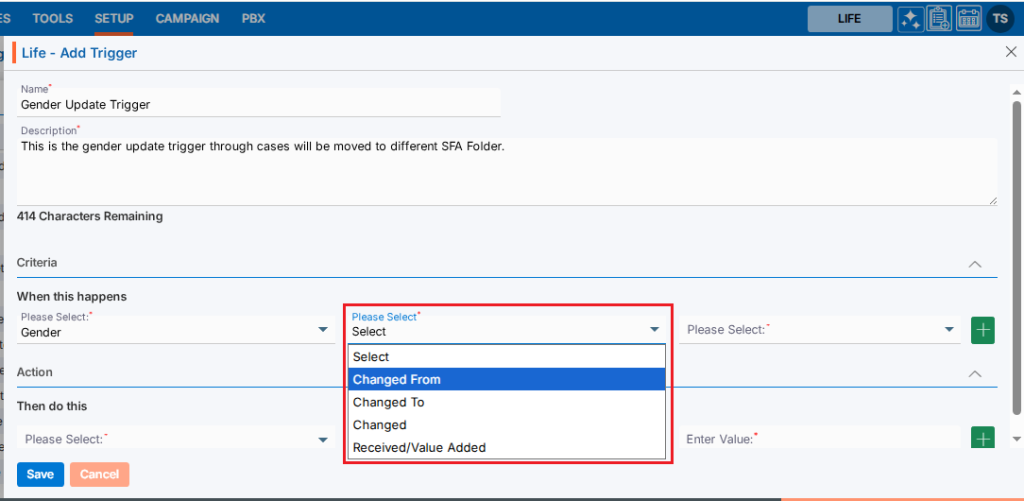
ii. Second Drop Down: This dropdown will display the options to set criteria based on the selected fields from the first dropdown, which include ‘Changed From’, ‘Changed To’, ‘Changed’, and ‘Received/Value Added’.
iii. Third Drop Down: This dropdown will be enabled only if a date-related field is selected from the first dropdown. It will then display options to set criteria, including ‘Today + Days’, ‘Today – Days’, ‘Fixed Date’, and ‘Other Fields’.
iv. Third/Fourth Drop Down or Text Field: This option will be enabled based on the selections made in the first, second, and third (if enabled) dropdowns. For this option, the user is required to either select an option from the dropdown or enter specific values in the text box, depending on the available options.
● For example, a trigger is created based on Gender. When the Gender value is changed from ‘Female’ to ‘Male’, this trigger will be executed.
● Please select ‘Gender’ from the Personal Information parent form fields from the first drop down.

● If a non-date-related field is selected in the first dropdown, the date-specific option dropdown will not be enabled.
● Since a non-date-related field is selected, only two fields are required to set the trigger.
● Please select the ‘Changed From’ option from the second dropdown menu.
● Then, please select the value ‘Female’ from the last dropdown menu.
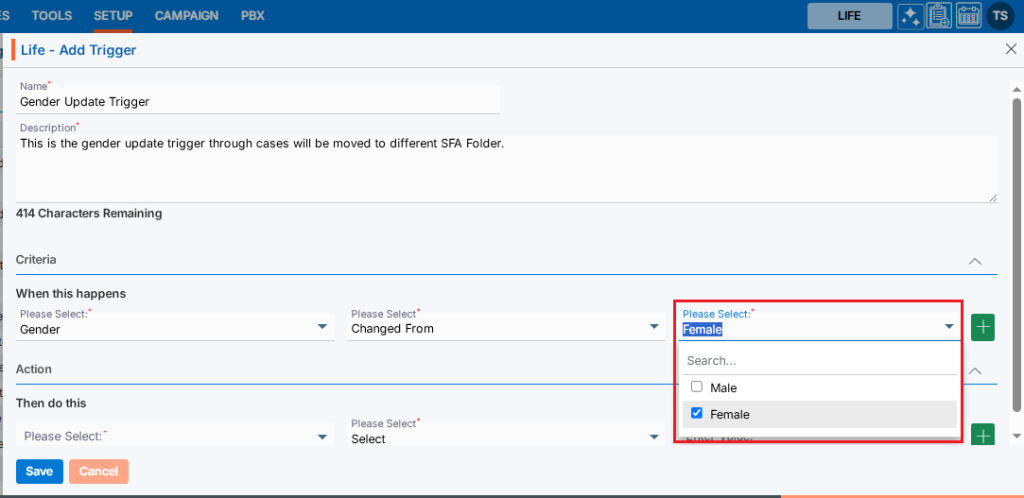
● The first criteria setup is completed as follows:
o When the gender is changed from Female.
● There is an option to set multiple criteria for the same trigger action.
● To add multiple criteria, click the + sign, and a new row will appear with the same fields under the “AND” header.
● If needed, the user can define the criteria in this new row, and both criteria will be applied to the trigger when it runs.
● So, by using the + sign, the user can set multiple criteria, and all criteria will be applied with an AND condition.
After completing the field selection under the criteria section, the action must now be set.
● Action: Actions are tasks or operations that are automatically executed once the specified criteria or conditions are met. When the conditions are fulfilled, the action is “triggered” and carried out without the need for manual intervention.
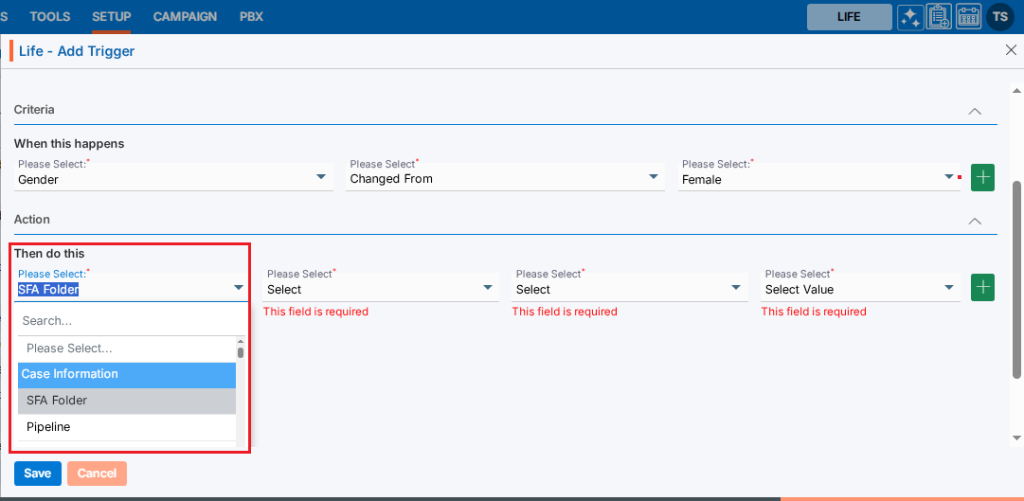
● There is a separate section under the header ‘Then do this’, which includes different fields such as:
i. First Drop Down: This dropdown will display a list of available fields in the system from the parent forms under both tabs in Cases: Information > Default and Information > Custom Fields. (This dropdown will not include the fields of parent forms through which more than one entry of data can be saved).
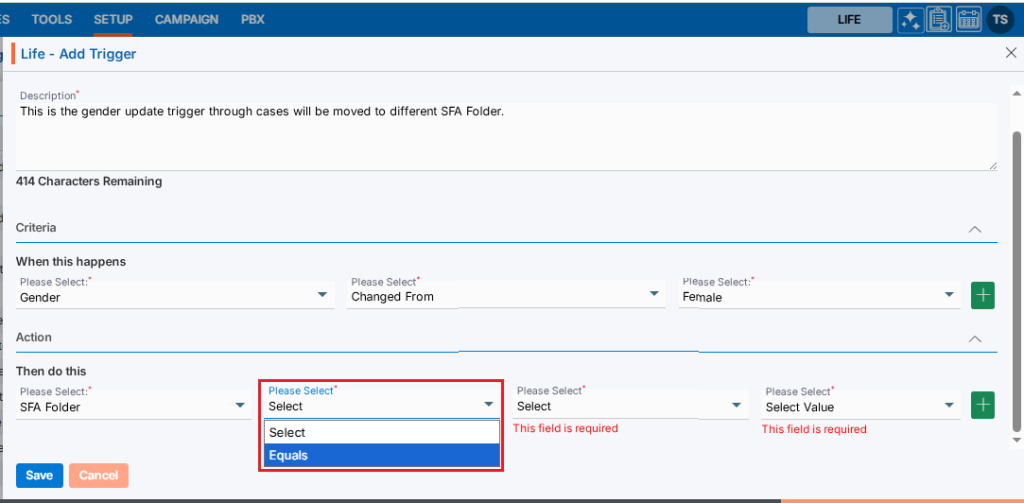
ii. Second Drop Down: This dropdown will display the options ‘Equals’ or ‘Equals and Remove Fields Value’ based on the field selected in the first dropdown. The user needs to select one of these options from the dropdown. [If the user selects the ‘Equals’ option, the third and fourth dropdowns will be enabled. If the user selects the ‘Remove Fields Value’ option, the third and fourth dropdowns will not be enabled.]
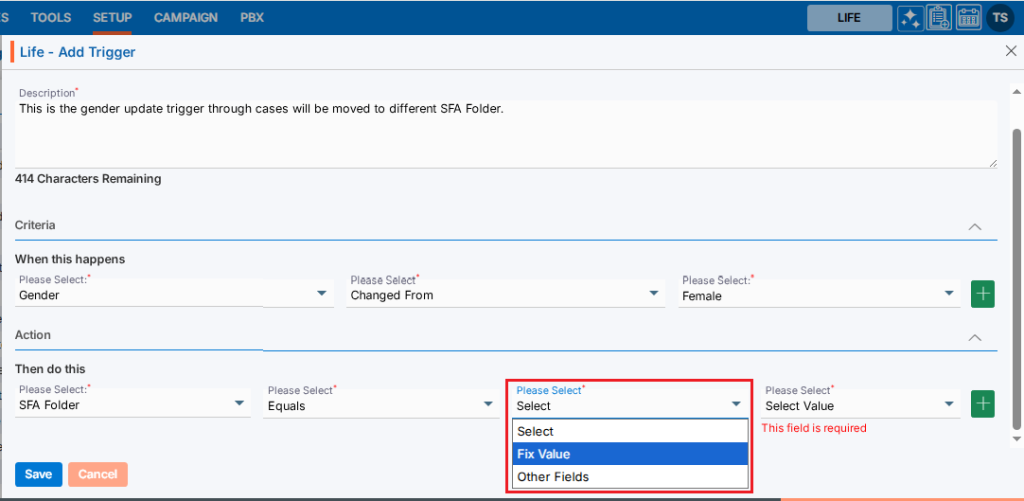
iii. Third Drop Down (if enabled): If a date-related field is selected from the first dropdown, this dropdown will display options to set criteria, including ‘Today + Days’, ‘Today – Days’, ‘Fixed Date’, and ‘Other Fields’. If a non-date-related field is selected, the dropdown will display options to set criteria, including ‘Fixed Value’ and ‘Other Fields’. The user needs to select one of these options from the dropdown.
iv. Fourth Drop Down or Text Field (if enabled): For this option, the user is required to either select an option from the dropdown or enter specific values in the text box, depending on the available options.
● For example, a trigger is created based on Gender. When the Gender value changes from ‘Female’, this trigger will be executed, and the case will be moved to the specified SFA folder.
● Please select the ‘SFA Folder’ field from the first dropdown.
● The next dropdown will display options based on the field selected in the first dropdown.
● Select the ‘Equal’ option from the second dropdown.
● The next dropdown will display options based on the field selected in the first and second dropdowns.
● Select the ‘Fix Value’ option from the third dropdown.
● The next dropdown will display options based on the fields selected in the first, second and third dropdowns.
● Select the specific SFA Folder name from the fourth dropdown.

● The ‘Rerate To Mail’ SFA folder name is selected.
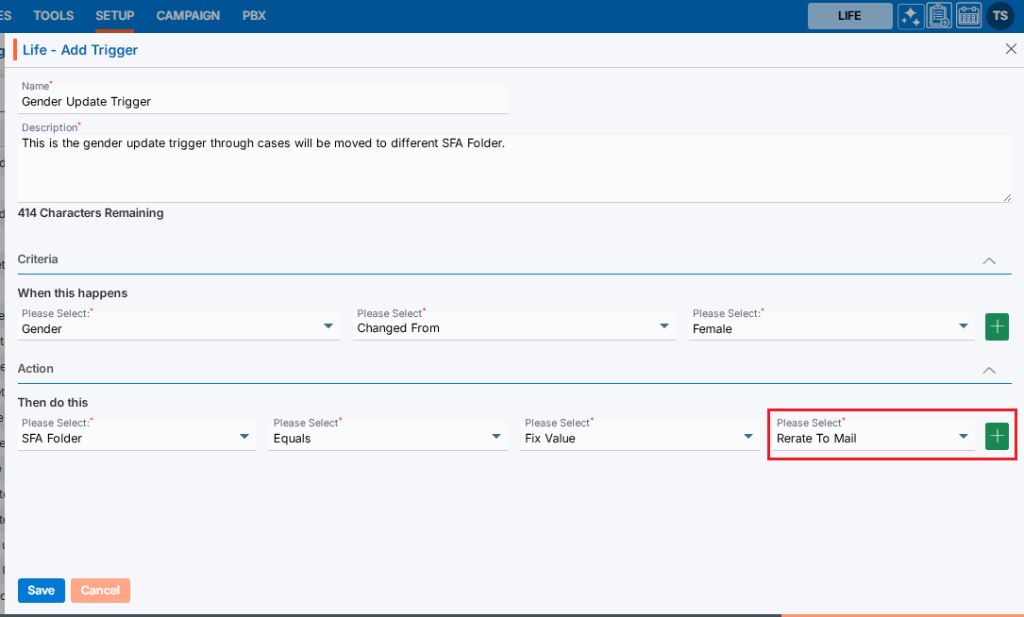
● The first action is set as follows:
o Based on the set criteria, when the gender is changed from Female for a particular case, the action will be triggered, and that case will be moved to the “Rerate To Mail” SFA Folder.
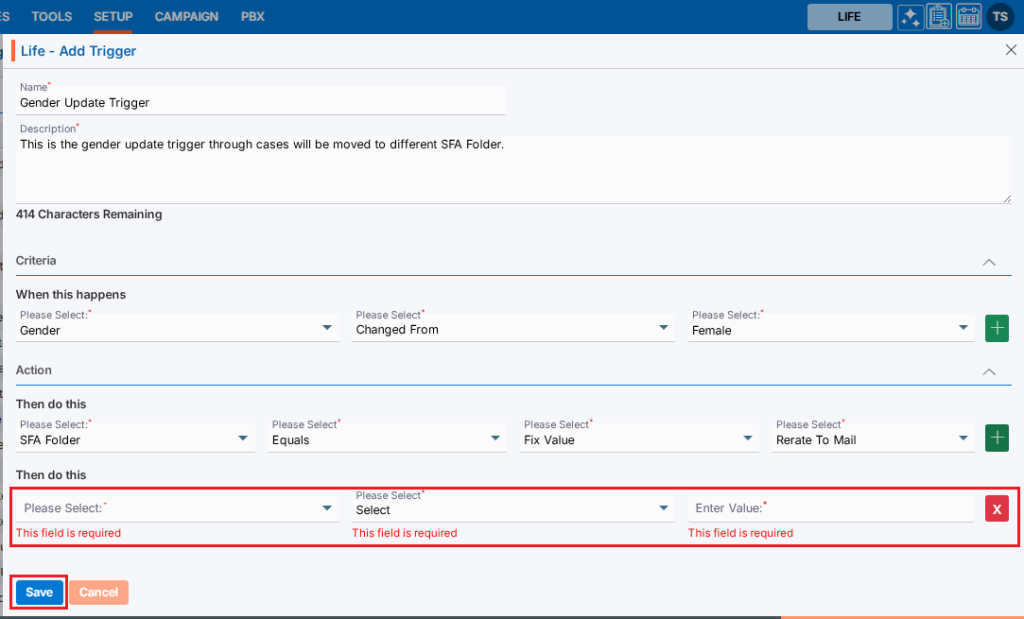
● Similarly, multiple criteria can be set, and multiple actions can also be defined for the same trigger action.
● To add multiple actions, click the ‘+’ sign, and a new row will appear below the first action row with the same fields.
● By clicking the ‘+’ sign, multiple actions can be configured to run with the trigger.
● If needed, the user can define the action in this new row, and all actions will be applied when the trigger runs.
● Using the ‘+’ sign, the user can set multiple actions, and all actions will be applied with an AND condition.
● After completing the criteria selection and setting the actions, click on Save button.
9. The system will generate a confirmation message indicating that the Trigger created successfully, and the newly created Trigger Action will now be available on the list.
10. There are four options available for each Trigger Action under the Action heading: Toggle to Disable/Enable, Edit, Copy, and Delete.
● Toggle to Disable/Enable: The newly added trigger will have a disabled status by default. Click the toggle to enable the trigger, and the color will change to green. Until the status is enabled, the trigger will not execute.
● Edit: The user can update the details, reset the criteria, or reset the action of the selected trigger action.
● Copy: The user can create a duplicate trigger with a different name.
● Delete: By clicking on Delete, the user will remove the selected trigger.

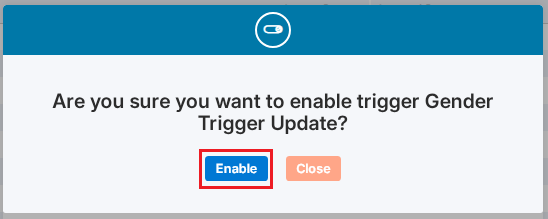
11. Click the Enable/Disable toggle to enable the trigger.

12. The system will generate a confirmation message to enable this trigger. Click on Enable.
13. The system will generate a confirmation message indicating that the trigger is enabled successfully, and the color is changed to green for that trigger.

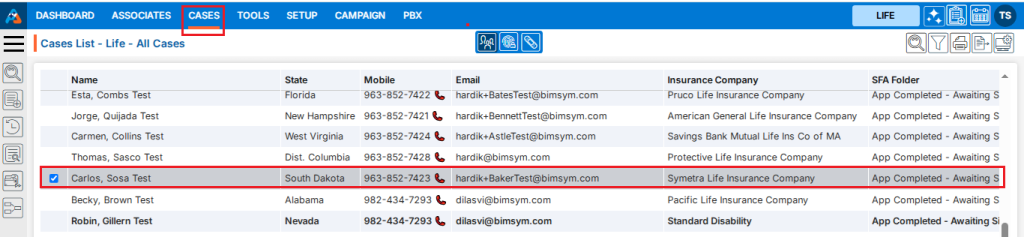
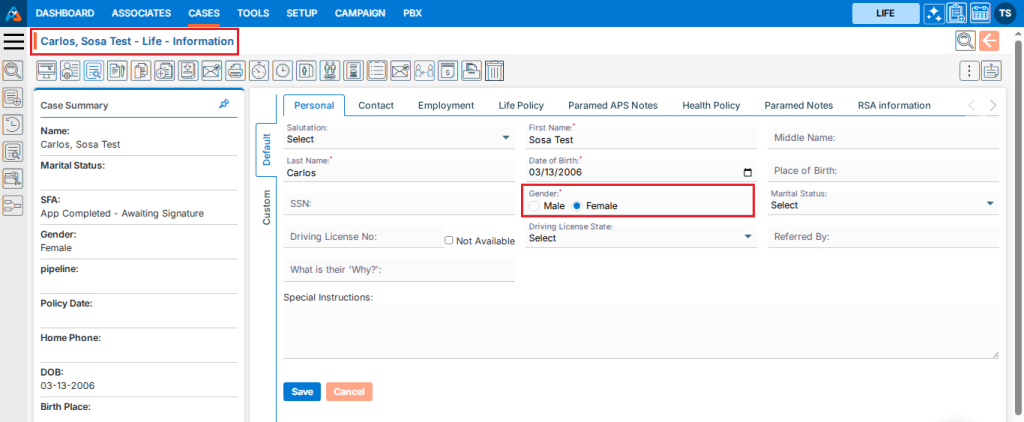
14. Go to the Cases tab and select any profile. Currently, no SFA is assigned to this profile.
15. Open the Information tab for the selected profile and check the current value of the gender field is Female.
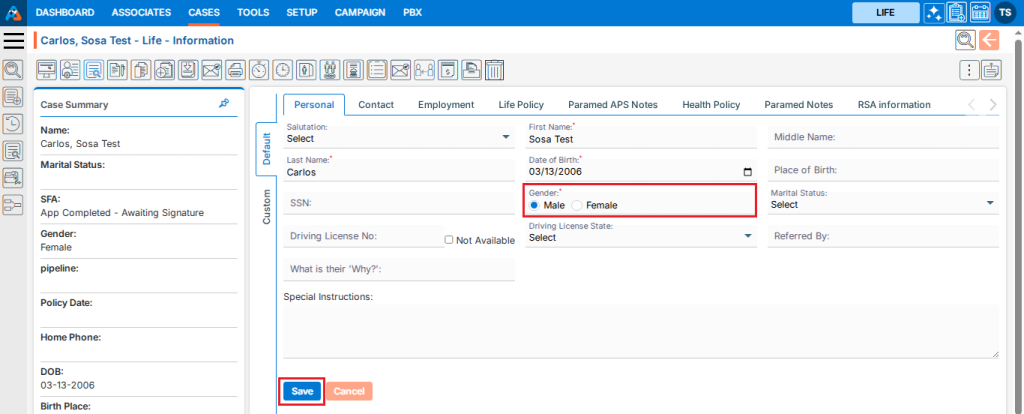
16. Change the gender value from Female to Male and click Save.
17. The system will generate a confirmation message indicating that the information has been updated successfully.
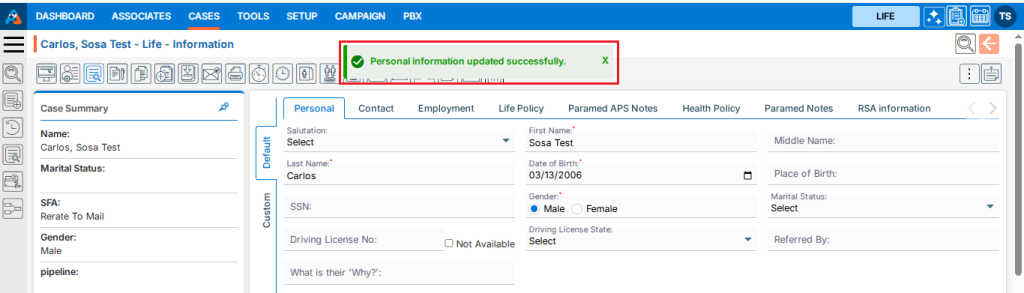
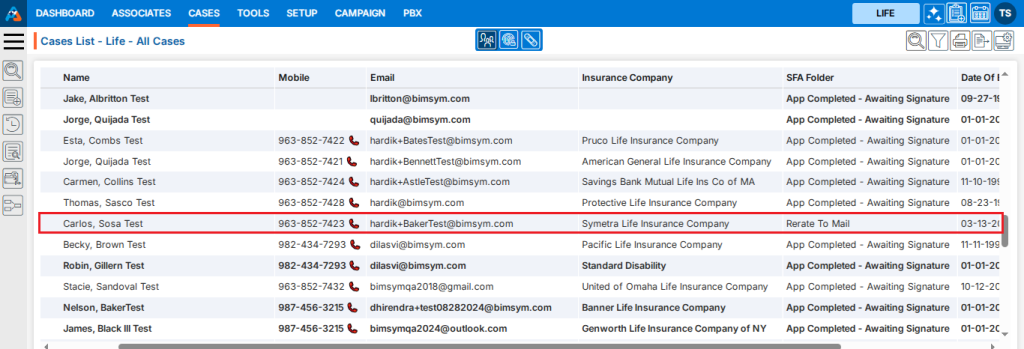
18. The trigger has run, and the selected case has been moved to the ‘Rerate To Mail’ SFA folder as set in the trigger.
19. Users can update the criteria and action for a created Trigger Action by clicking the edit icon next to the Trigger Action on the right hand side.

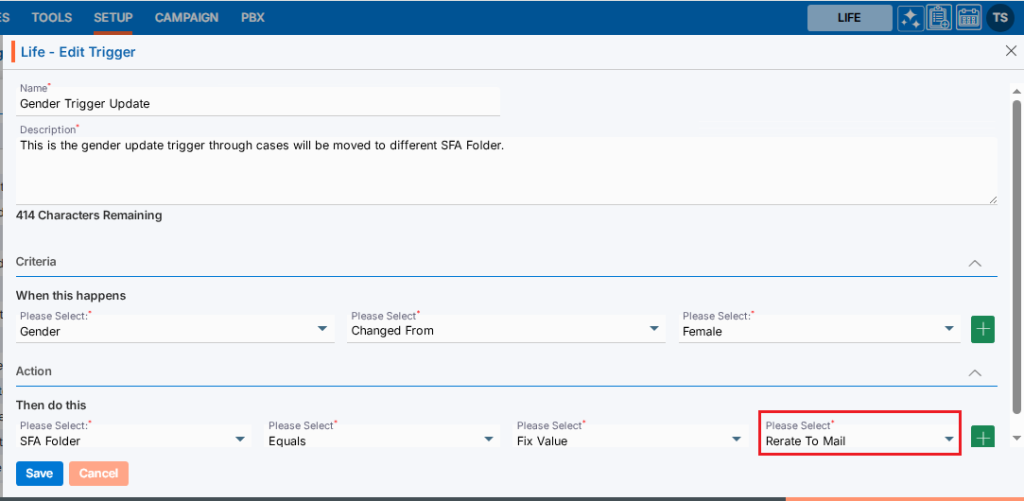
20. A pop-up window titled ‘Life – Edit Trigger’ will open, displaying the existing field values for criteria and action. Update the values as needed.
For example, in this case, we are updating the SFA folder name under the Action section: change the SFA folder value from ‘Rerate to Mail’ to ‘Rerate – Send Close’ and click Save.
Now, when the user updates the gender value from Female, the case will be moved to ‘Rerate – Send Close’ instead of ‘Rerate to Mail’.
21. Change the option for the SFA Folder and click Save.
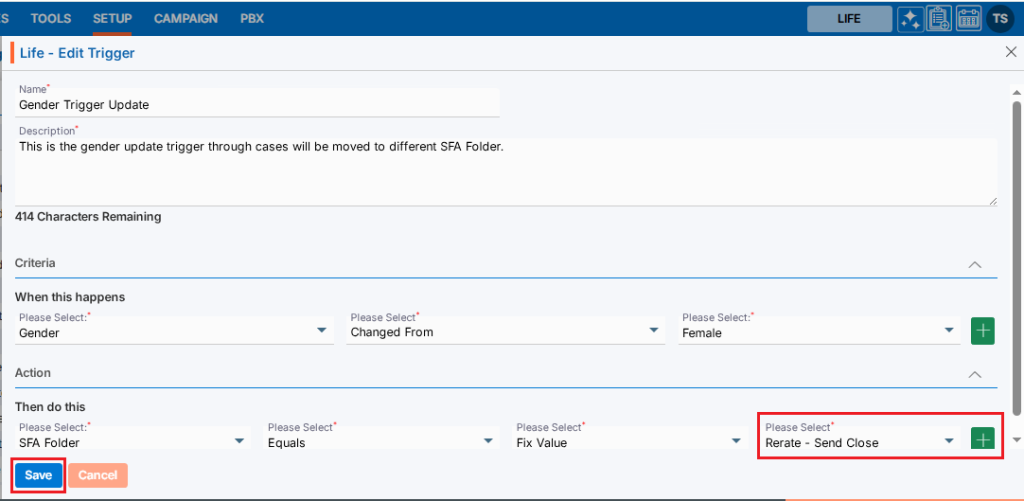
22. The system will generate a confirmation message that the trigger has been updated successfully.

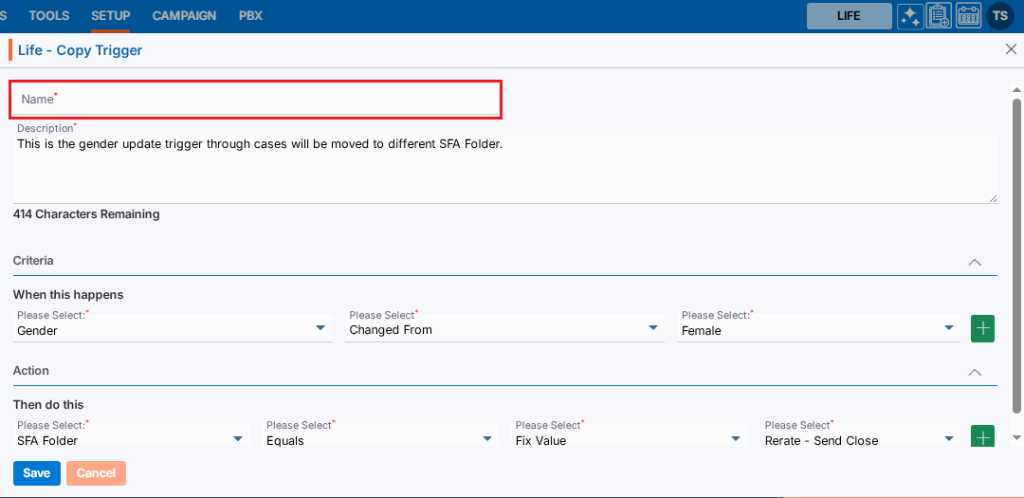
23. To create a duplicate trigger, click on ‘Copy’ for the trigger the user wants to duplicate.

24. A pop-up window titled ‘Life – Copy Trigger’ will open, pre-filled with the same criteria and action settings from the selected trigger. The description will also remain the same as the selected trigger, but the Name field will be blank.
25. Enter the new Trigger name and click on Save. (User can update the criteria and actions as needed)
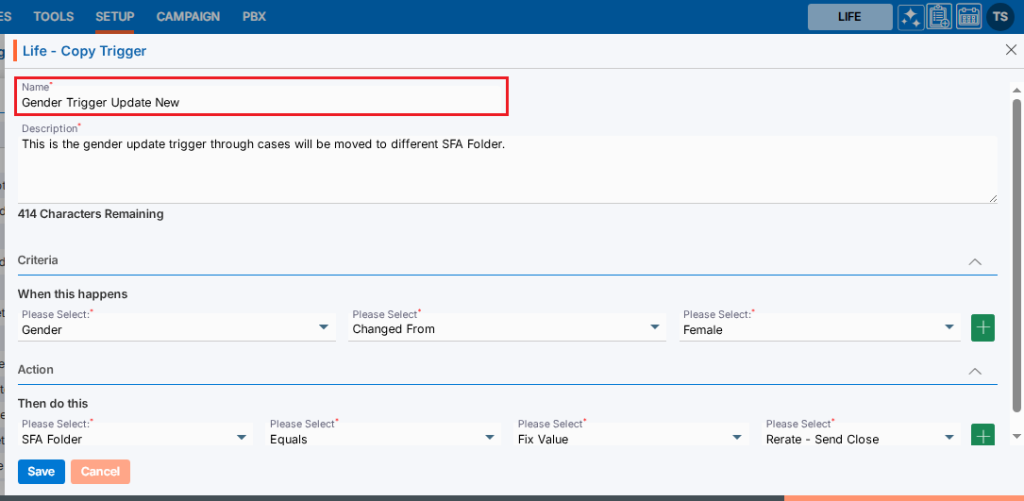
26. The system will display a confirmation message indicating that the trigger has been created successfully and the newly created Trigger Action will now be available on the list.

27. To remove the existing trigger, click the Delete icon on the right hand side of the window.

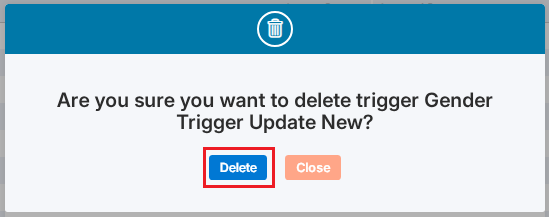
28. After clicking on Delete, the system will prompt for confirmation before deleting.
29. Click Delete to remove the selected Trigger.
30. The system will generate a confirmation message saying, ‘Trigger deleted successfully,’ and the trigger will be removed from the list.

31. Additionally, pagination and sorting features are available on this page.
● Users can set the view to display 10, 20, 25, 50, 75, or 100 triggers per page, as needed.
● Sorting features are available on the Trigger Name field. Users can set the trigger sequence in ascending or descending order by Trigger Name.