The Cases Quick Search Setup feature allows users to configure which Cases fields are searched for when specific characters are entered in the Quick Search bar. Users can select up to 10 fields and prioritize them to improve search efficiency.
Setup Cases Quick Search
- Sign in to AgentFront CRM
- From the top menu, choose Setup
- In the left-side panel, select System Setup
- Under System Setup, click Quick Search
- Note: The user can also access this page by typing Quick Search in the Enter Text to Search bar
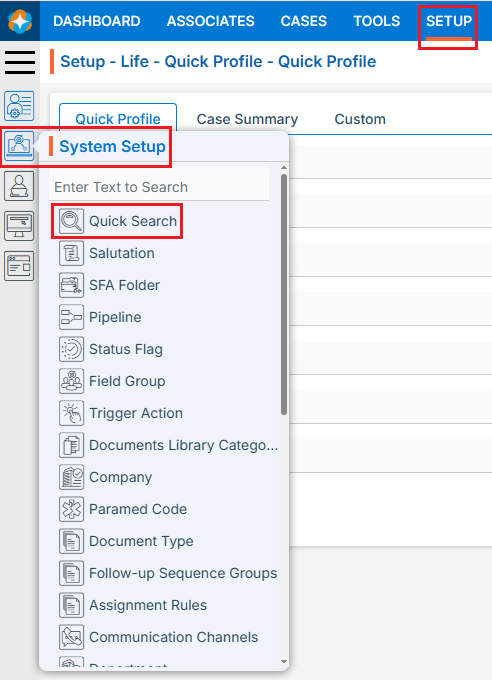
- Note: The user can also access this page by typing Quick Search in the Enter Text to Search bar
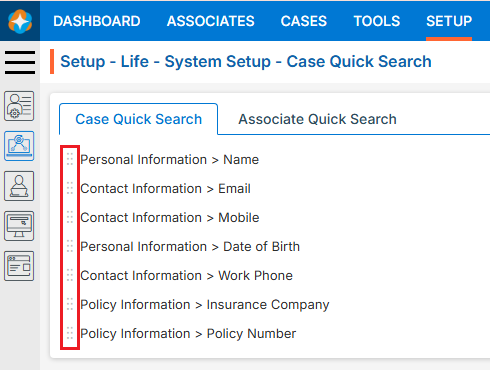
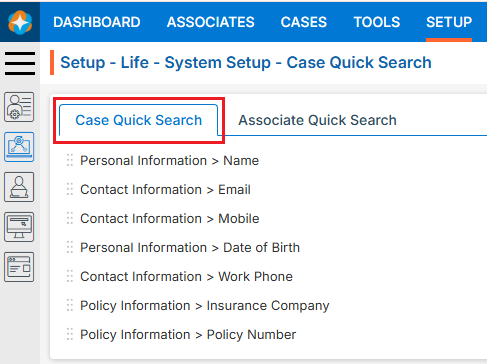
- The Case Quick Search page opens by default
Configure Quick Search Fields
- Click the Quick Search option to open the configuration window

- When clicking on Quick Search, Change Cases Quick Search window will open
- Click the drop-down arrow to view the available fields or use Enter Field Name to Search to quickly find a specific field
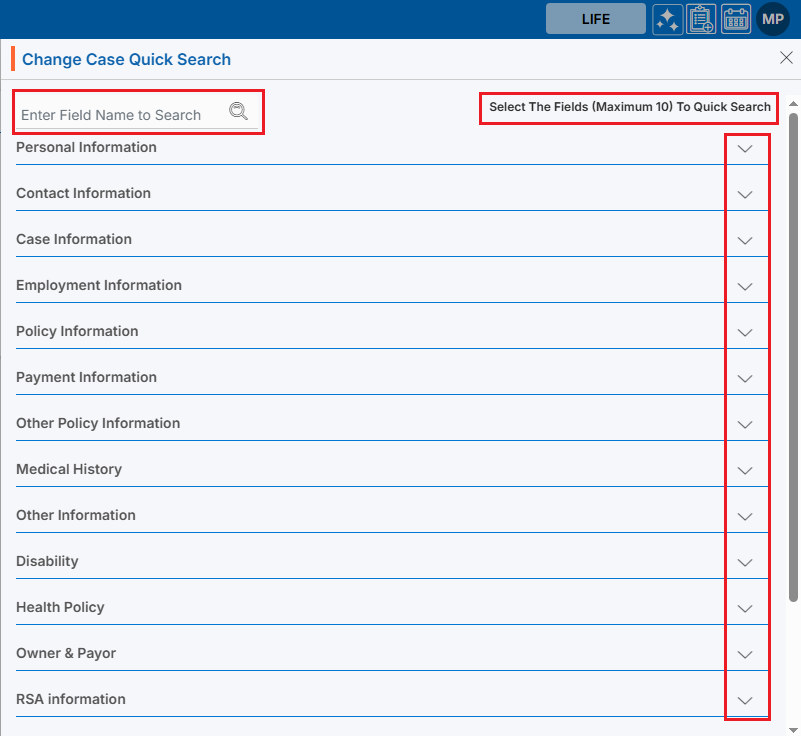
- Click the drop-down arrow next to Personal Information to expand the list
- Fields displayed in the list are selected by default
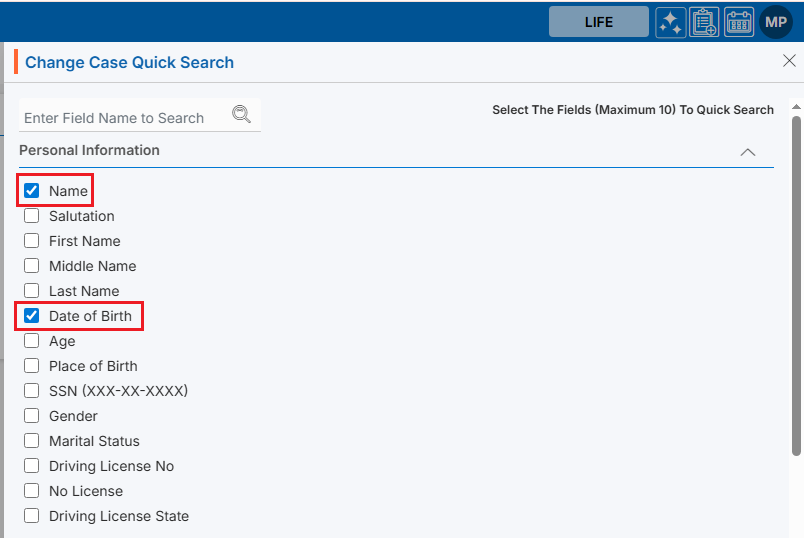
- Select or deselect fields to configure which Personal Information fields are included in Cases Quick Search
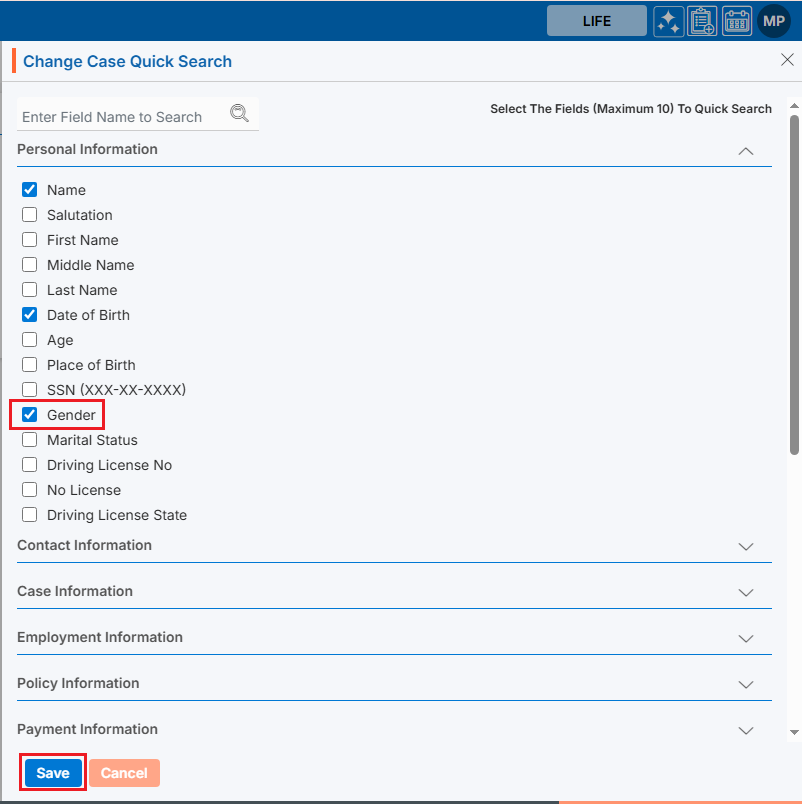
- Repeat the same process to select fields from other information categories, if required
- The system allows the selection of a maximum of 10 fields
- After selecting the required fields, click Save
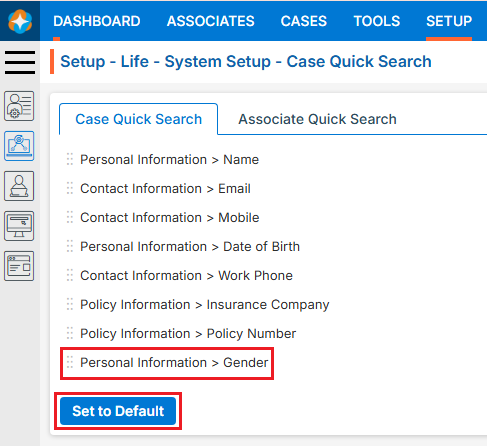
- Updated fields will now be displayed in the Cases Quick Search list
- The ‘Set to Default’ button will now appear, allowing users to restore default settings if needed
Use Cases Quick Search
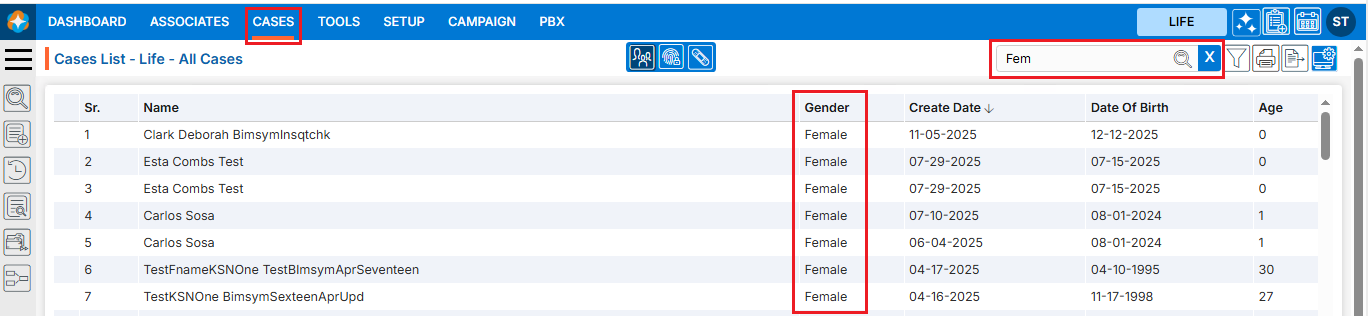
- Navigate to the CASES tab
- Click the Quick Search option
- Enter at least 3 characters in the search box. Here, we have entered ‘FEM’ in the quick search box
- Click the Search icon to view results
- The search results will display a list of cases whose gender is Female
Reset to Default Settings
- By clicking Set to Default, the settings will be restored to their default values
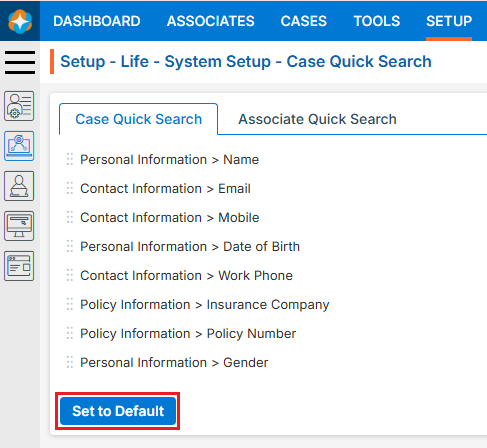
- Once the Cases Quick Search settings are reset, the search will operate using the default field preferences defined in System Setup
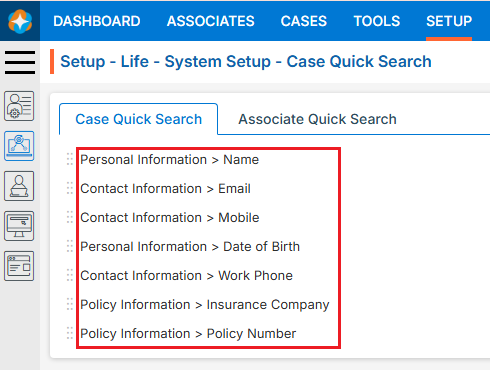
Re-arrange Field Priority
- Fields can be rearranged (
 ) to set their priority in the search results
 - Hover over the Re-arrange () icon at the beginning of a field name
- Select and drag the Re-arrange () icon to move up or down the field to the desired position, then drop it to save the new order