Using the Quick Action Menu the user can perform mass action on single or multiple profiles at a time. It enables the user to change the Pipeline status or move single or multiple cases from one pipeline to another pipeline simultaneously.
Sign in to AgentFront CRM
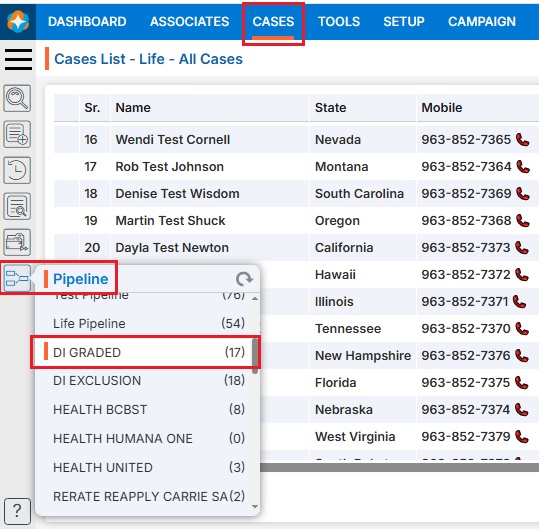
From the top menu, choose Cases
In the left-side panel, select Pipeline
Select the desired Pipeline. For example, here we have selected ‘DI GRADED’ pipeline and there are 17 cases available in this pipeline
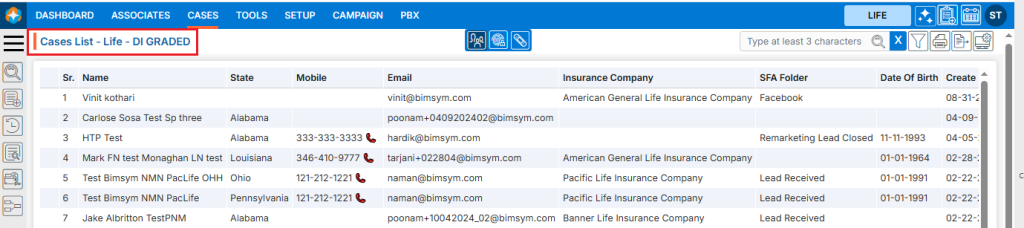
A new page will open for the DI GRADED pipeline, displaying the available cases within it
Select the case(s)
After selecting the case(s) action menu will be enabled
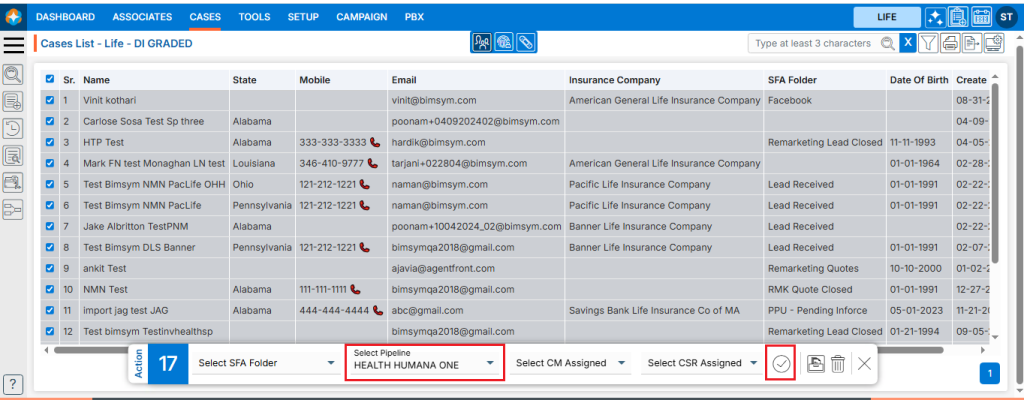
Select the another pipeline from the drop-down menu. Here we have selected ‘HEALTH HUMANA ONE’ pipeline from the drop-down menu
Click on Submit icon
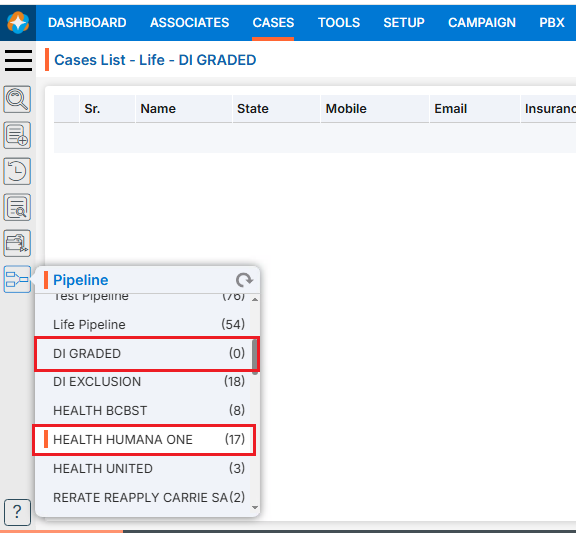
The selected case(s) will be moved from the current pipeline to the selected pipeline from the drop-down menu
User can see the number of cases will be updated in Pipeline on cases tab. We have moved cases from the ‘DI GRADED’ pipeline to the ‘HEALTH HUMANA ONE’ pipeline. As a result, 17 cases were transferred to ‘HEALTH HUMANA ONE’, updating its count from 0 to 17, while the count for the ‘DI GRADED’ pipeline are updated from 17 to 0.
The Pipeline represents the sales journey, showing where each lead currently stands in the sales process. It reflects the progression of sales from initial contact with a prospect to the final conversion into a customer.
Setup Pipeline
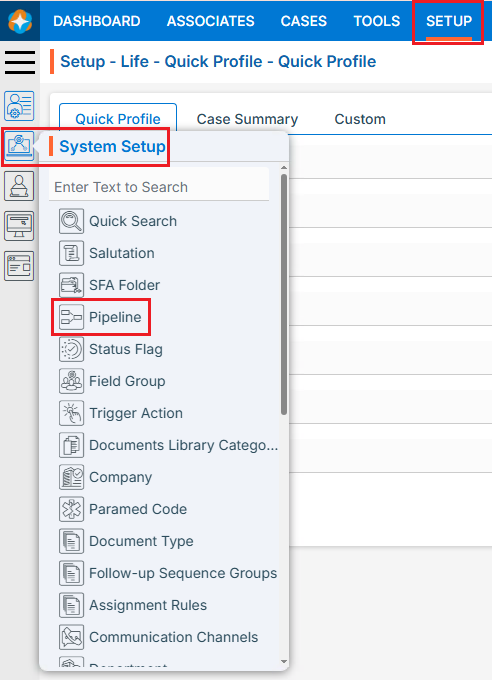
Sign in to AgentFront CRM.
From the top menu, choose Setup.
In the left-side panel, select System Setup.
Under System Setup, click Pipeline. Note: The user can also access this page by typing Pipeline in the Enter Text to Search bar.
The Pipeline page opens with a list of existing Pipelines.
There is an Add button above the Action Column on the right panel to add new pipeline.
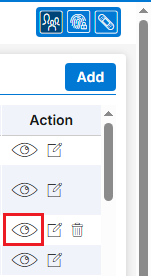
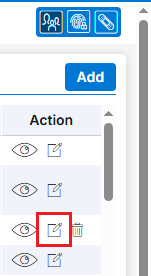
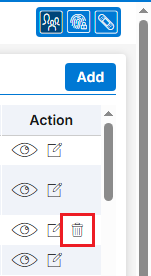
There are options to View (), Edit () and Delete () the existingPipeline under the Action column. Note: If there are cases in the pipeline, the Delete button will not be available for that pipeline and it cannot be deleted.
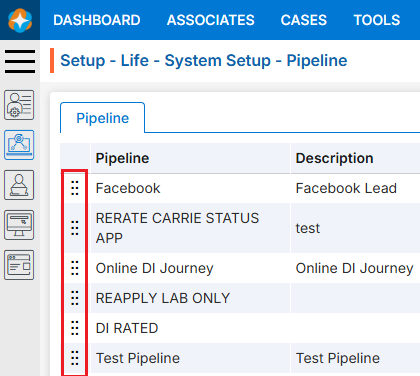
Also, users can Rearrange () pipelines according to their requirements.
Add New Pipeline:
Click on Add button to add new Pipeline.
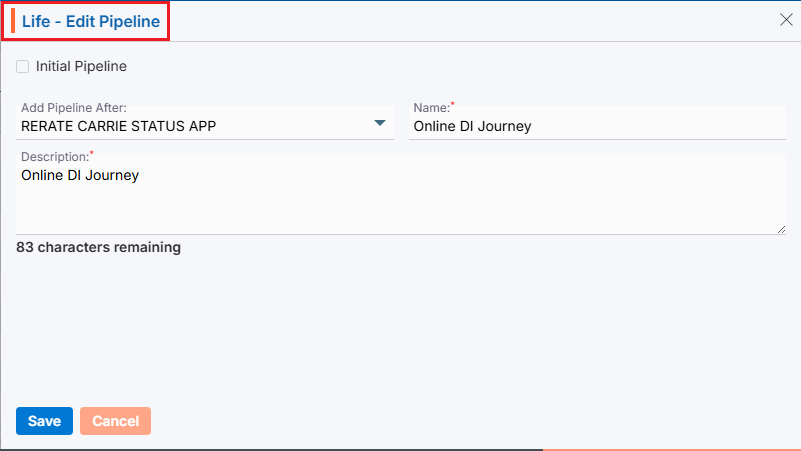
The Add Pipeline window will open, allowing the user to enter the required details to create a new Pipeline.Initial Pipeline: Select this checkbox to keep the Pipeline at the top of the list.Add Pipeline After: The user can choose an existing Pipeline from the drop-down menu, and the new Pipeline will be added immediately after the selected pipeline, allowing it to be placed in the desired order.Name: Enter the clear, descriptive name. This is what users will see under the Cases tab.Description: Optional explanation of the Pipeline’s description.
Click Save button. The Pipeline is now listed and ready to use.
View Pipeline:
Click View () icon from the Action Column for the Pipeline you want to view details of pipeline, new page will open with all details of Pipeline.
Update Pipeline:
To update the existing Pipeline from the available list, Click on Edit () icon from Action Column for the Pipeline you want to edit/change.
Clicking Edit () icon will open the selected Pipeline in edit mode with title Edit Pipeline. Update the required details and click Save.
Delete Pipeline:
To delete the existing Pipeline from the available list, click on Delete() icon from the Action Column for the Pipeline you want to delete. Note:Delete option will not be available for a pipeline if there are cases in it. To delete a pipeline that does not have a Delete button, the user must move all cases from that pipeline to another pipeline. Once the pipeline has no cases, the Delete button will appear, allowing the user to delete the pipeline.
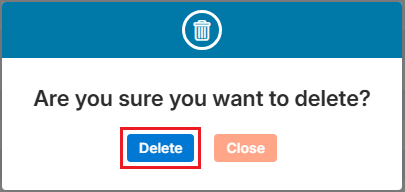
It will ask for confirmation popup, click on Deleted button to delete Pipeline otherwise click on Close button.
Re-arrange Pipeline:
Pipelines can be rearranged () to set their priority in the search results.
Hover over the Re-arrange () icon at the beginning of a Pipeline.
Click and drag the Re-arrange () to move up or down to the desired position, then drop it to save the new order.