Export – The Export feature is used to export files with specific data in CSV, XML, and JSON formats.
The following are the steps for Export data:
1. Navigate to the ‘Tools’ tab.

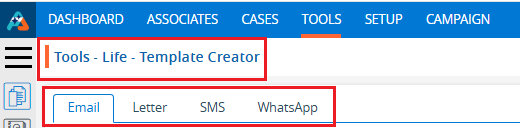
2. The Tools tab will open, displaying the ‘Tools – Life – Template Creator’ with four tabs: Email, Letter, SMS, and WhatsApp.
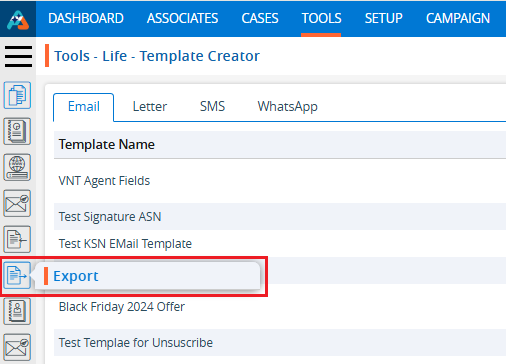
3. Click on ‘Export’ from the left-side menu.
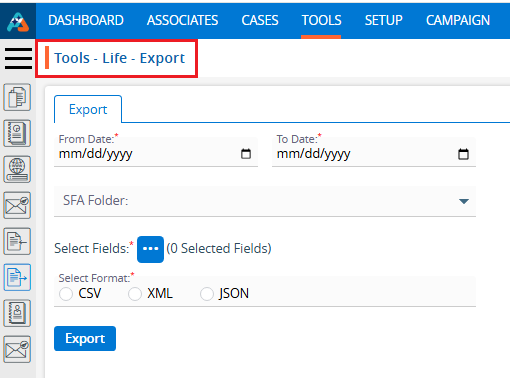
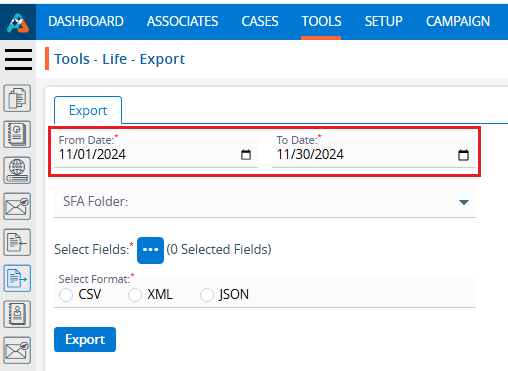
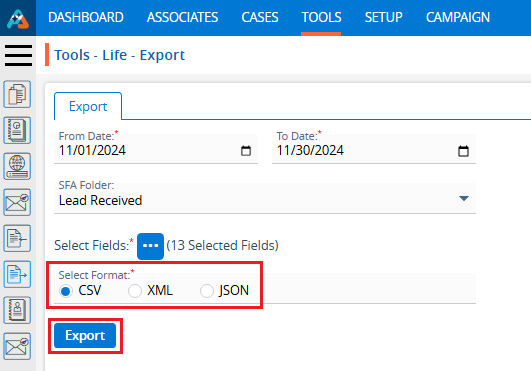
4. A new page titled ‘Tools – Life – Export’ will open with the ‘Export’ tab, which has fields for exporting a file with dates, SFA Folder, and format selected.
5. Fields marked with an asterisk (*) are mandatory to select.
6. Select ‘From Date’ and ‘To Date’ for the date range. The range can only be a maximum of 31 days.
For example, we have selected dates from 11/01/2024 to 11/30/2024.
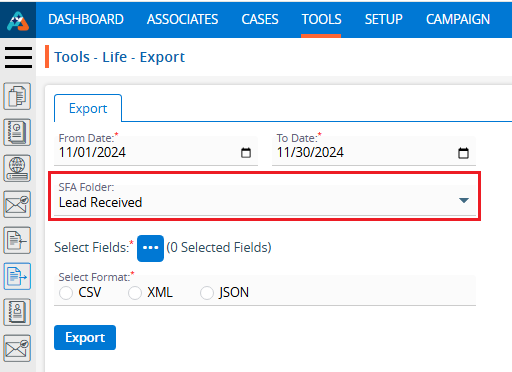
7. Select the SFA Folder to export the file with data.
For example, we have selected SFA as ‘Lead Received’.
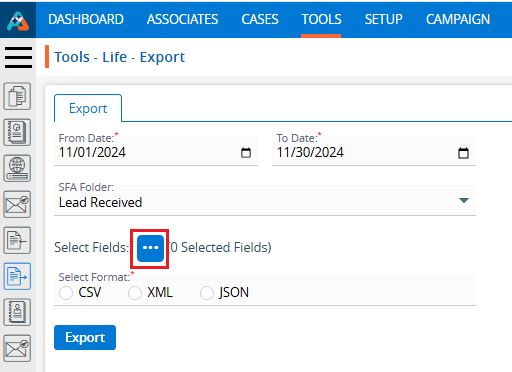
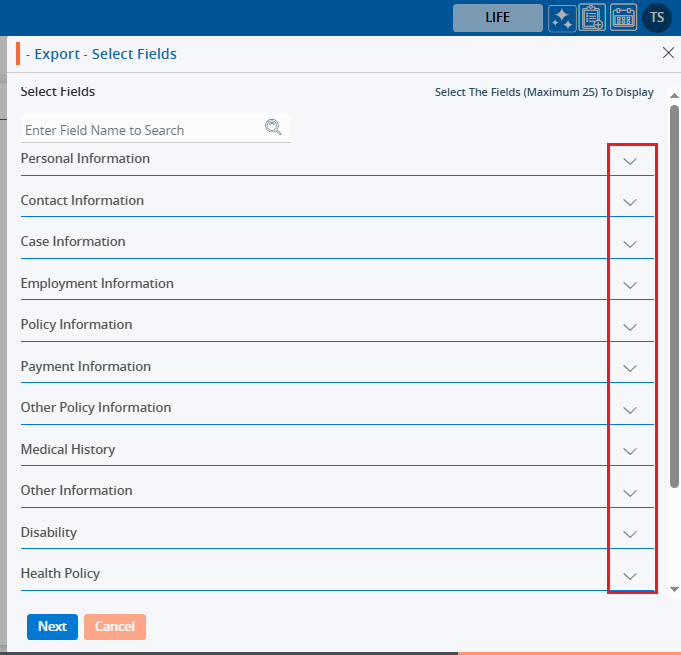
8. Click on the three-dot button to select fields.
9. A pop-up window titled ‘Export – Select Fields’ will open.
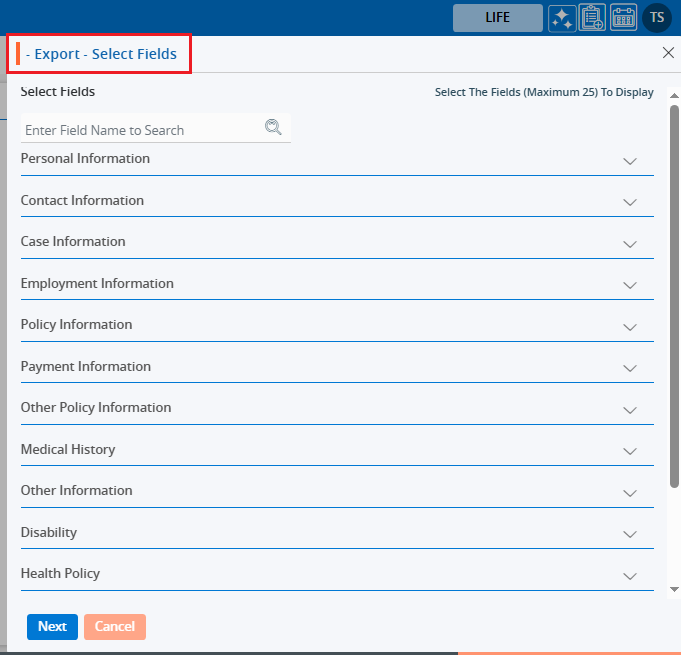
10. Click on the down arrow to reveal the fields for selection. The fields will be listed in sections such as Personal Information, Contact Information, Employment Information, Policy Information, Other Policy Information, Medical History, Other Information, Disability, Health Policy, Owner & Payor, RSA Information, Horizon Agent Journey, and Health Policy Information.
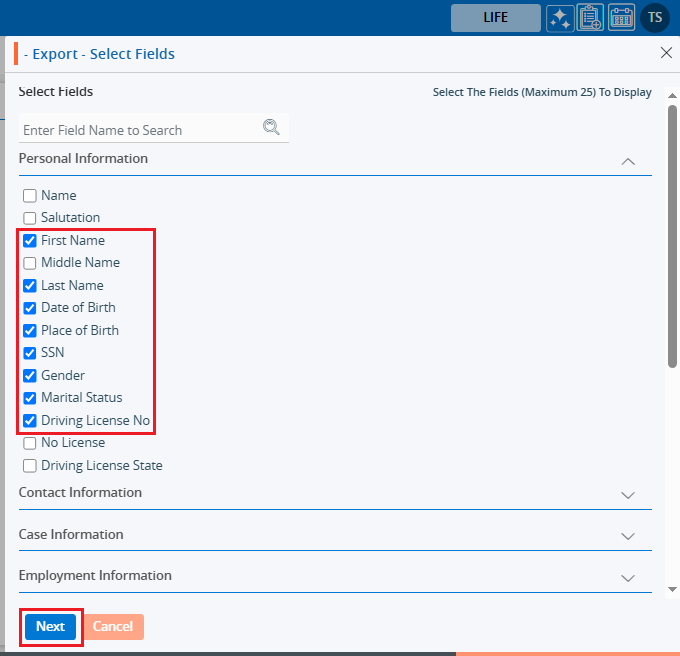
11. Additionally, the user can search for field names based on their requirements, and the system will display the corresponding results.
12. Select the field names whose data the user needs to export in the file.
For example, the user might choose First Name, Last Name, Date of Birth, Place of Birth, SSN, Gender, Marital Status and Driving License No from the Personal Information section. Additionally, the user could select Email, Address1, City, State and Zipcode from the Contact Information section.
13. Click ‘Next’ to proceed.
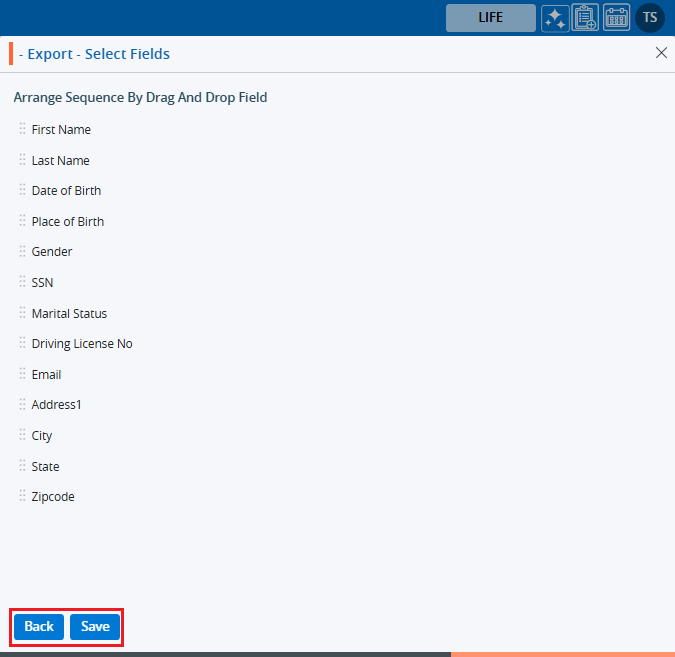
14. Clicking on ‘Next’ opens a new page listing the selected fields.
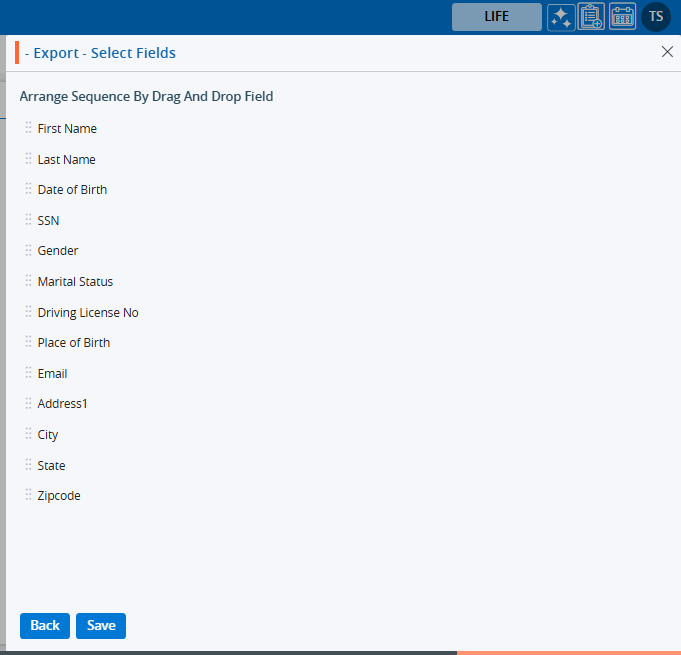
15. The user can change the sequence of the fields list using the six dots.
For example, we have set Place of Birth and Gender after the Date of Birth field.
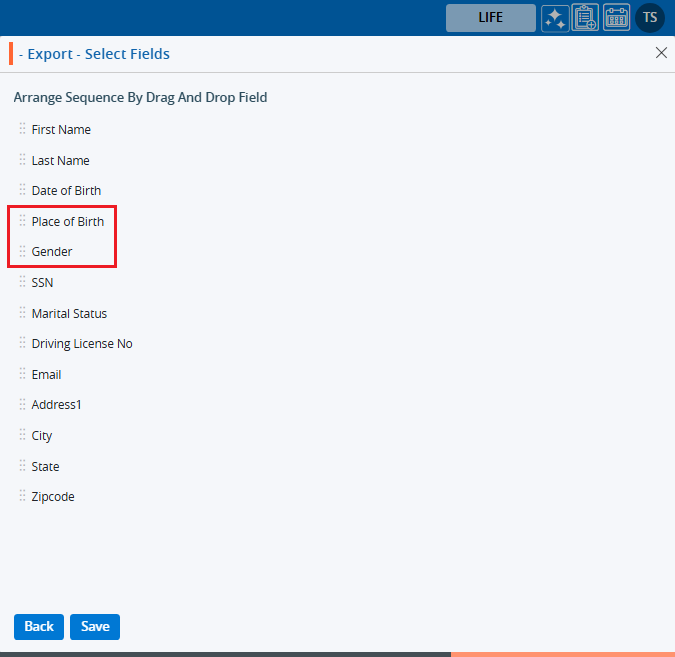
16. Click on the ‘Save’ button to proceed. If changes to the field selection are required, click on the ‘Back’ button.
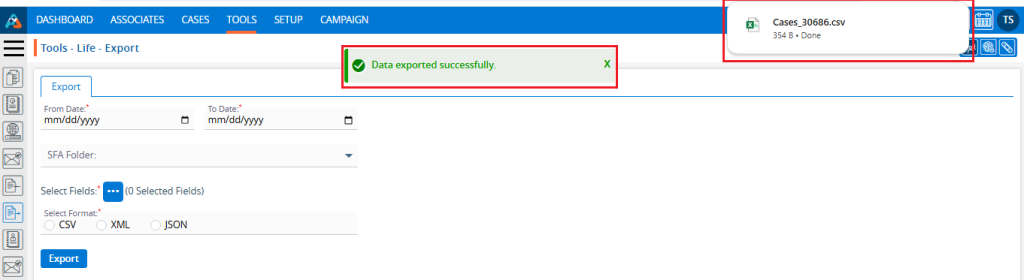
17. There are three available formats for exporting the file: CSV, XML, and JSON. Select the desired format and click the ‘Export’ button to proceed.
For example, you might choose the CSV format.
18. A confirmation message will appear, stating that the data has been exported. The file will be exported and saved in a temporary location.