The following are the steps to add/edit/delete Department in the system:
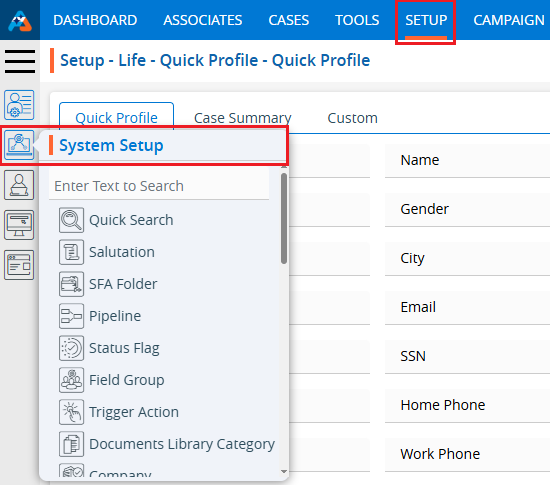
1.Navigate to the ‘SETUP’ tab and click on ‘System Setup’ in the left-side panel.
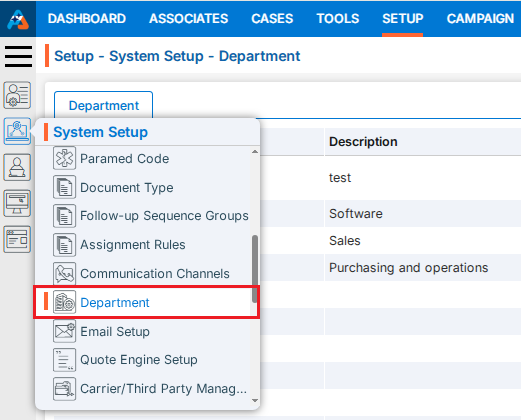
2. Click on the ‘Department’ option in the System Setup menu.
3. Users can search for a specific Department by typing in the search area.

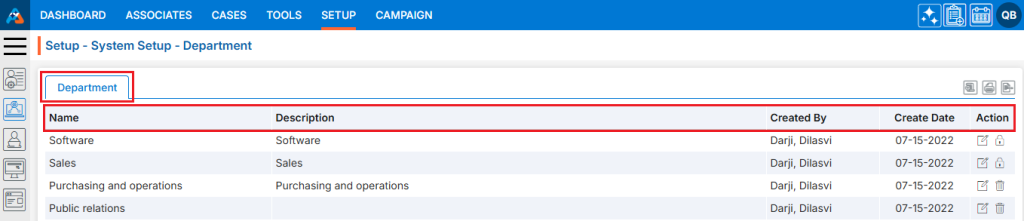
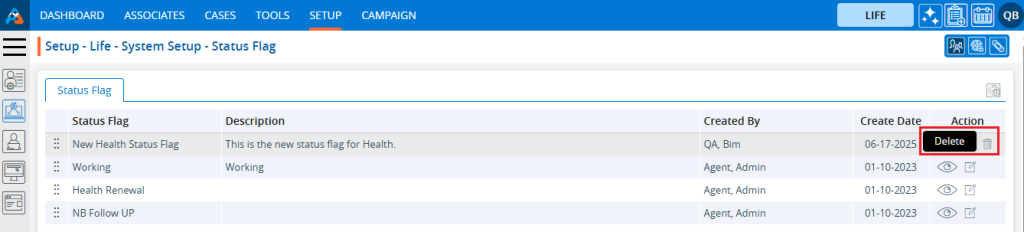
4. The page ‘Setup – Life – System Setup – Department’ will open, displaying existing Department along with details including Name, Description, Created By, Create Date and Action under the ‘Department’ tab.
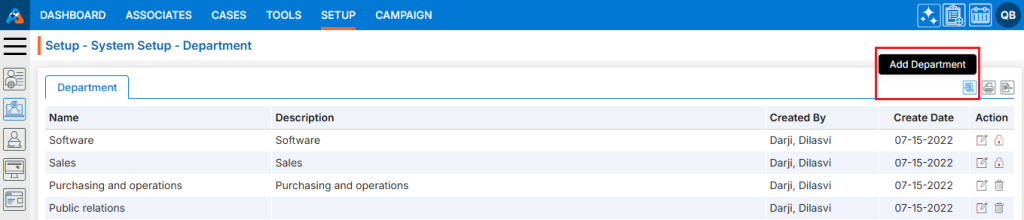
5. Click the ‘Add Department’ icon to add a new Department.
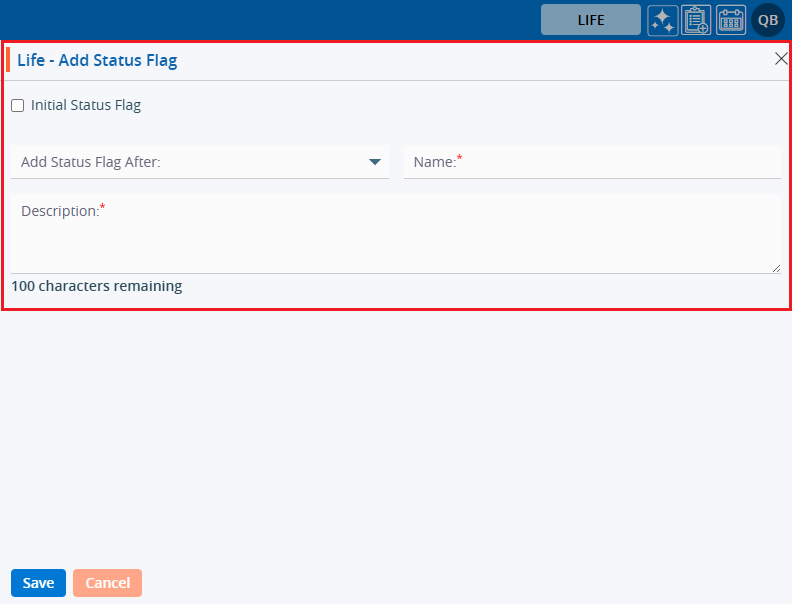
6. A pop-up window titled ‘Life – Add Status Flag’ will open, containing fields for ‘Initial Status Flag,’ ‘Add Status Flag After,’ ‘Status Flag Name,’ and ‘Description’.
Fields with an asterisk* are mandatory. In this case, Status Flag Name and Description are mandatory fields.
● Initial Status Flag Checkbox – By checking this checkbox, the status flag will remain at the top of the listing.
● Add Status Flag After: The user can select the Status Flag from the drop-down menu, after which the Status Flag will be placed in the desired sequence.
● Name: Enter the desired Status Flag name. (Limit is a maximum of 100 characters)
● Description: A description for the Status Flag needs to be added in accordance with the Status Flag name. (Limit is a maximum of 100 characters)
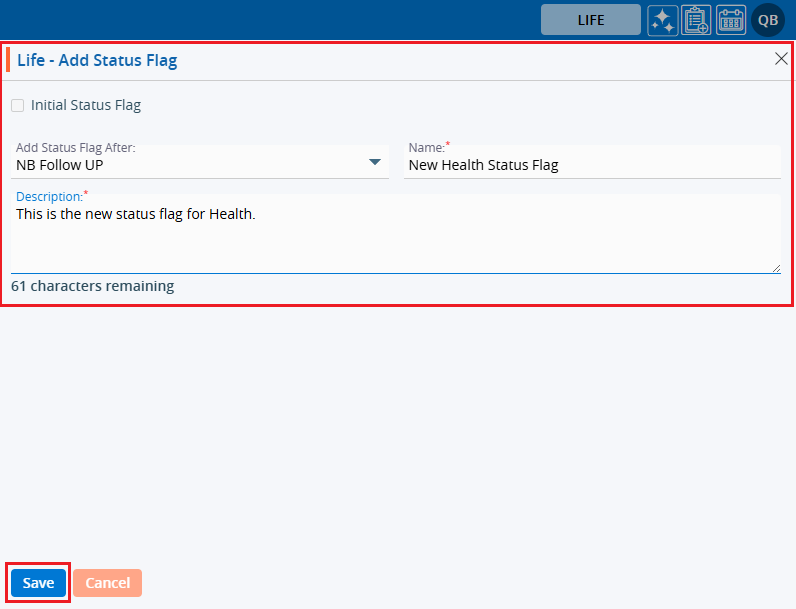
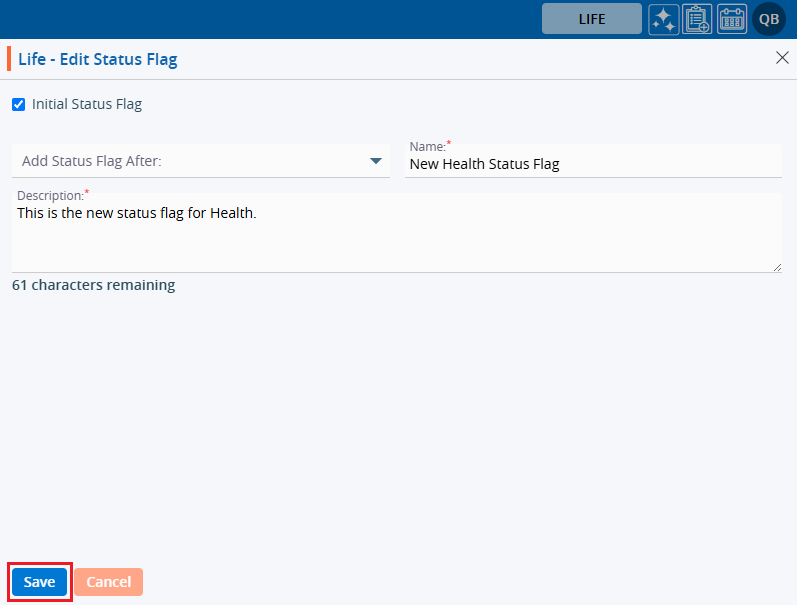
7. Fill in the details and click the ‘Save’ button to continue.
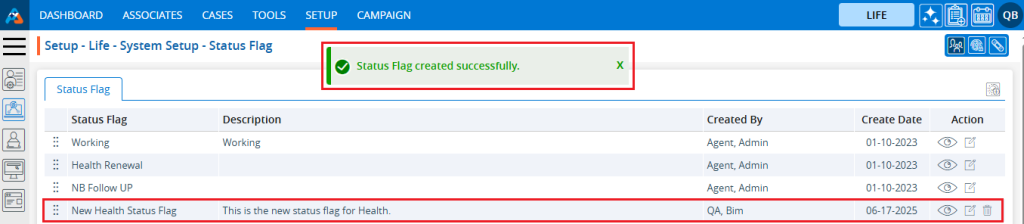
8. A confirmation message will appear on the page, and the newly added Status Flag will be available in the list.
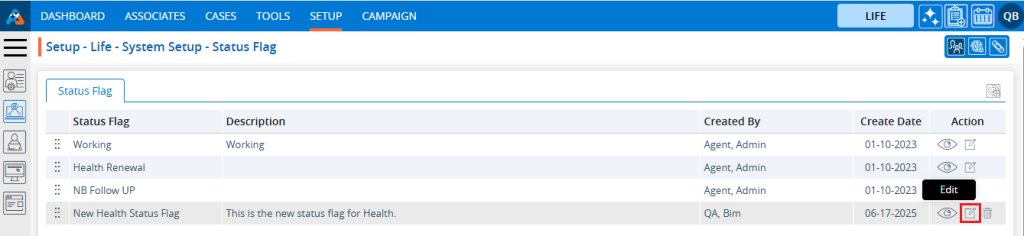
9. There are three options available for each Status Flag under the Action heading: View, Edit, and Delete.
● View: By clicking on the view icon, the user can view the details of the selected Status Flag.
● Edit: With this option, the user can update the details of the selected Status Flag.
● Delete: By clicking on Delete, the user can remove the selected Status Flag.
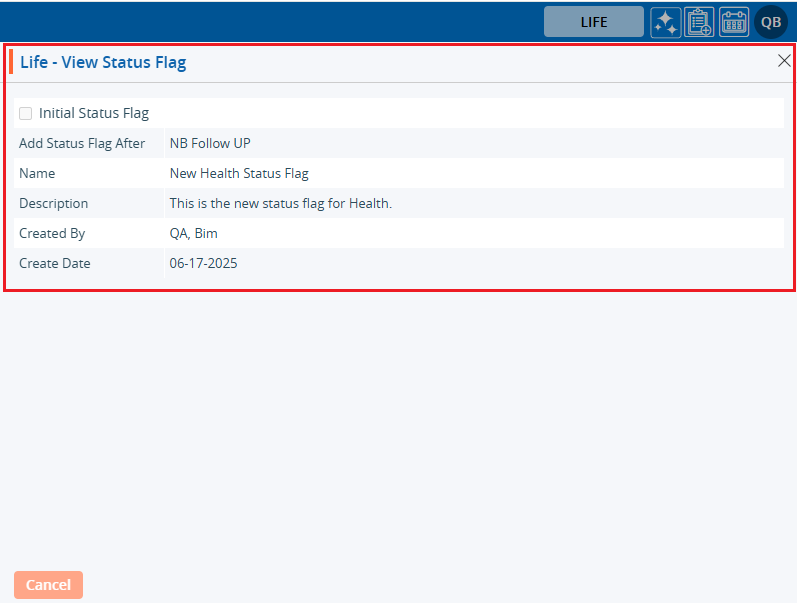
10. By clicking on the view icon, a pop-up window “Life – View Status Flag” will open, displaying the details of the selected Status Flag.
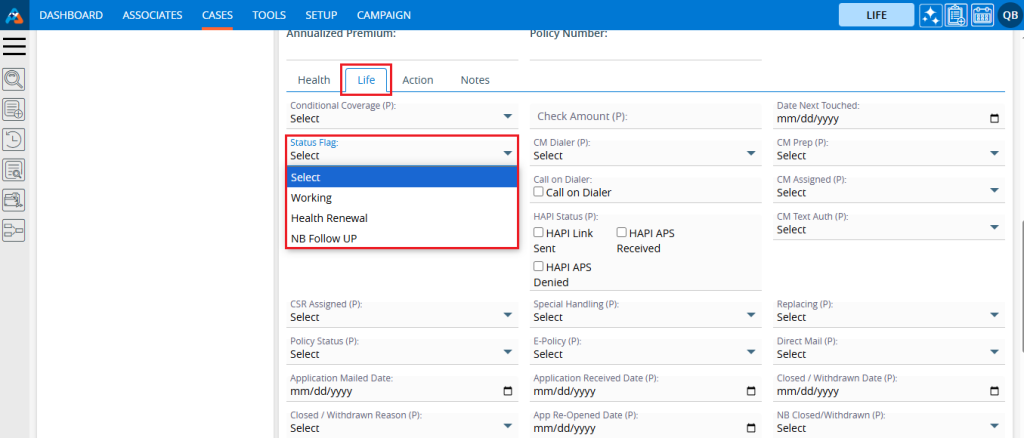
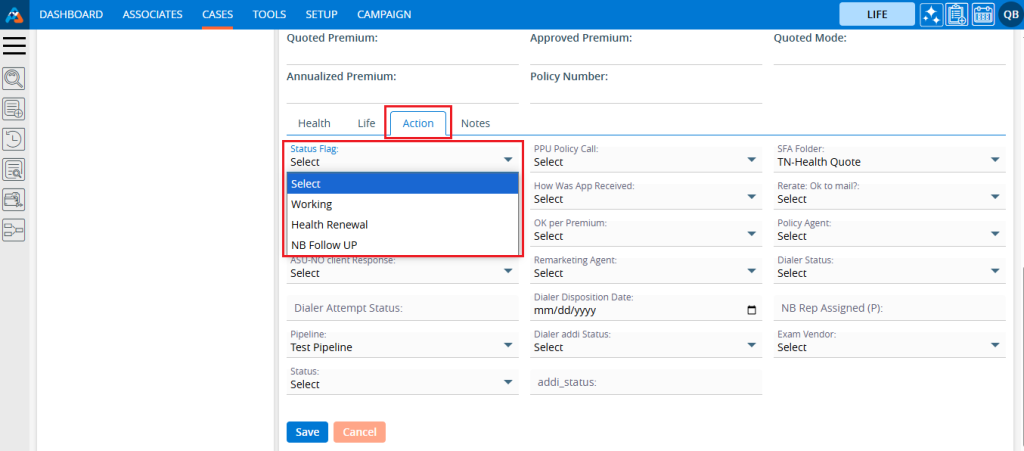
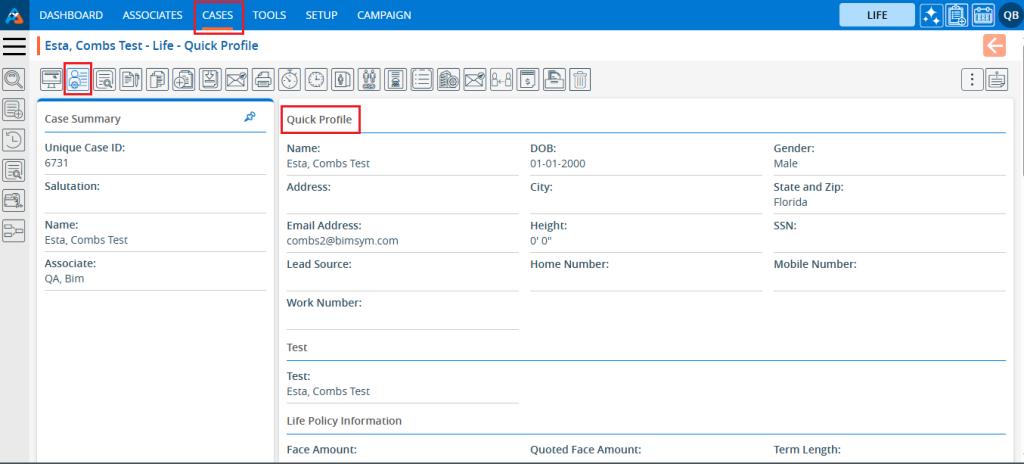
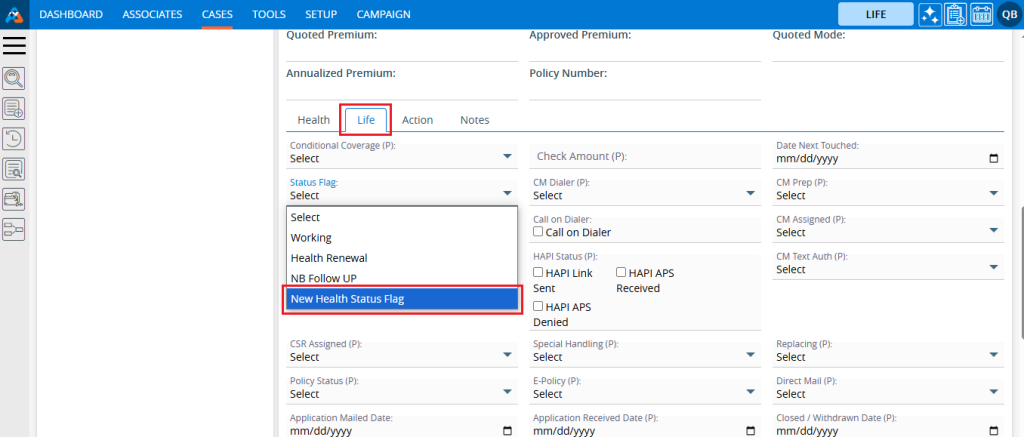
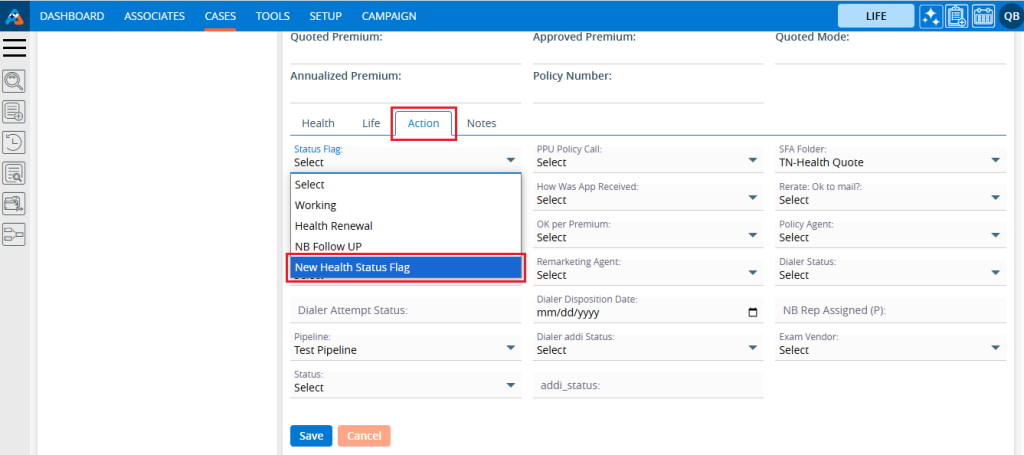
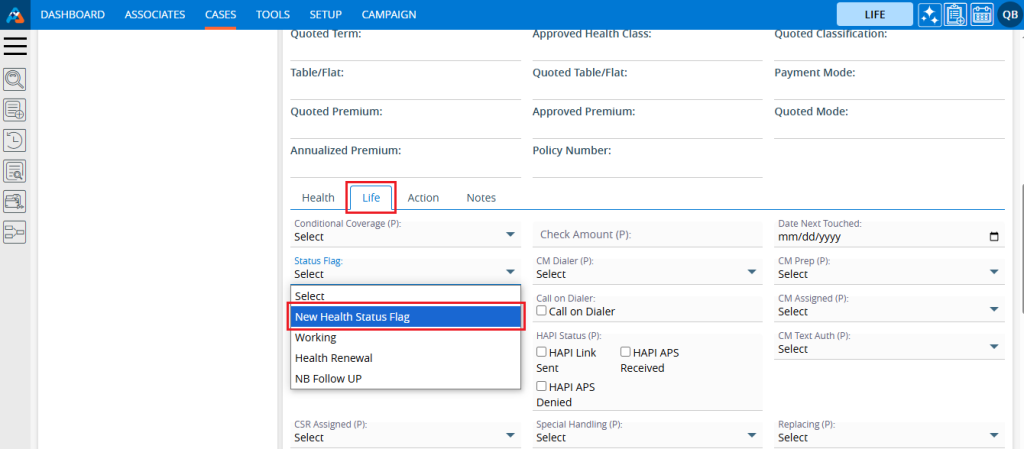
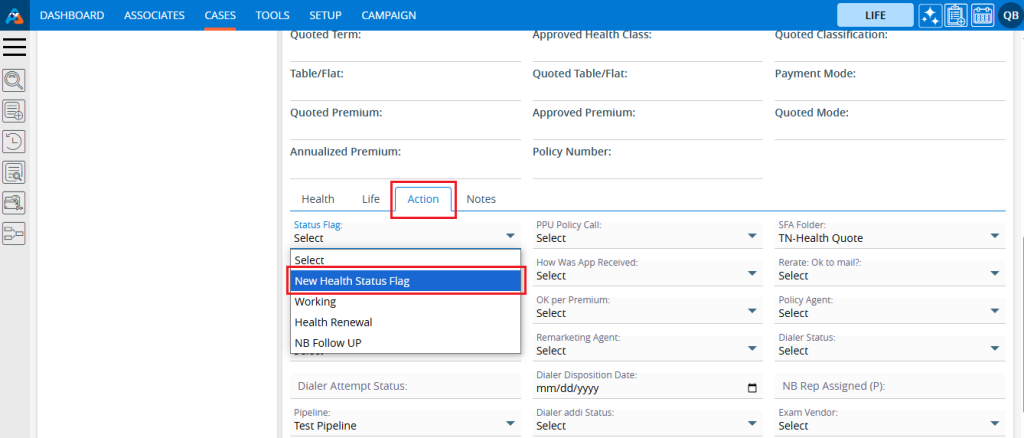
11. The newly added Status Flag will be displayed in Status Flag drop down in the following two places:
● Cases tab > Case Profile > Quick Profile > Life tab
● Cases tab > Case Profile > Quick Profile > Action tab
12. Users can update the values for a created Status Flag by clicking on the edit icon for the Status Flag.
13. A pop-up window ‘Life – Edit Status Flag’ will open with the field values. Update the values for the Status Flag.
For example, we are updating the sequence of the Status Flag: remove the value from the “Add Status Flag After” drop-down and select the checkbox for “Initial Status Flag” and click on Save.
14. The sequence of the Status Flag will be updated and displayed at the top of the listing.
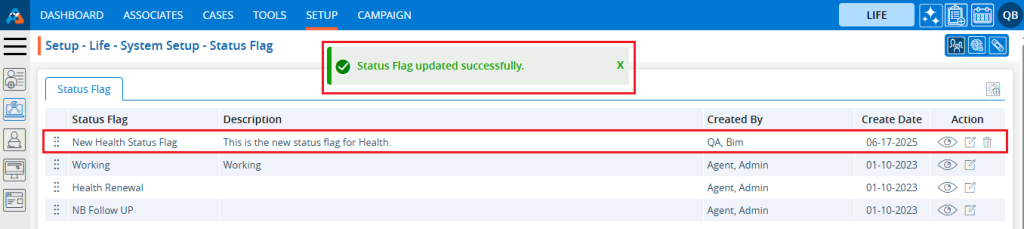
15. Updated sequences will also be changed in Status Flag drop down in the following two places:
● Cases tab > Case Profile > Quick Profile > Life tab
● Cases tab > Case Profile > Quick Profile > Action tab
16. To remove the existing Status Flag, click on the Delete icon. (The delete button will not be enabled if a status flag has already been assigned to any case.)
17. After clicking on Delete, the system will ask to confirm before deleting.
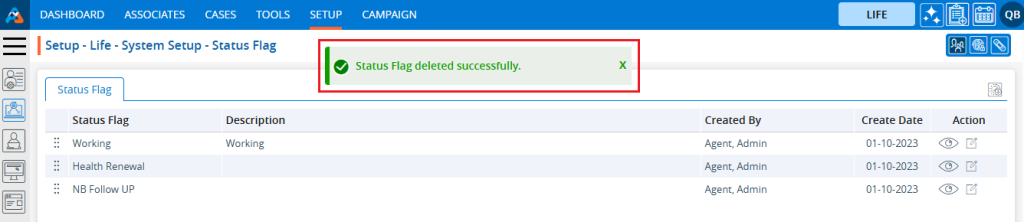
18. Click on Delete to remove this Status Flag.
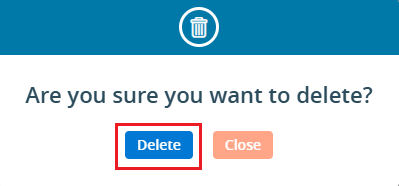
19. The system will confirm, “Status Flag deleted successfully” and the Status Flag will be removed from the list.
20. The Status Flag will no longer be displayed in the Status Flag drop down in the following two places:
● Cases tab > Case Profile > Quick Profile > Life tab
● Cases tab > Case Profile > Quick Profile > Action tab