Cases – History allows the user to view the timeline of events and actions associated with a specific case, providing insight into past activities, updates, and changes.
The following are the steps to access Cases History:
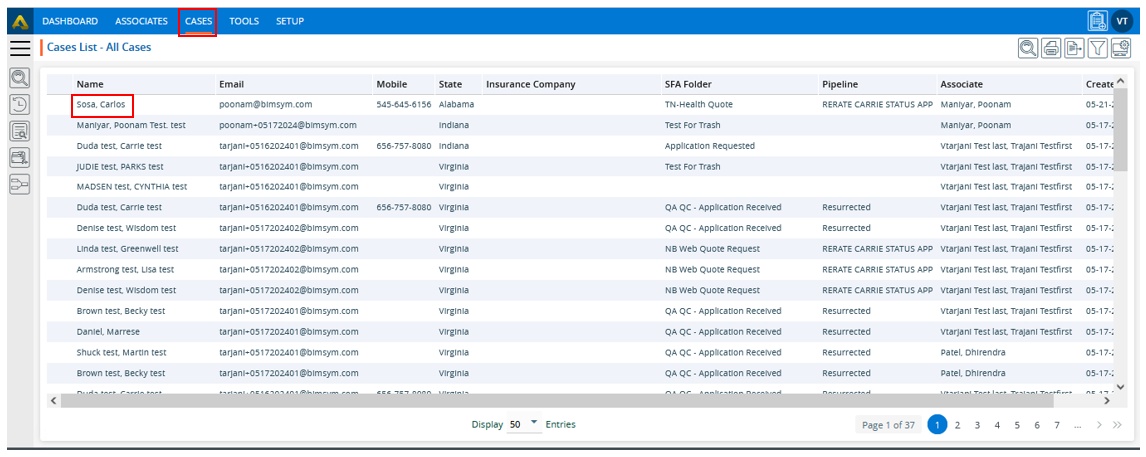
1. Navigate to the ‘CASES’ tab where you’ll find the Cases List – All Cases.
2. Click on a case to proceed.
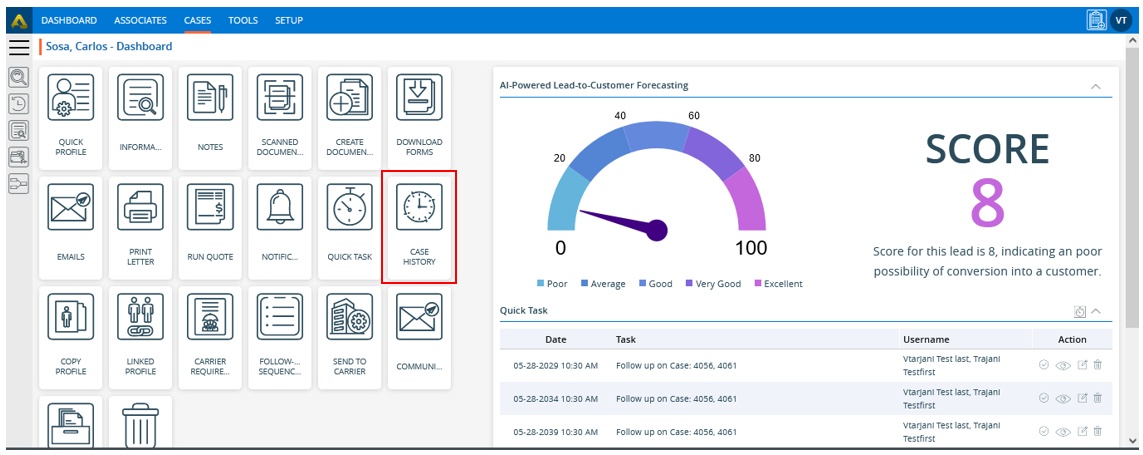
3. After clicking on the case, the ‘Dashboard’ will open.
4. Click on the ‘CASE HISTORY’ option.
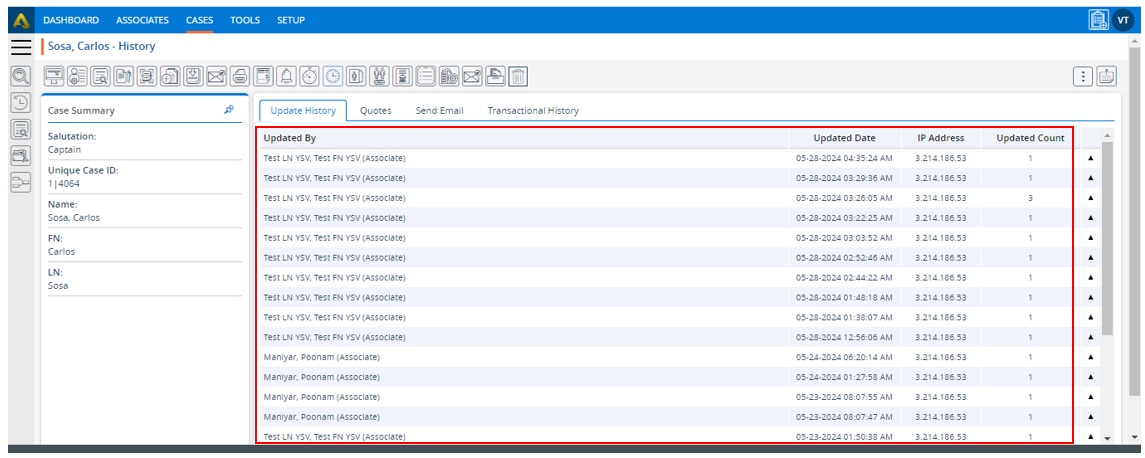
5. The Case History page will open, consisting of four sections:
a. Update History
b. Quotes
c. Send Email
d. Transactional History
6. By default, the ‘Update History’ section will be open. This section displays the history of the case’s information tab.
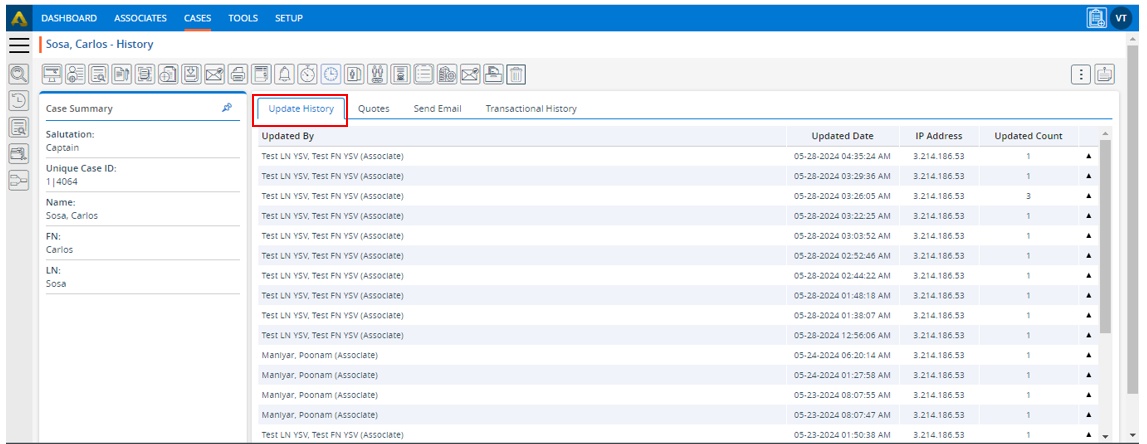
7. Fields in this section, such as ‘Updated By’, ‘Updated Date’, ‘IP Address’, and ‘Updated Count’, pertain to case details.
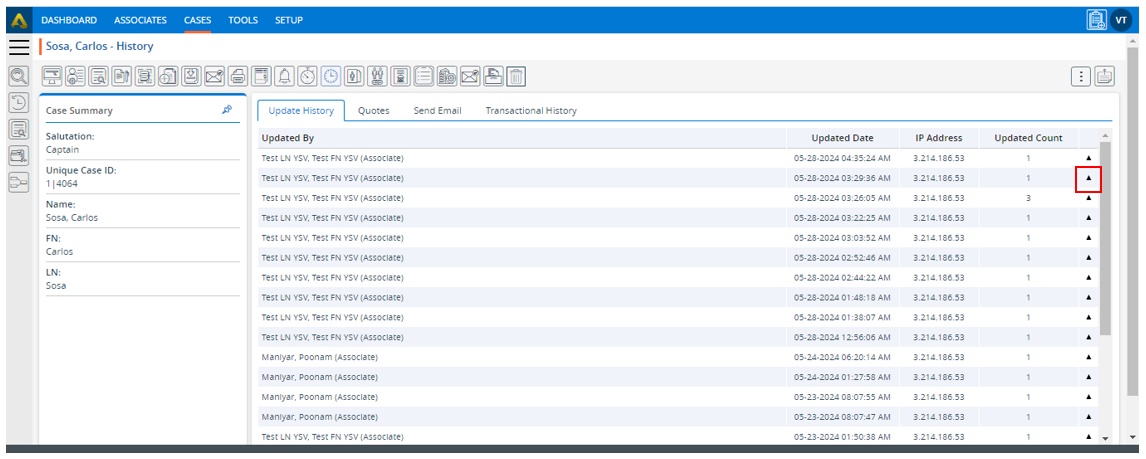
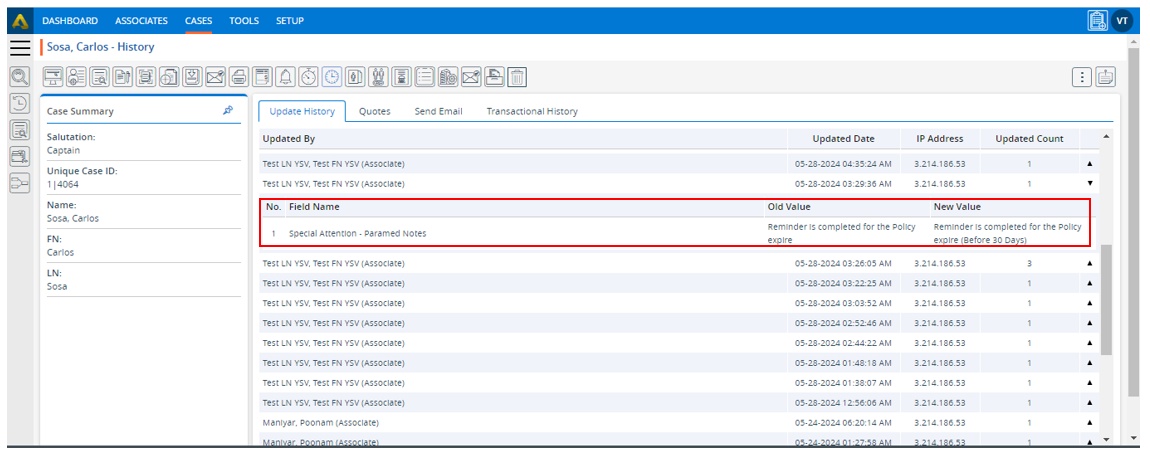
8. Click on the drop-down icon in the case history to view the updated details.
9. The details of the history will open, showing the values of the fields ‘No.’, ‘Field Name’, ‘Old Value’, and ‘New Value’. These fields are related to member details. This section will display the case’s information that has been updated.
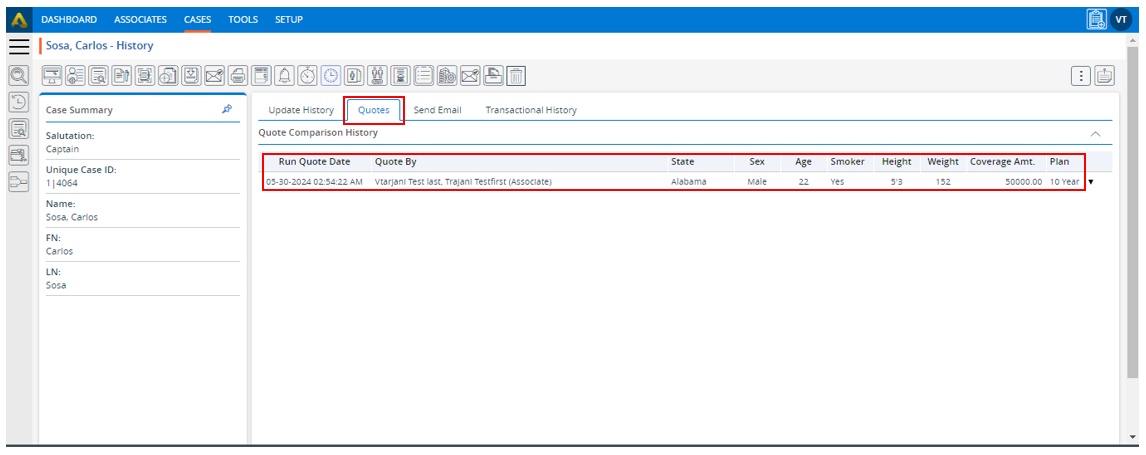
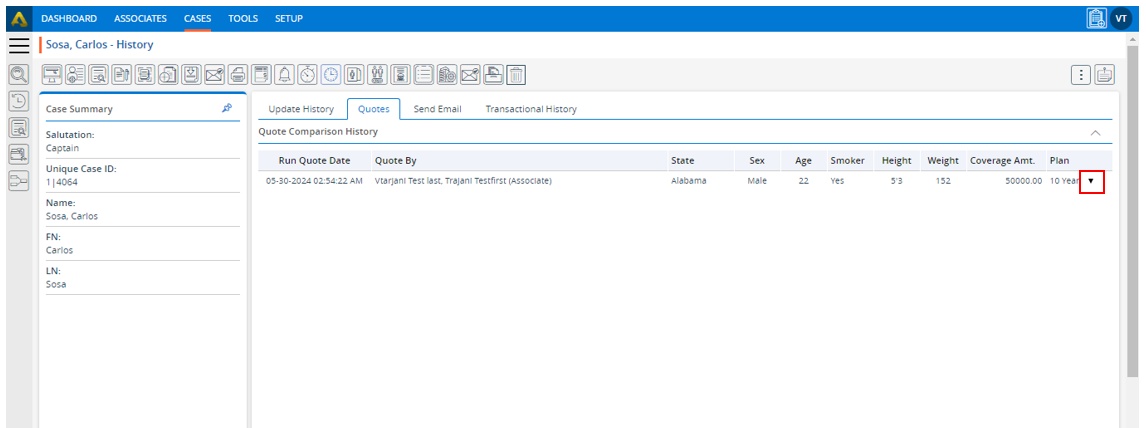
10. Click on the Quotes Tab to view the history of related quotes. This section saves the action history when users compare insurance company details on the run quote result page after running the quote.
11. The history displays the values of the fields ‘Run Quote Date’, ‘Quote By’, ‘State’, ‘Sex’, ‘Age’, ‘Smoker’, ‘Height’, ‘Weight’, ‘Coverage Amt.’, and ‘Plan’.
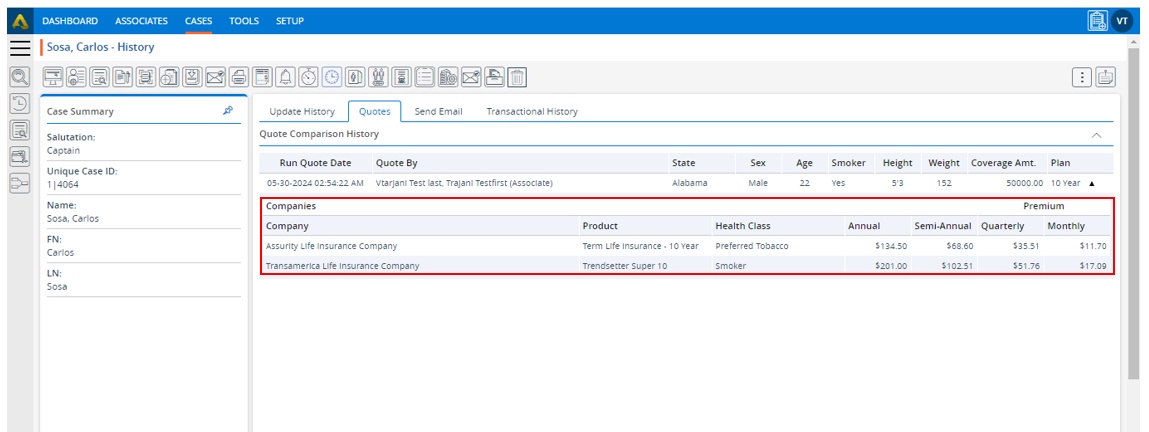
12. Click on the drop-down icon in the case history to view the updated details.
13. The history will display the values for the fields including ‘Company’, ‘Product’, ‘Health Class’, ‘Annual’, ‘Semi-Annual’, ‘Quarterly’ and ‘Monthly’ sections.
14. Click on the ‘Send Email’ section to view the history of sent emails.
15. This section will display the values of the fields: ‘Date’, ‘Subject/Username’ and ‘Send To’.
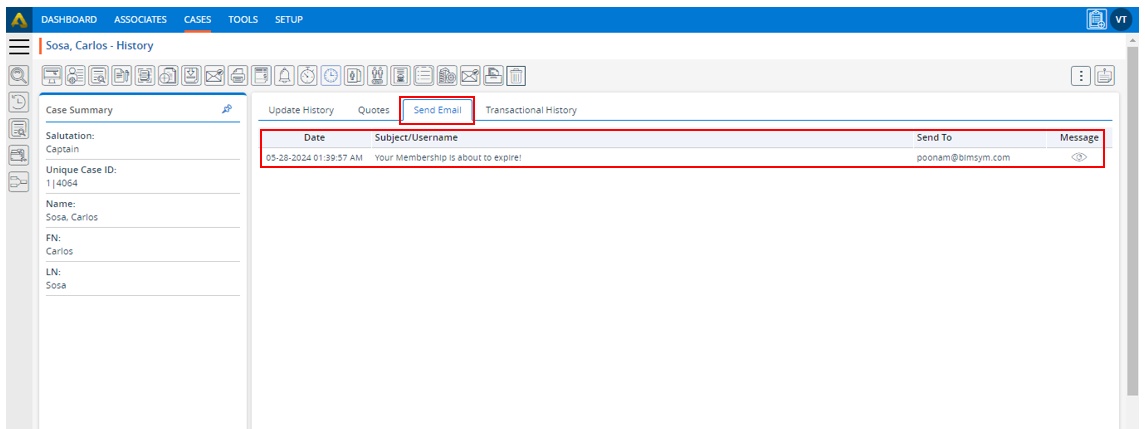
16. With the help of option ‘Message’, represented by an eye icon, the user can view the email details.
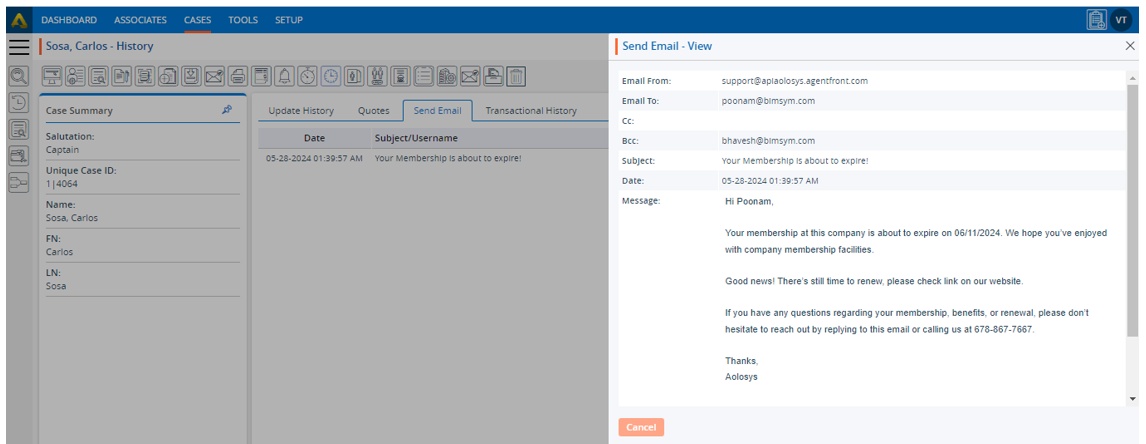
17. Click on the ‘View’ icon to check the details of the email history.

18. A pop-up ‘Send Email – View’ will open, displaying the details of the sent email.
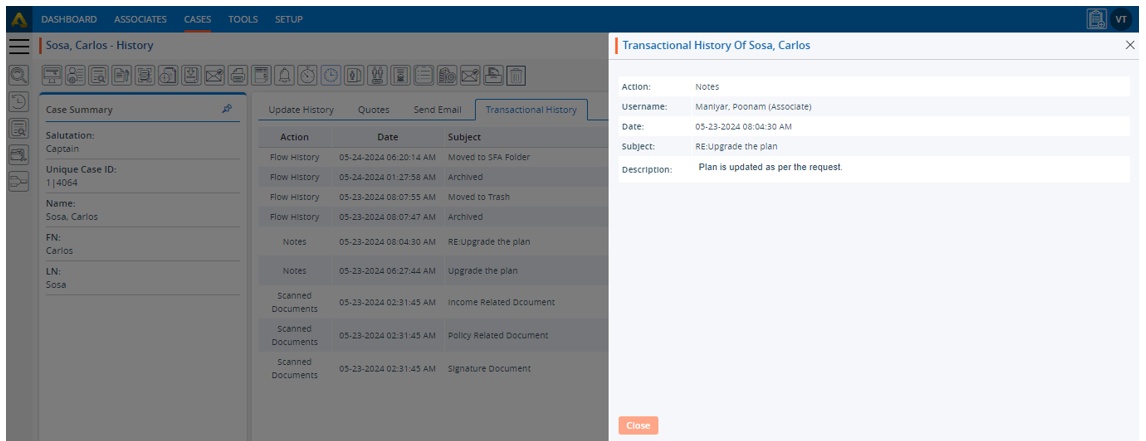
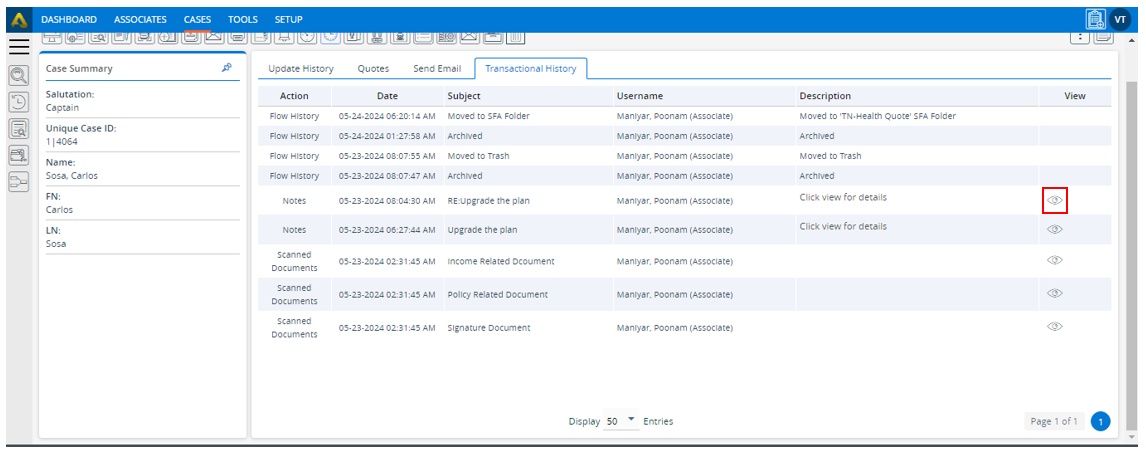
19. Click on the ‘Transactional History’ section to view transaction-related history. This section will display the flow history for cases, such as if one case is moved to another SFA or another pipeline.
20. It will also display the history of any notes that were added for this case, or if any documents were scanned and saved for this case.
21. History will include values for fields such as ‘Action’, ‘Date’, ‘Subject’, ‘Username’ and ‘Description’.

22. Additionally, there will be an option to view details represented by an eye icon under the ‘View’ header for entries other than flow history.
23. Click on the View button to see the Transaction History in detail.
24. A new pop-up ‘Transaction History of #Name of the Applicant#’ will open, displaying the details for the selected transaction entry.