Custom fields in the Campaign tab of a system are additional user-defined fields. Using these fields, the user can import specific data for business needs.
Create Custom Fields
- Sign in to AgentFront CRM.
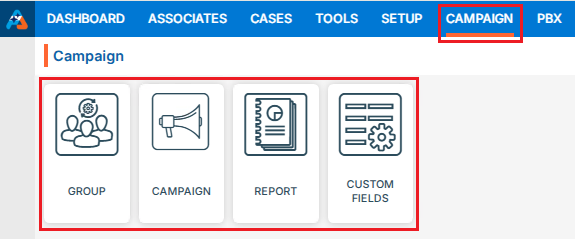
- From the top menu, choose Campaign.
- Campaign dashboard will open with multiple options (Based on the access rights).
- Click on Custom Fields.
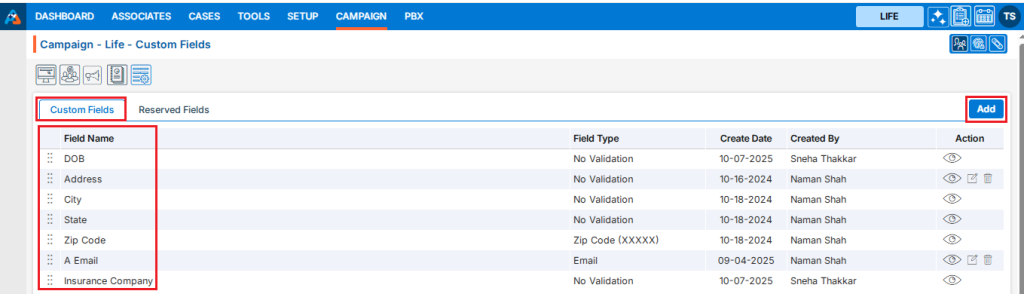
- This will open with 2 tabs (Default will be Custom Fields):
- Custom Fields
- Reserved Fields
- Custom Fields displays the list of available/created fields.
- Click on ‘Add’ icon from the Top Right side of the list.
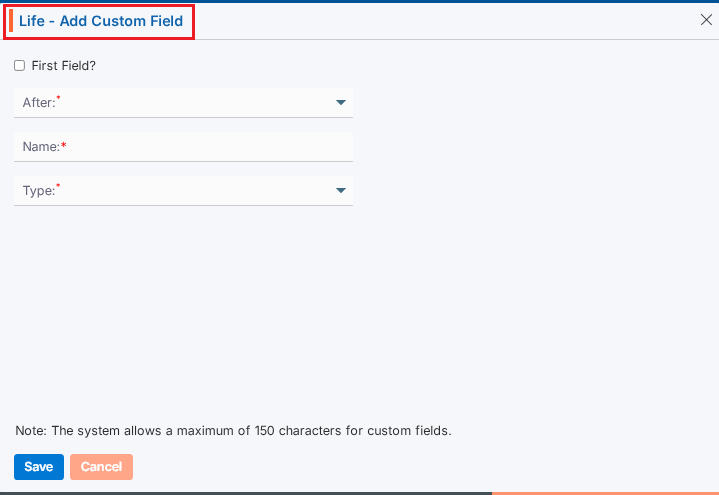
Add Custom Field
- It will open page to add field with title Add Custom Field.
- To add custom field, enter the following details:
- First Field?: Select this option if you want this field to appear first in the display.
When this checkbox is selected, field 2-b (After) will become uneditable. - After: To select a value for this field, the “First Field” checkbox must not be selected.
Choose a value from the drop-down list to set the display order of the field. - Name: Enter a clear, descriptive name. This is what users will see while importing contacts to the campaign group.
- Type: Choose an option from the drop-down list to set validation rules for this field.
- Click Save. The custom field will now appear in the list.
- First Field?: Select this option if you want this field to appear first in the display.
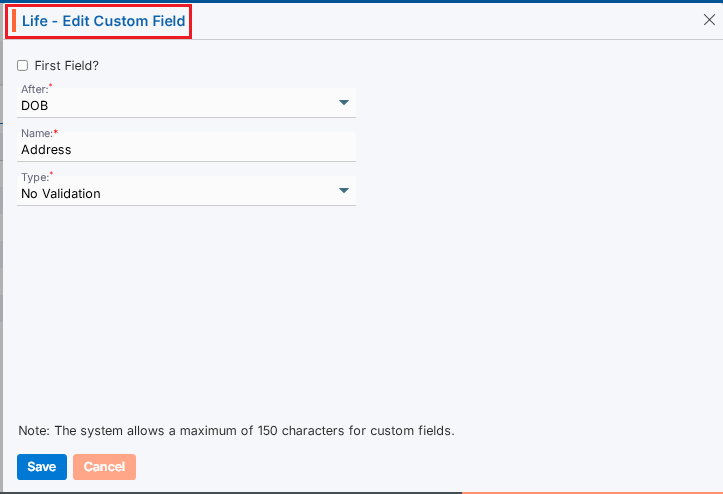
Update Custom Field
- To update the existing field from the available list, click on Edit (
 ) icon from the Action Column for the field you want to edit/change.
Note: If any field is used/assigned, editing and deleting options will not be enable for those fields.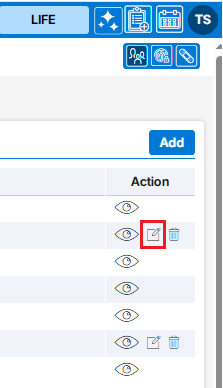
- Clicking the Edit icon will open the selected Custom Field in edit mode with title Edit Custom Field.
- You can make the required editing in the below field’s values of the open Custom Field.
- First Field?: Update this option if you want this field to appear first in the display.
When this checkbox is selected, field 3-b (After) will become uneditable. - After: To select a value for this field, the “First Field” checkbox must not be selected.
Choose a value from the drop-down list to set the display order of the field. - Name: Enter a clear, descriptive name. This is what users will see while importing contacts to the campaign group.
- Type: Update an option from the drop-down list to set validation rules for this field.
- Click Save. The custom field will now appear in the list.
- First Field?: Update this option if you want this field to appear first in the display.
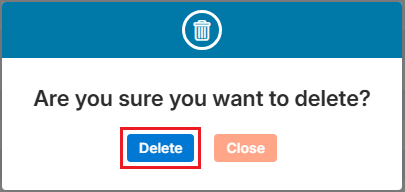
Delete Custom Field
- To delete the existing field from the available list, click on Delete (
 ) icon from the Action Column for the filed you want to delete.
- It will ask for confirmation popup, click on Deleted button to delete field otherwise click on Close button.
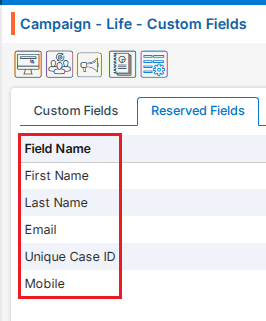
Reserved Fields
- These fields are system generated fields and non-editable. These fields will be available in the drop down of the Campaign > Group > Import Contacts.
Multi-Product tip
If your login has access to multiple products, be sure to select the correct product from the product icons in the top-right corner before adding, editing, or deleting custom field.