A campaign is a planned marketing effort or communication initiative aimed at reaching a specific group of customers or leads through channels such as email, SMS, or social media. Using this module, users can create multiple groups, set up various campaigns, and view reports for each one.
- Sign in to AgentFront CRM.
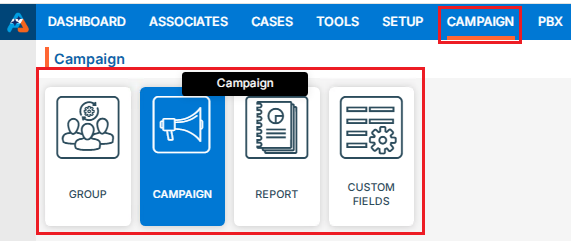
- From the top menu, choose Campaign.
- Campaign dashboard will open with multiple options (Based on the access rights).
- Click on Campaign.
- It displays the list of available/created Campaign.
- There is an Add button above the Action Column on the right pane to add new Campaign.
- Also, there are options to Edit (
 ), Delete (
 ), and View (
 ) the existing campaign under the Action Column on the right pane.Note: If any campaign is used or implemented, the editing and deleting options will be locked for that campaign, meaning it cannot be edited or deleted.
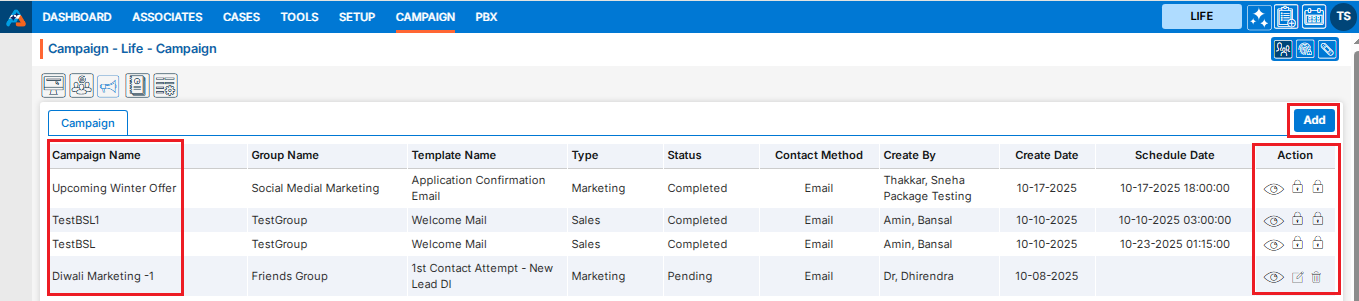
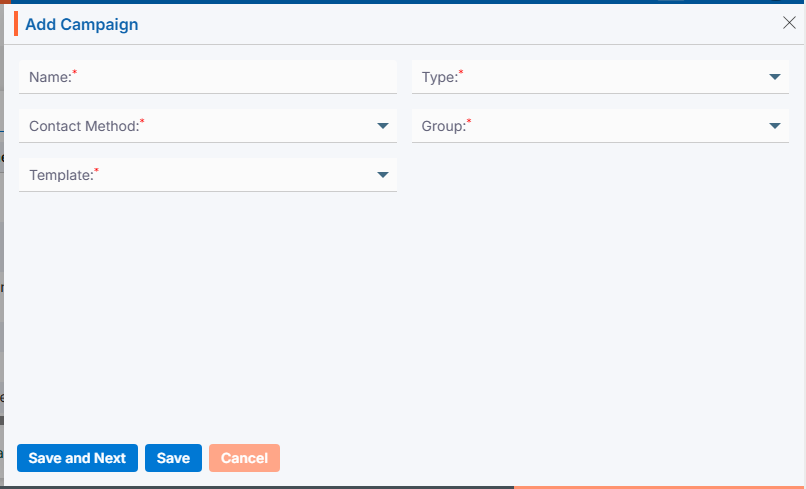
Add Campaign
- Click the ‘Add’ button at the top right of the list to add new campaign.
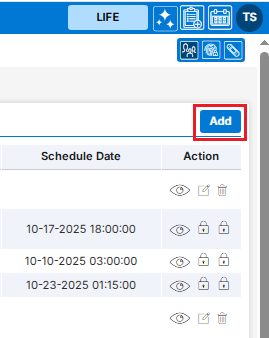
- It will open page to add new Campaign with title Add Campaign.
Email Campaign
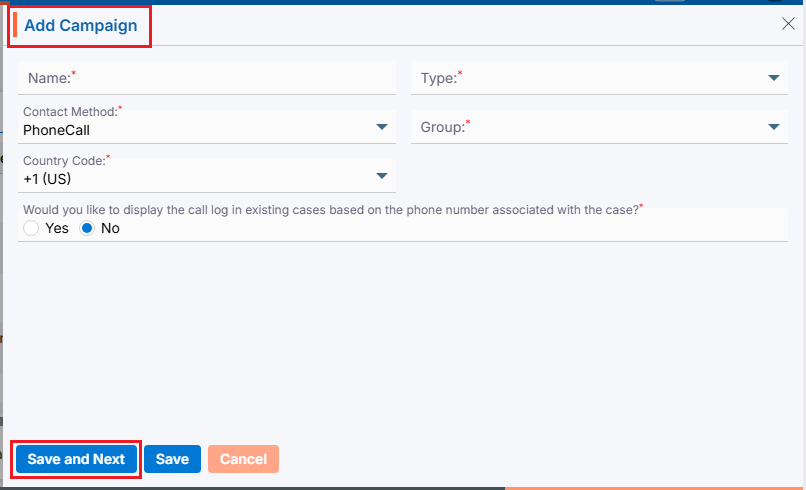
- To add Email Campaign, enter the following details:
- Name: Enter the clear, descriptive name. This is what users can identify the purpose of the campaign.
- Type: Choose option from the Drop-Down. This option is for the purpose for which the campaign needs to be created.
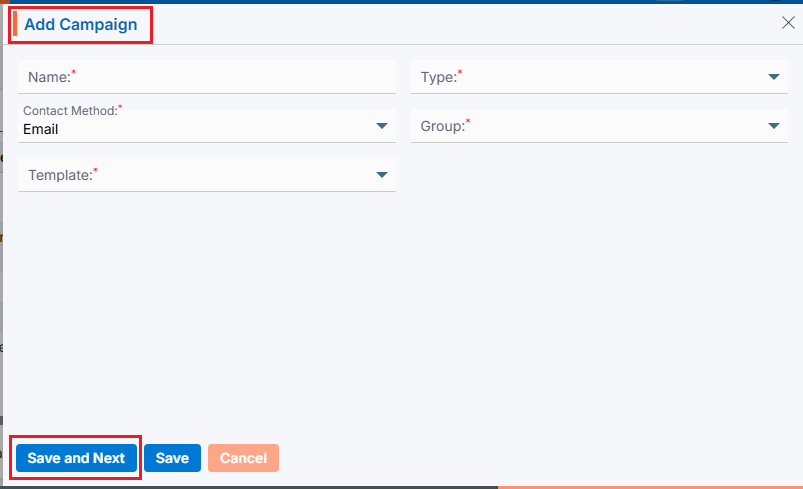
- Contact Methods: Choose Email option from the Drop-Down. This option is for the methods through which this campaign needs to be implemented.
- Group: Choose group name from Drop-Down. This drop-down will list the groups created under ‘Campaign’ > ‘Group’. (Contacts must be available for selected group)
- Template: Choose template from the drop-down list. The options in this drop-down will be enabled based on the selected Contact Methods: Email, SMS, and WhatsApp. You can view templates for each category as available in ‘Tools’ > ‘Template Creator’. This field will not be available if ‘Phone Call’ is selected as the Contact Method.
- Click Save and Next.
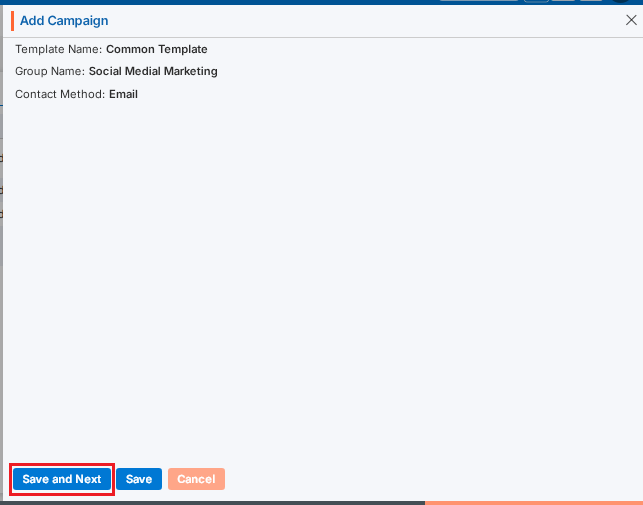
- On the same page next step will display the details of the campaign created for Template Name, Group Name and Contact Method.
- Click Save and Next.
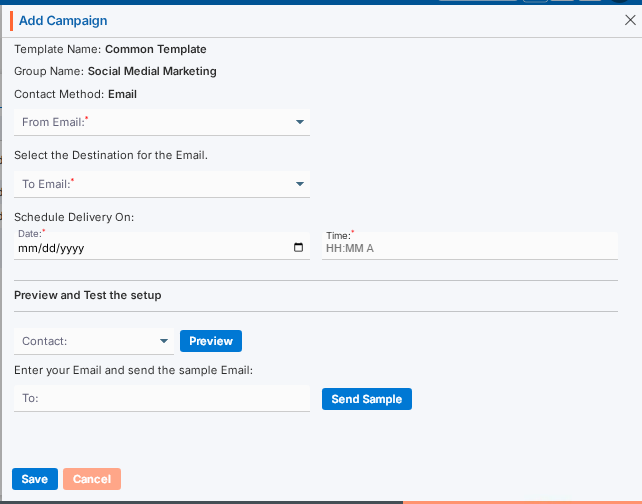
- On the same page next step is for setup of selected Contact Methods.
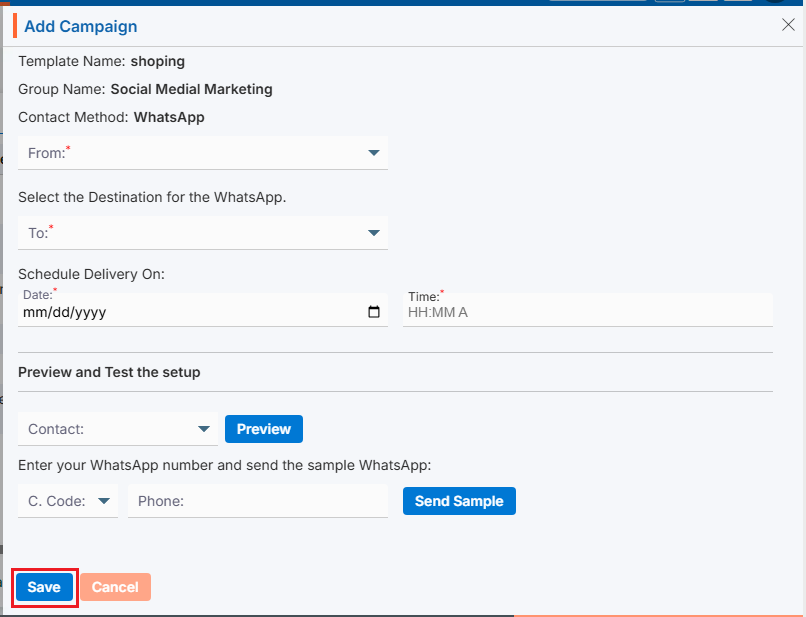
Template Name, Group Name and Contact Methods will display on the top of the page as per selected on first step.
- Select the “From” and “To” email addresses from the dropdown.
- Select the date for “Scheduled Delivery on”. The email will be sent on this date.
- Set the Time. The email will be sent according to the time set in this field.
- Preview and Test the setup:
- You can preview the email and test before sending it.
- You can also send a sample email to check how it looks.
- Click “Save” once the setup is complete. The campaign is now listed and ready for use.
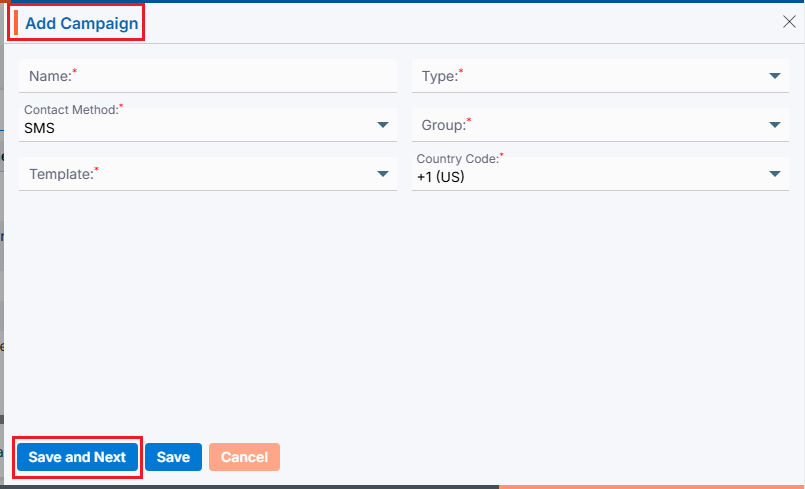
SMS Campaign
- To add SMS Campaign, enter the following details:
- Name: Enter the clear, descriptive name. This is what users can identify the purpose of the campaign.
- Type: Choose option from the Drop-Down. This option is for the purpose for which the campaign needs to be created.
- Contact Methods: Choose SMS option from the Drop-Down. This option is for the methods through which this campaign needs to be implemented.
- Group: Choose group name from Drop-Down. This drop-down will list the groups created under ‘Campaign’ > ‘Group’. (Contacts must be available for selected group)
- Template: Choose template from the drop-down list. The options in this drop-down will be enabled based on the selected Contact Methods: Email, SMS, and WhatsApp. You can view templates for each category as available in ‘Tools’ > ‘Template Creator’. This field will not be available if ‘Phone Call’ is selected as the Contact Method.
- Country Code: Choose option from the drop-down list. This field will be enabled if the Contact Method selected is SMS, WhatsApp, or Phone Call. Default option will be +1 (US).
- Click Save and Next.
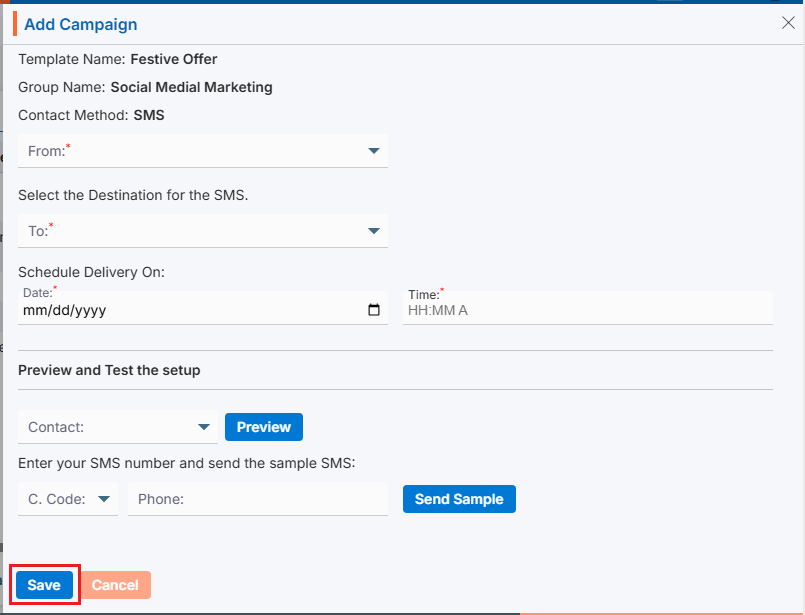
- On the same page next step will display the details of the campaign created for Template Name, Group Name and Contact Method.
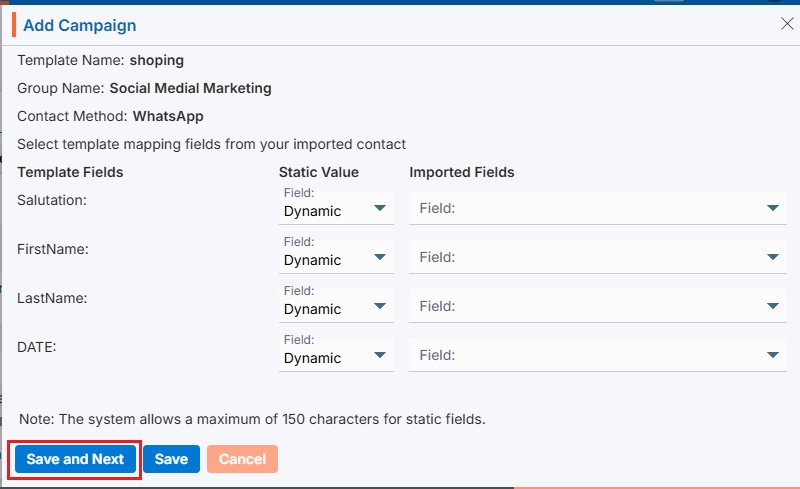
- Select the template mapping fields from your imported contacts.
- The fields from the selected template will be displayed on the left side of the page.
- The options for selecting the mapping will be displayed on the right side of the page:
- Static Value: Select an option from the drop-down menu—either Dynamic or Static.
- Imported Fields: With the Dynamic option, you can map the template field to the imported field. With the Static option, you must map a static value to the template field for all records.
- Click Save and Next.

- On the same page next step is for setup of selected Contact Methods.
Template Name, Group Name and Contact Methods will display on the top of the page as per selected on first step.- Select the “From” and “To” contact from the dropdown.
- Select the date for “Scheduled Delivery on”. The SMS will be sent on this date.
- Set the Time. The SMS will be sent according to the time set in this field.
- Preview and Test the setup:
- You can preview the SMS and test before sending it.
- You can also send a sample SMS to check how it looks. Select the country code and phone to send sample SMS.
- Click “Save” once the setup is complete. The campaign is now listed and ready for use.
WhatsApp Campaign
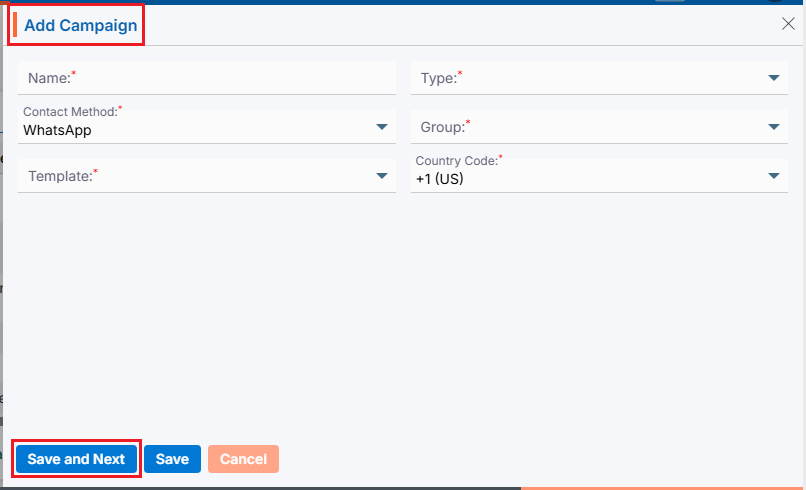
- To add WhatsApp Campaign, enter the following details:
- Name: Enter the clear, descriptive name. This is what users can identify the purpose of the campaign.
- Type: Choose option from the Drop-Down. This option is for the purpose for which the campaign needs to be created.
- Contact Methods: Choose WhatsApp option from Drop-Down. This option is for the methods through which this campaign needs to be implemented.
- Group: Choose group name from Drop-Down. This drop-down will list the groups created under ‘Campaign’ > ‘Group’. (Contacts must be available for selected group)
- Template: Choose template from the drop-down list. The options in this drop-down will be enabled based on the selected Contact Methods: Email, SMS, and WhatsApp. You can view templates for each category as available in ‘Tools’ > ‘Template Creator’. This field will not be available if ‘Phone Call’ is selected as the Contact Method.
- Country Code: Choose option from the drop-down list. This field will be enabled if the Contact Method selected is SMS, WhatsApp, or Phone Call. Default option will be +1 (US).
- Click Save and Next.
- On the same page next step will display the details of the campaign created for Template Name, Group Name and Contact Method.
- Select the template mapping fields from your imported contacts.
- The fields from the selected template will be displayed on the left side of the page.
- The options for selecting the mapping will be displayed on the right side of the page:
- Static Value: Select an option from the drop-down menu—either Dynamic or Static.
- Imported Fields: With the Dynamic option, you can map the template field to the imported field. With the Static option, you must map a static value to the template field for all records.
- Click Save and Next.
- On the same page next step is for setup of selected Contact Methods.
Template Name, Group Name and Contact Methods will display on the top of the page as per selected on first step.- Select the “From” and “To” contact from the dropdown.
- Select the date for “Scheduled Delivery on”. WhatsApp will be sent on this date.
- Set the Time. WhatsApp will be sent according to the time set in this field.
- Preview and Test the setup:
- You can preview the WhatsApp and test before sending it.
- You can also send a sample WhatsApp to check how it looks. Select the country code and phone to send sample WhatsApp.
- Click “Save” once the setup is complete. The campaign is now listed and ready for use.
- To add PhoneCall Campaign, enter the following details:
- Name: Enter the clear, descriptive name. This is what users can identify the purpose of the campaign.
- Type: Choose option from the Drop-Down. This option is for the purpose for which the campaign needs to be created.
- Contact Methods: Choose PhoneCall option from the Drop-Down. This option is for the methods through which this campaign needs to be implemented.
- Group: Choose group name from Drop-Down. This drop-down will list the groups created under ‘Campaign’ > ‘Group’. (Contacts must be available for selected group)
- Country Code: Choose option from the drop-down list. This field will be enabled if the Contact Method selected is SMS, WhatsApp, or Phone Call. Default option will be +1 (US).
- Call Log Question: Would you like to display the call log in existing cases based on the phone number associated with the cases? Select Yes or No. This option is enabled only when ‘Phone Call‘ is selected as the Contact Method. (Default option will be NO)
- Click Save and Next.
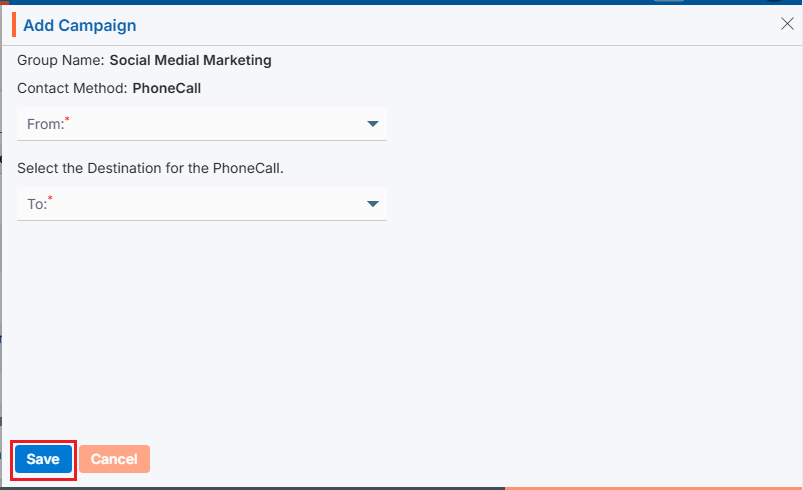
- On the same page next step is for setup of selected Contact Methods.
Group Name and Contact Methods will display on the top of the page as per selected on first step.- Select the “From” and “To” contact from the dropdown.
- Click “Save” once the setup is complete. The campaign is now listed and ready for use.
- Click View Contacts ()icon from the Action Column for the group you want to view details of Contact.
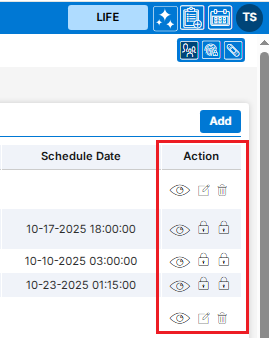
- Clicking on View () icon, New page will open with all details of Campaign.
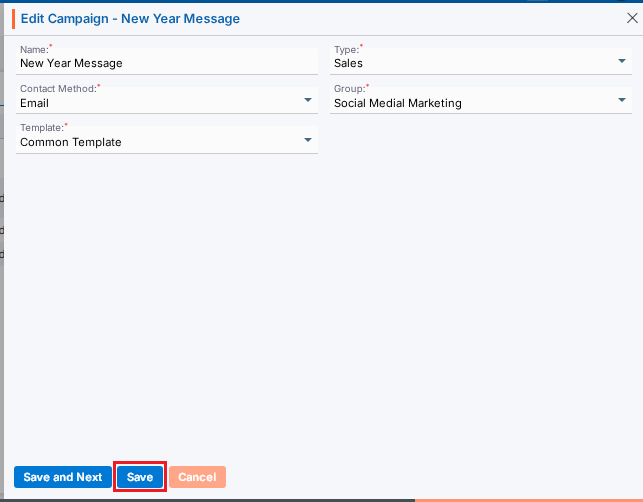
- To update the existing campaign from the available list, click on Edit () icon from the Action Column for the campaign you want to edit/change.
- Edit () icon will restrict editing if the group is used/implemented.
- Clicking the Edit () icon will open the selected Campaign in edit mode with title Edit Campaign if the campaign is not used/implemented.
- Update the required details and click Save.
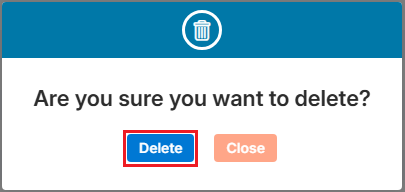
- To delete the existing campaign from the available list, click on Delete () icon from the Action Column for the campaign you want to delete.

- It will ask for confirmation popup, click on Deleted button to delete campaign otherwise click on Close button.
Note: If the campaign is referenced elsewhere deletion is restricted until those referenced are removed.