The SMS Template category is used to categorize SMS such as business communications, sales support, customer support, updates, seasonal greetings, personal messages, and networking.
The following are the steps to managing the SMS Template Categories :
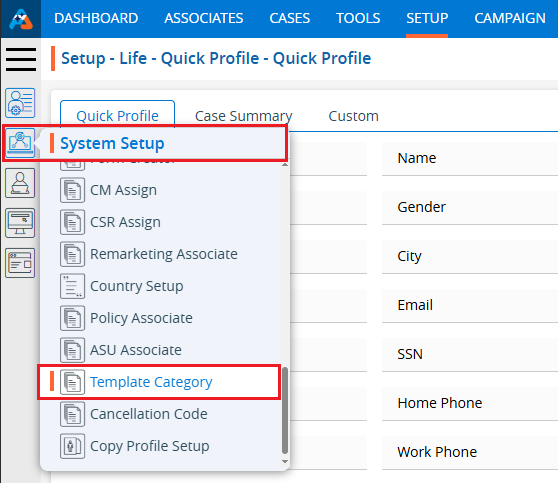
1. Navigate to the ‘SETUP’ tab.

2. Select ‘System Setup’ from the left-hand panel and a pop-up window will appear.
3. Select the ‘Template Category’ option.
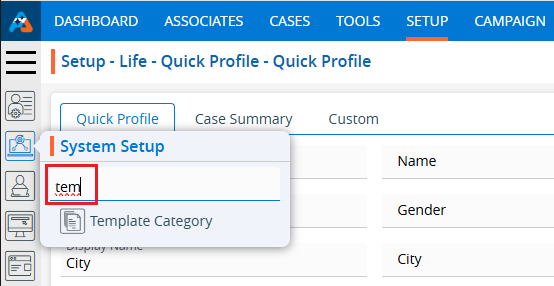
4. The user can search for the ‘Template Category’ setup by entering keywords in the search field.
5. A new page titled ‘Setup – System Setup – Template Category’ will open, displaying the SMS Template Category by default. Click on the SMS tab.

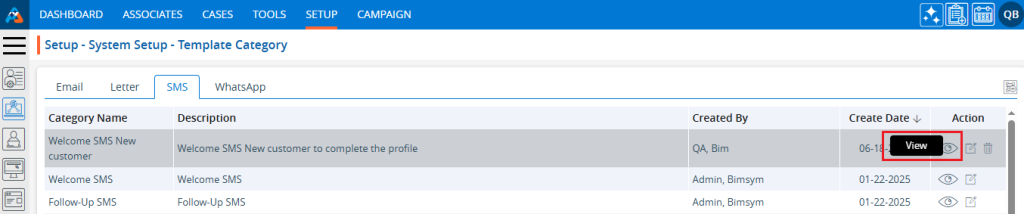
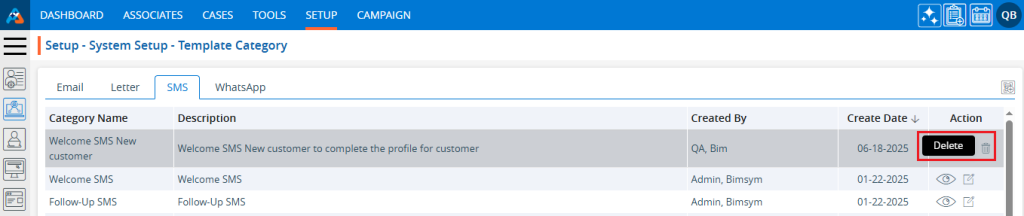
6. A new page will open showing the SMS Template Categories. This page will show fields including Category Name, Description, Created By, Creation Date, and Action.

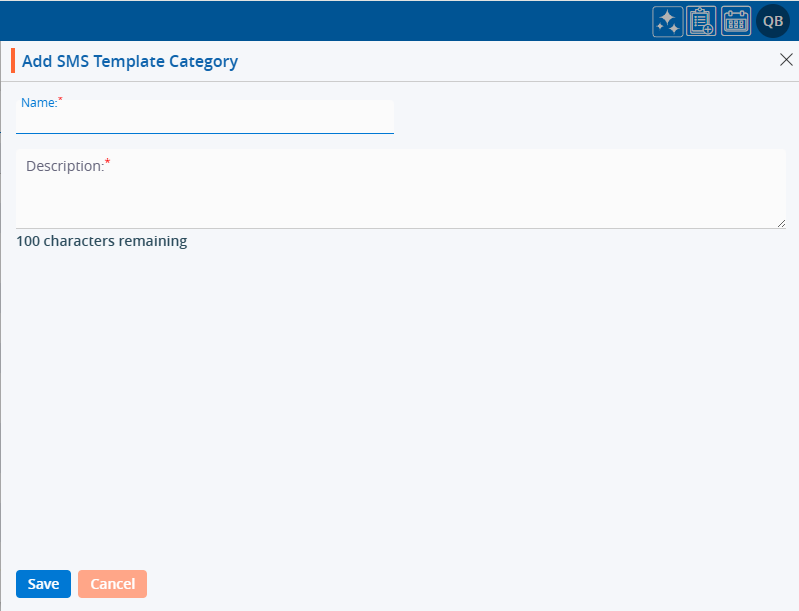
7. Click the ‘Add SMS Template Category’ icon on the right side of the window to add a new SMS template category.

8. A pop-up window titled ‘Add SMS Template Category’ will open, containing fields such as ‘Name’, ‘Description’, and ‘Do you want to add an unsubscribe link to the end of the SMS in this category?’ along with ‘Save’ and ‘Close’ options at the bottom.
● Fields marked with an asterisk are mandatory. ‘Name’ and ‘Description’ are required fields.
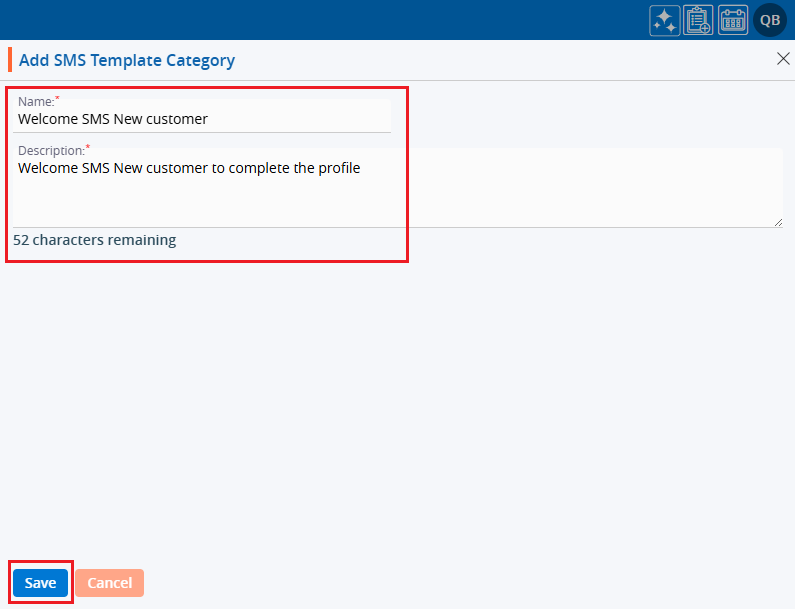
9. Fill in the fields and click the ‘Save’ button:
● Name: Enter the desired name for the SMS Template Category. The maximum length is 30 characters.
● Description: Provide a description for the SMS Template Category that aligns with its name. The maximum length is 100 characters.
10. The system will display a confirmation message indicating that the SMS Template Category was created successfully, and the newly created category will appear in the list.

11. Under the ‘Action’ heading, three options are available for each SMS Template Category: Disable/Enable, Edit, and Delete.
● View: By clicking ‘View’, the user can see the details of the selected SMS Template Category.
● Edit: By clicking ‘Edit’, the user can modify the selected SMS Template Category.
● Delete: By clicking ‘Delete’, the user can remove the selected SMS Template Category. The Delete option is only available for categories which are not used.

12. Click the ‘View’ icon to see the details of the selected SMS Template Category.
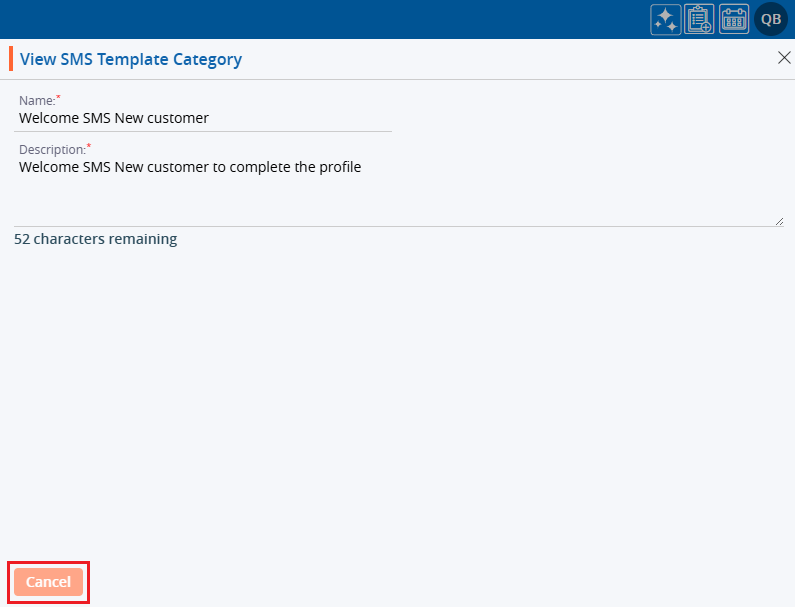
13. A pop-up window will appear where all the fields are read-only, allowing the user to view the details without making any changes. After viewing the information, click the ‘Cancel’ button to close the pop-up.
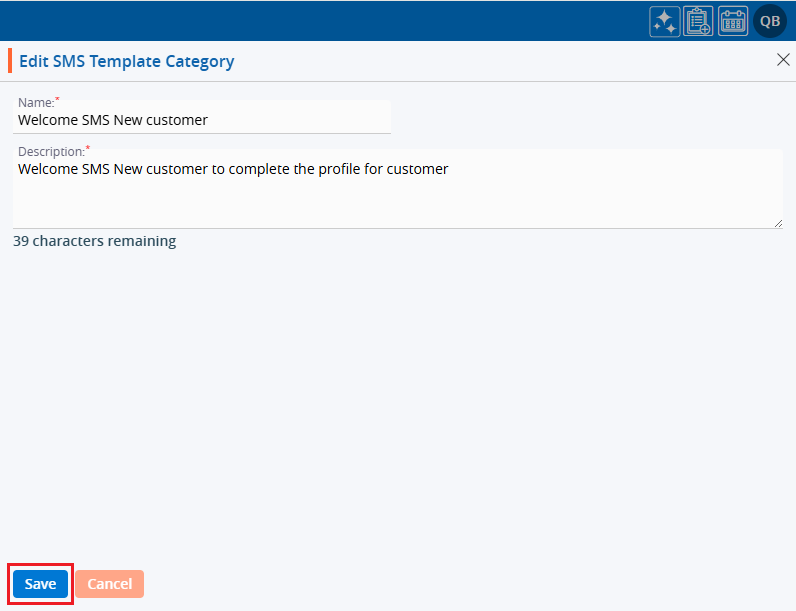
14. Click the ‘Edit’ icon, the second option in the Action column on the right side of the SMS Template Category (highlighted by a red box), to modify the details of the SMS Template Category.

15. A pop-up window titled ‘Edit SMS Template Category’ will appear, allowing the user to update the details of the SMS Template Category.
16. Update the details as needed. For example, change the ‘Description’ and click the ‘Save’ button.
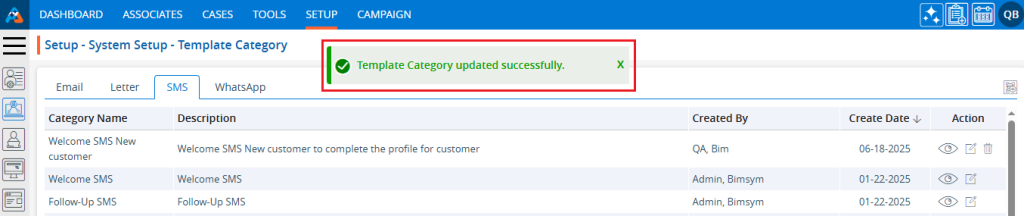
17. A confirmation message will appear, indicating that the SMS Template Category has been updated successfully.
18. The user can remove the SMS Template Category by ‘Delete’ option. The Delete icon is only available for categories which are not used. Click the ‘Delete’ icon, the last option in the Action column on the right side of the SMS Template Category (highlighted by a red box), to remove the SMS Template Category from the list.
19. Click the ‘Delete’ option in the confirmation message to proceed with removing the SMS Template Category from the list.
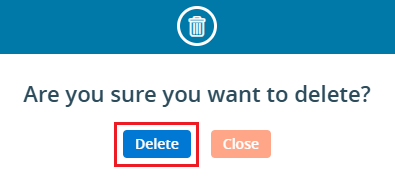
20. A confirmation message will appear, indicating that the SMS Template Category has been deleted and is no longer available on the list.
