The Documents Library Category helps organize and classify documents based on their content or purpose.
The following are the steps to manage the Documents Library:
1. Navigate to the ‘SETUP’ tab and click on ‘System Setup’ in the left-side panel.

2. Click on the ‘Documents Library Category’ option in the System Setup menu.

3. Users can search for the Documents Library Category option by typing in the search area.

4. A new page titled ‘Setup – Life – System Setup – Documents Library Category’ will open, displaying the existing Document Library Categories along with details of fields such as Category name, Description, Created By, Create Date and Action under the ‘Documents Library Category’ tab.
There are three available options: Add, Print, and Export.

5. Click the ‘Add Documents Library Category’ icon to add a new Documents Library Category.

6. A pop-up window titled ‘Life – Add Documents Library Category’ will open, containing fields for ‘Category Name’ and ‘Description’, additionally ‘Save’ and ‘Cancel’ options available at the bottom.
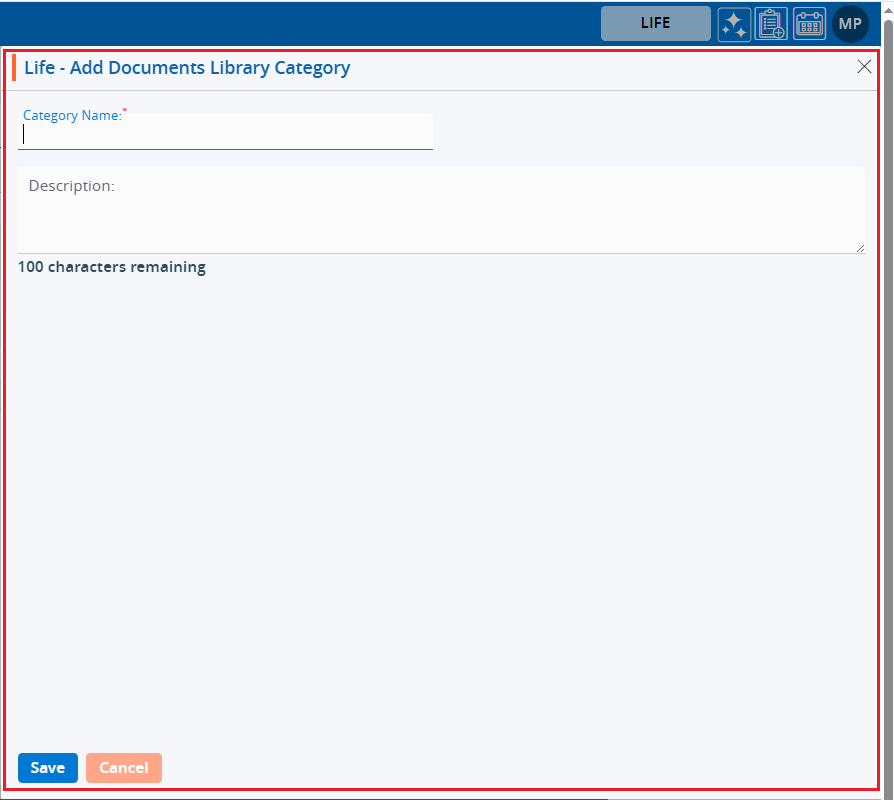
Fields with an ‘*’ sign are mandatory. In this case, Category Name is a mandatory field.
● Category Name: Enter the desired Category Name. (Limit is a maximum of 100 characters) (This field allows to enter alphabet, space and single quote only)
● Description: A description for the Documents Library Category needs to be added in accordance with the Category name. (Limit is a maximum of 100 characters)
7. Fill in the details and click the ‘Save’ button to continue.

8. The system will generate a confirmation message saying ‘Document Library Category created Successfully’ and the newly added Documents Library Category will now be available on the list.
9. There are two options available for each Category under the Action heading: Edit and Delete or Lock.
For newly created categories, the Edit and Delete options will be available by default.
● Edit: By clicking on the Edit icon, the user can edit the details of the selected Category.
● Delete or Lock: By clicking on Delete, the user can remove the selected category. However, once the category is assigned to any document, the option will change from Delete to Lock. The Delete option will remain available until the category is assigned to any document.

10. The newly added Category will be available on the CASES tab > Case > Documents Library > Document Category Drop down.
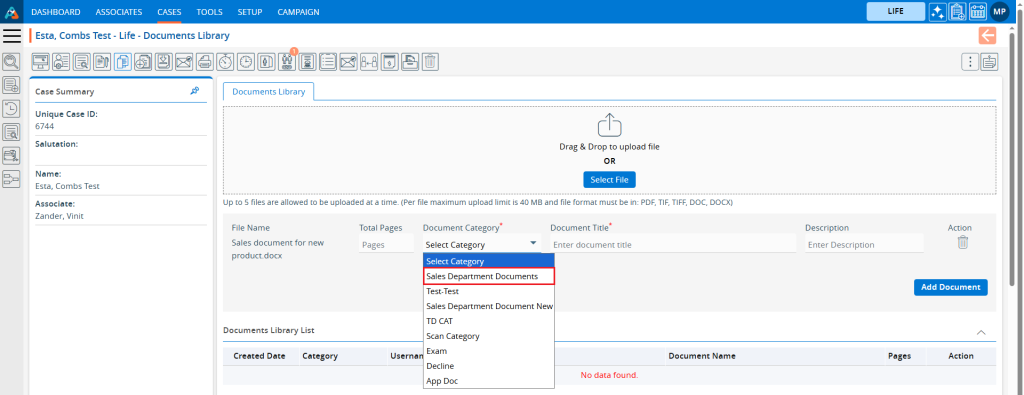
11. The user can save a Document under this newly added Document Library Category.

12. Once the category is assigned to any document, the option will change from Delete to Lock, and it can no longer be deleted.

13. Users can update the values for the created Category by clicking the edit icon for the selected Category.

14. A new pop-up window titled ‘ Life – Edit Documents Library Category’ will be opened with the existing fields value. Update the values for the Category as needed.
For example, in this case, we are updating the category name. Once the category name is updated, click on Save.

15. The system will generate a confirmation message saying ‘Documents Library Category updated Successfully’. The updated name will be displayed in the listing.

16. Category names will be updated in the CASES Tab > Case > Documents Library > Category Drop down.
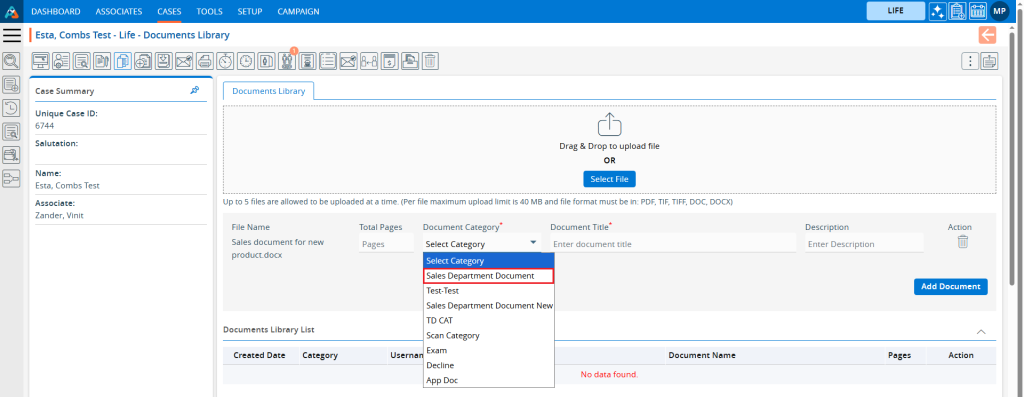
17. Category names will also be updated in the existing document listings under CASES Tab > Case > Document Library > Document Library List, where this category has already been assigned.

18. To remove the existing Category, click on the Delete icon. (If a category is assigned to any document, it cannot be deleted.) (To explain the delete function here we have created another category which is HR Document Category and not assigned any documents).

19. After Clicking on Delete, the system will generate a pop-up to confirm before deleting.
20. Click on delete to remove this Category.

21. The system will generate a confirmation message “Documents Library Category deleted successfully,” and the Category will be removed from the list.

22. This Category will no longer be displayed in the CASES Tab > Case > Documents Library > Category Drop down.
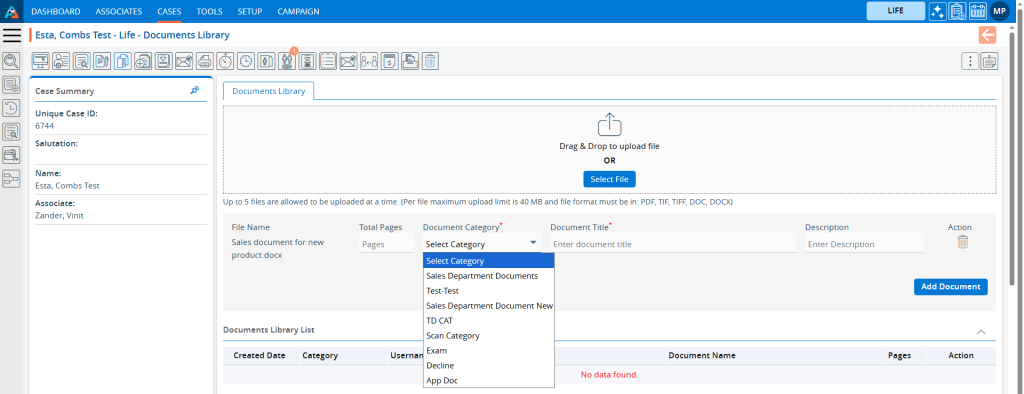
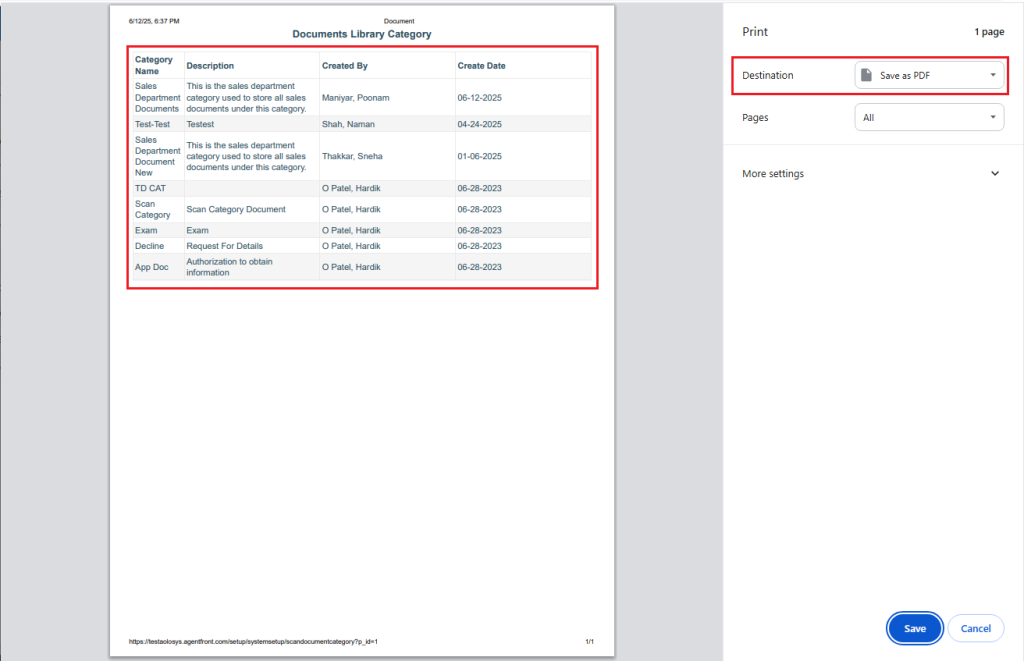
23. To print the list of available categories, click on the Print icon.

24. By clicking on the Print icon, a new page will be displayed with the print window containing the list of available categories. The user can print the data using the desired options.
25. To export the list of available categories, click on the Export icon.

26. By clicking on the Export icon, a pop-up window will open with different period options. The user can export the data using the desired options. Select the required period and click on ‘Export’.

27. Records will be exported according to the selected option, and the CSV file will be saved in the designated location.

 - Knowledge Base