The Field Group provides a comprehensive way to manage and customize both Groups and fields in a member’s profile. It allows the user to easily add new Groups and fields, modify existing ones, and update information based on user’s specific requirements. This ensures that member profiles remain up-to-date and are tailored to capture the most relevant data, ultimately improving the overall management and organization of member information.
The following are the steps to manage the Field Group:
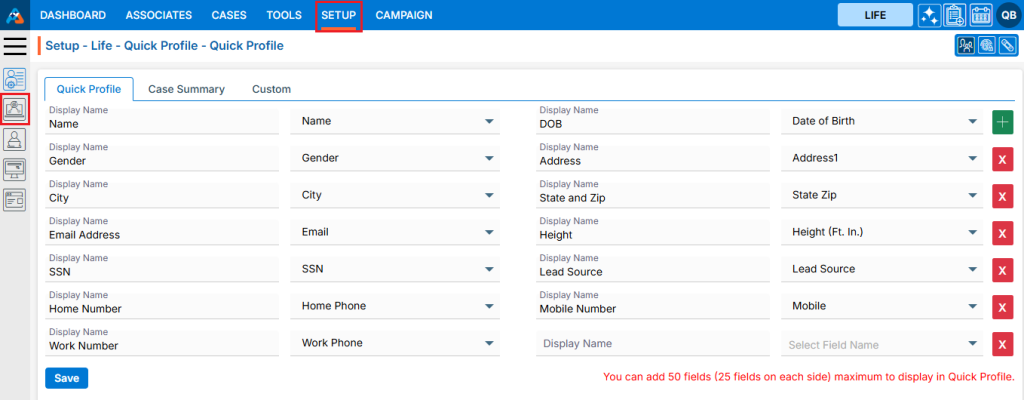
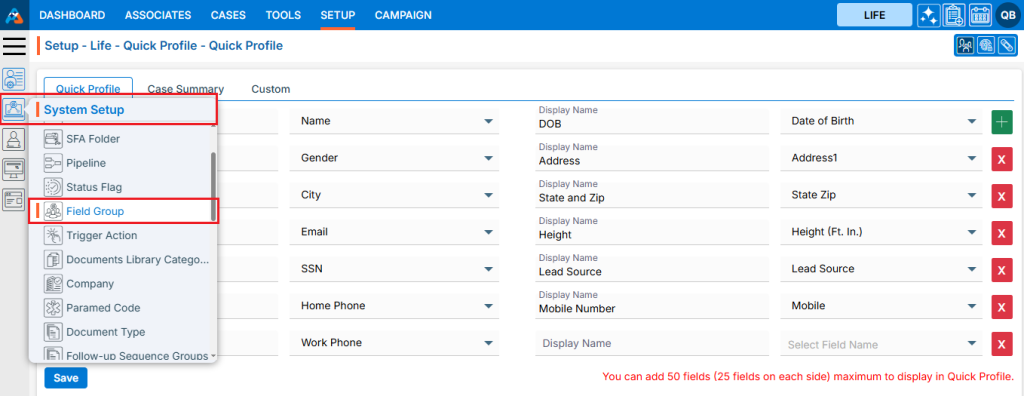
1. Navigate to the ‘SETUP’ tab and click on ‘System Setup’ from the left-side panel.
2. A pop-up bar will appear. Select the ‘Field Group’ option.
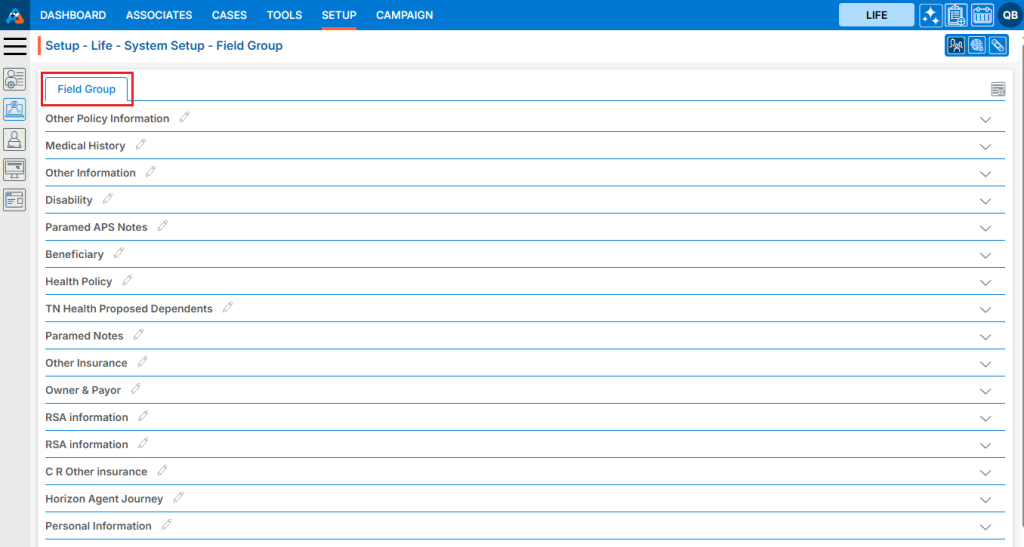
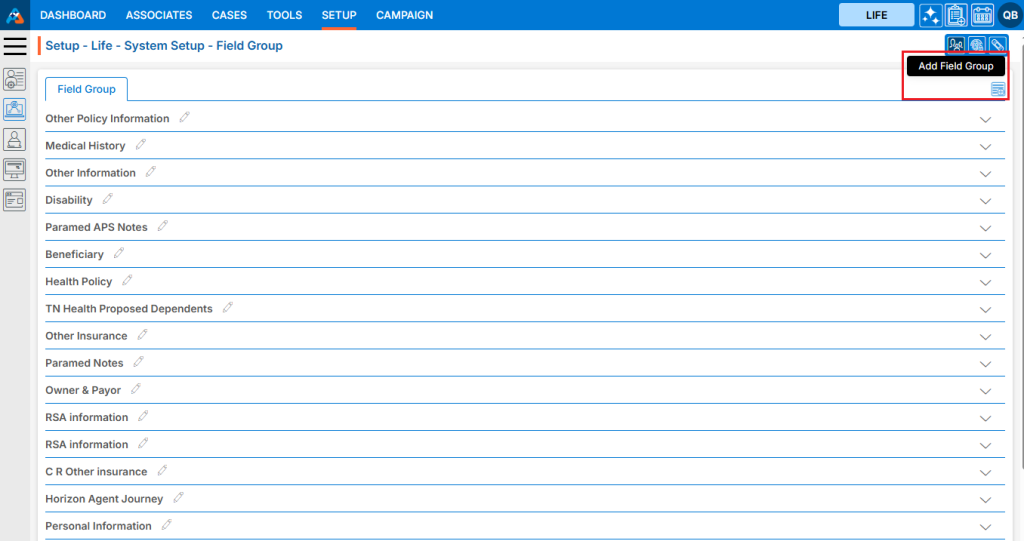
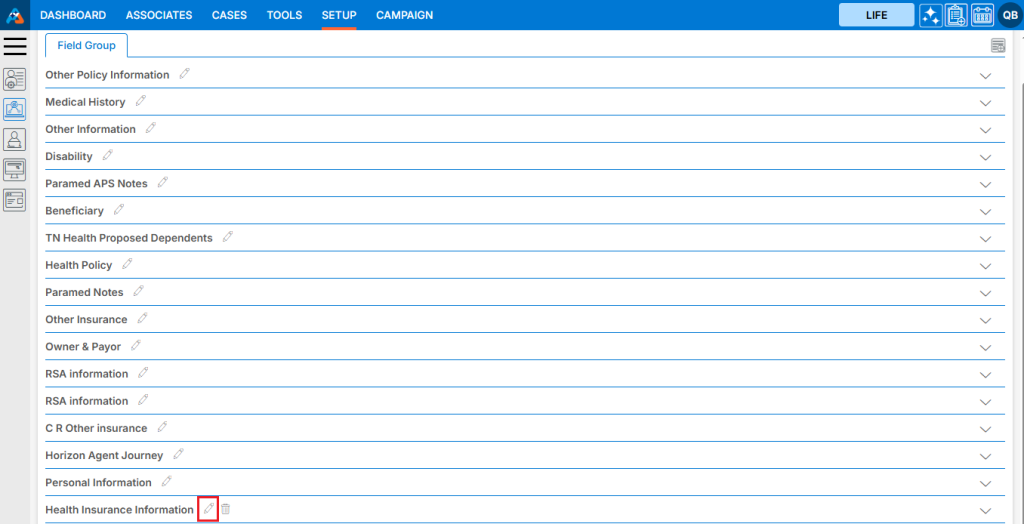
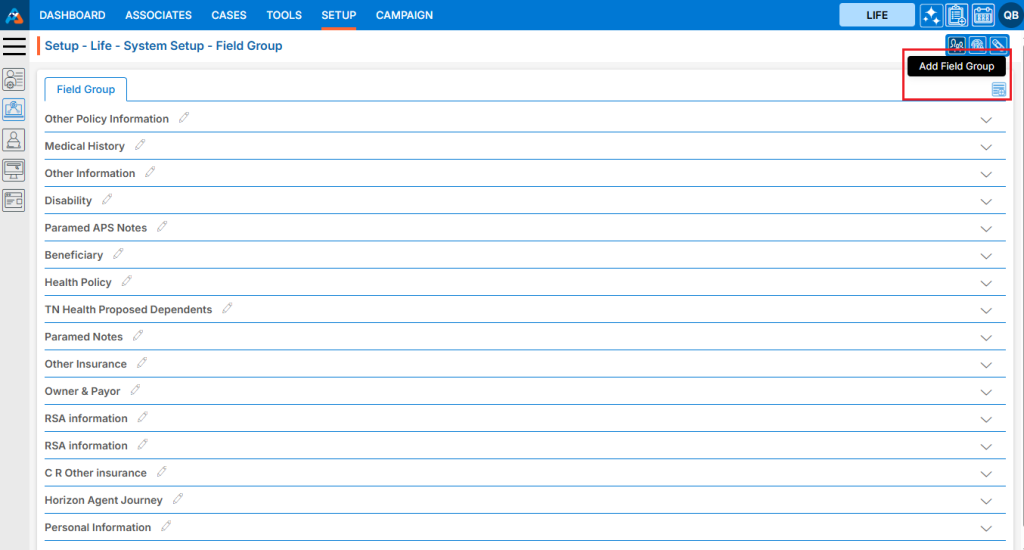
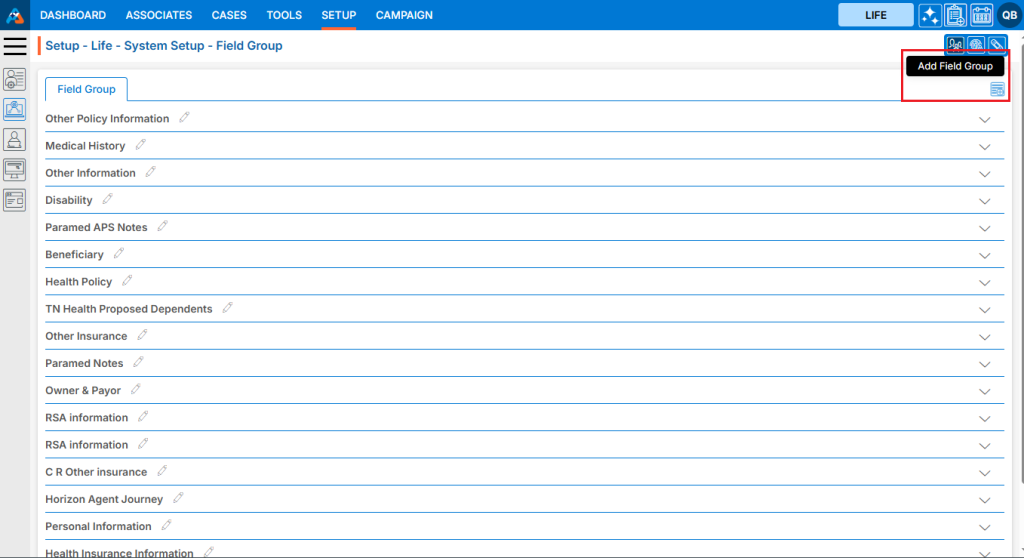
3. The Field Group page will load, displaying a list of existing Field Groups.
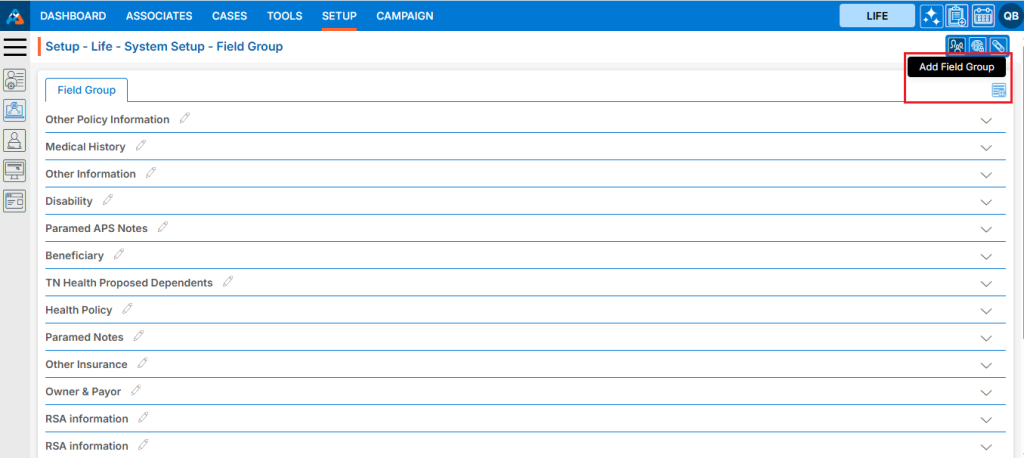
4. To create a new Field Group or add a new Field to an existing Field Group, click the ‘Add Field Group’ icon.
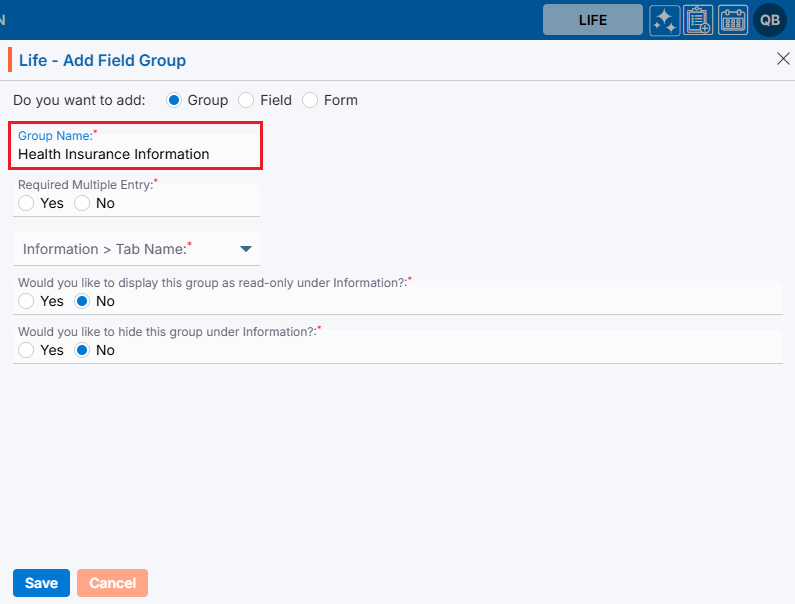
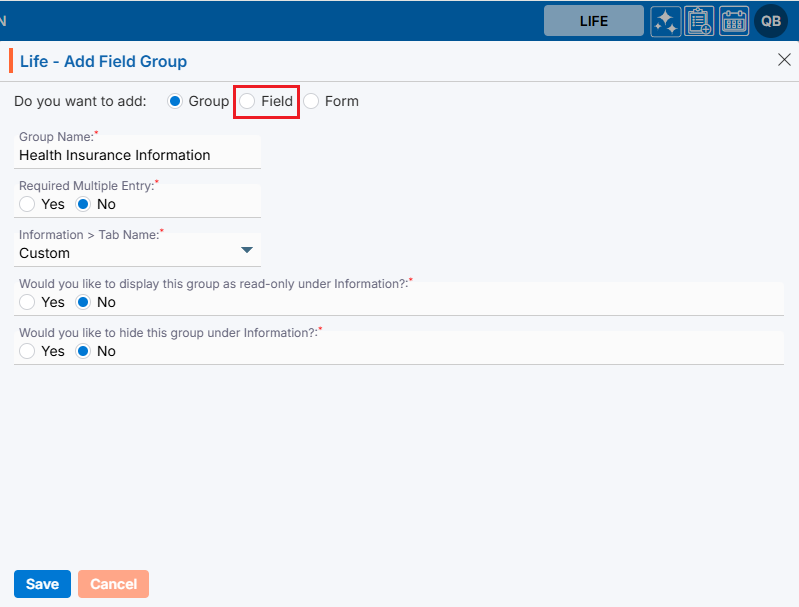
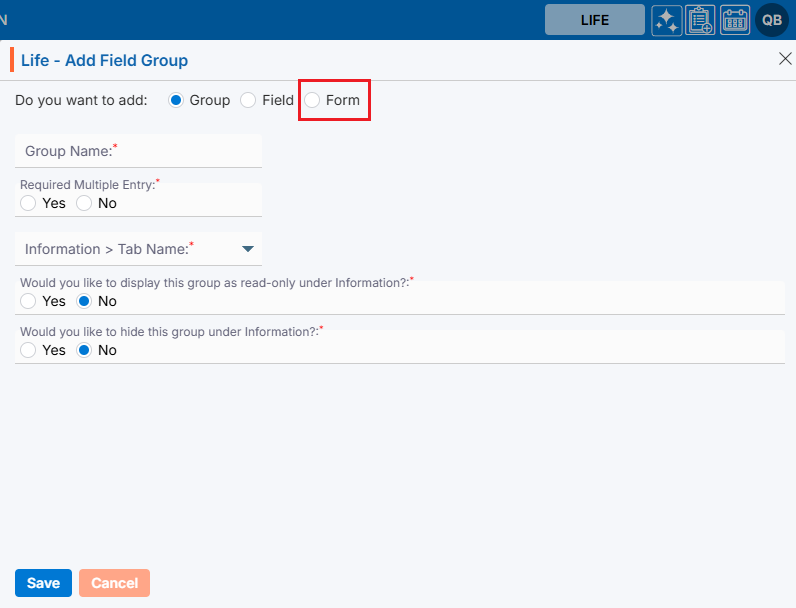
5. A new pop-up page will appear for adding a Field Group, with the ‘Group’ field selected by default.
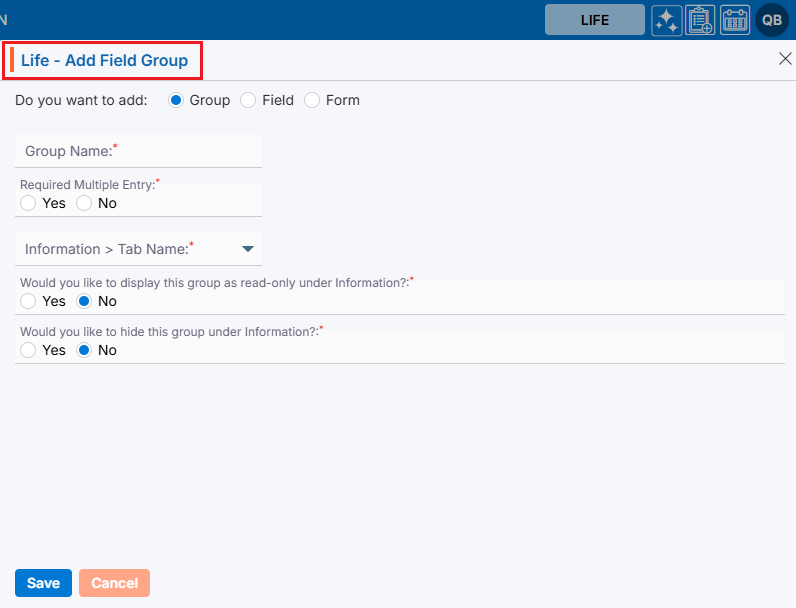
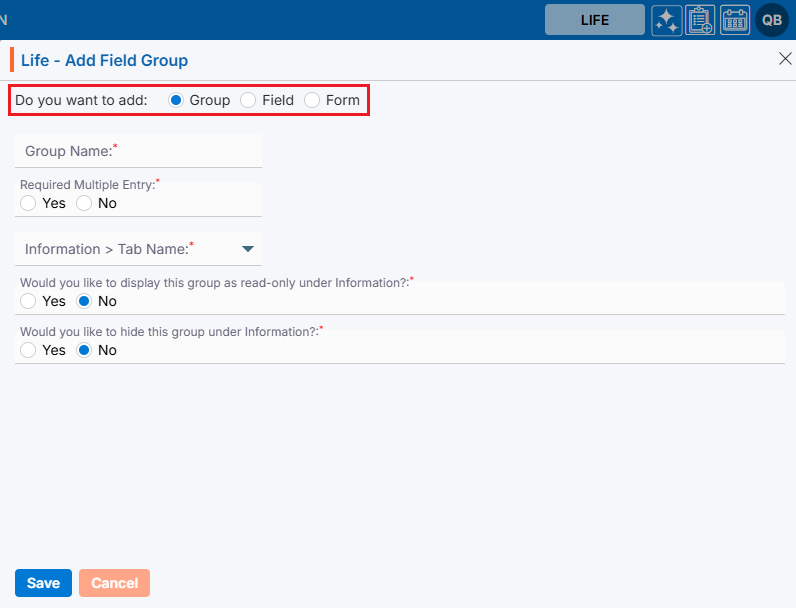
6. The user can add a Group, Field or Form with the help of this page.
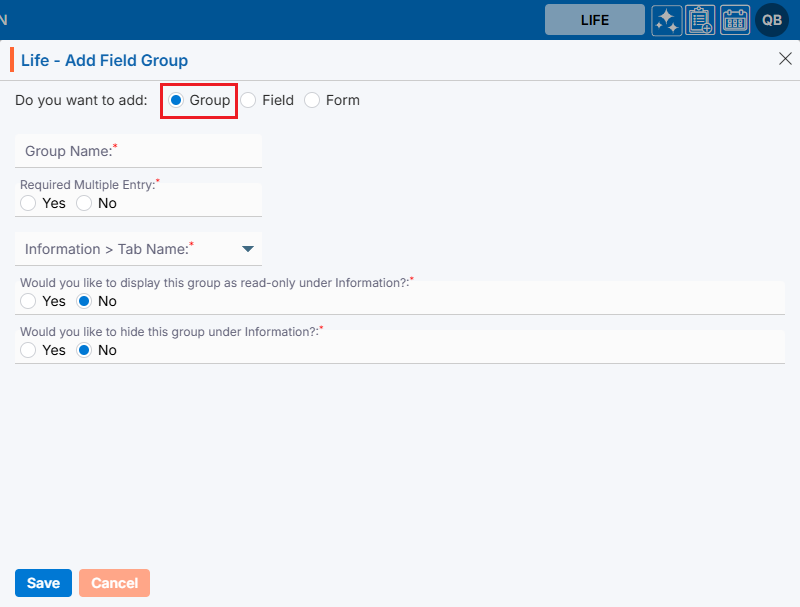
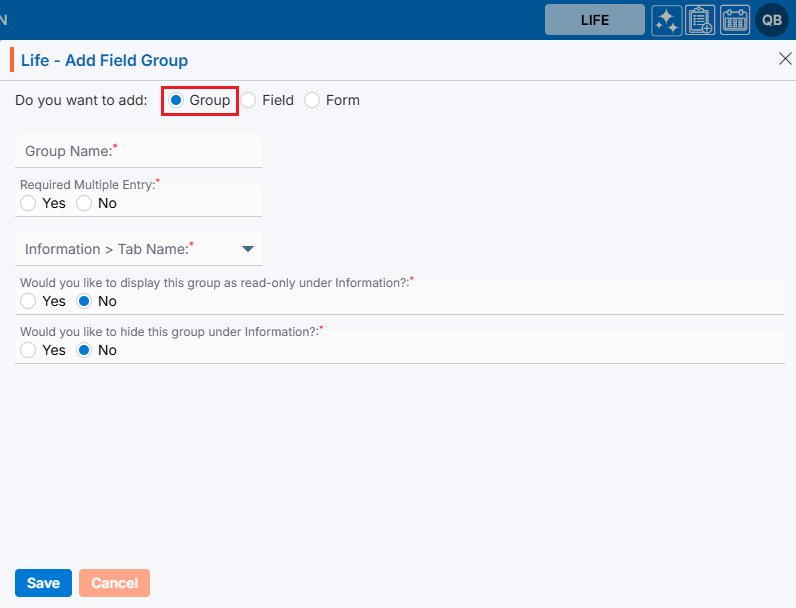
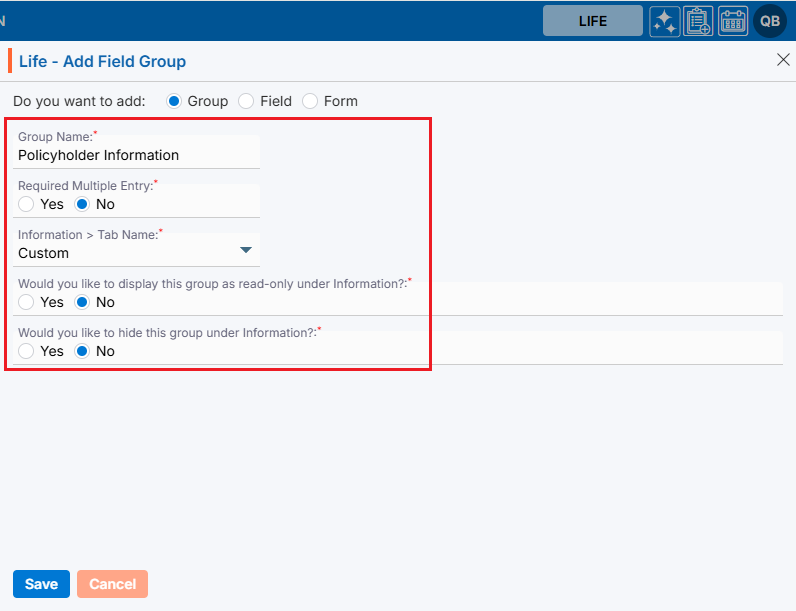
7. First, add a Group, which is selected by default.
8. Enter the Group Name. This field is mandatory, can contain up to 30 characters, and does not allow special characters.
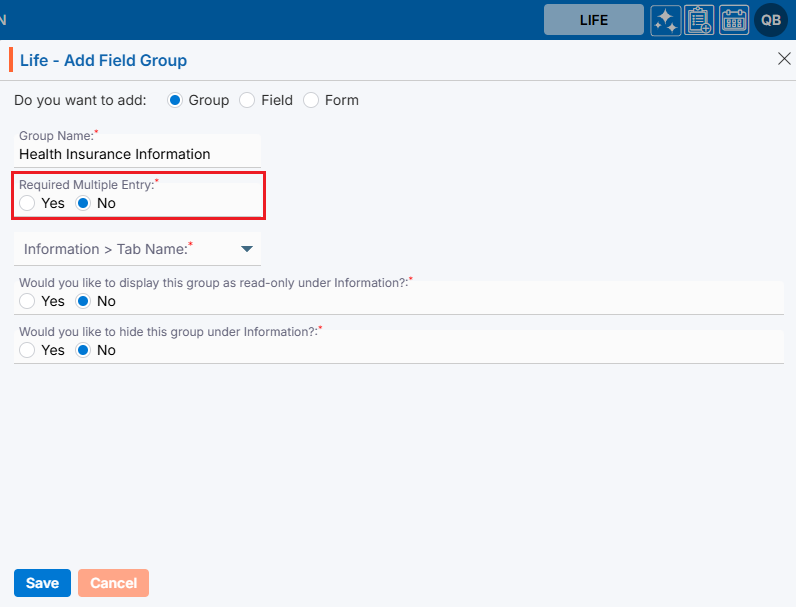
9. Select an option from ‘Required Multiple Entry’. Choose ‘Yes’ if multiple entries are required for the form, or ‘No’ if only a single entry is needed.
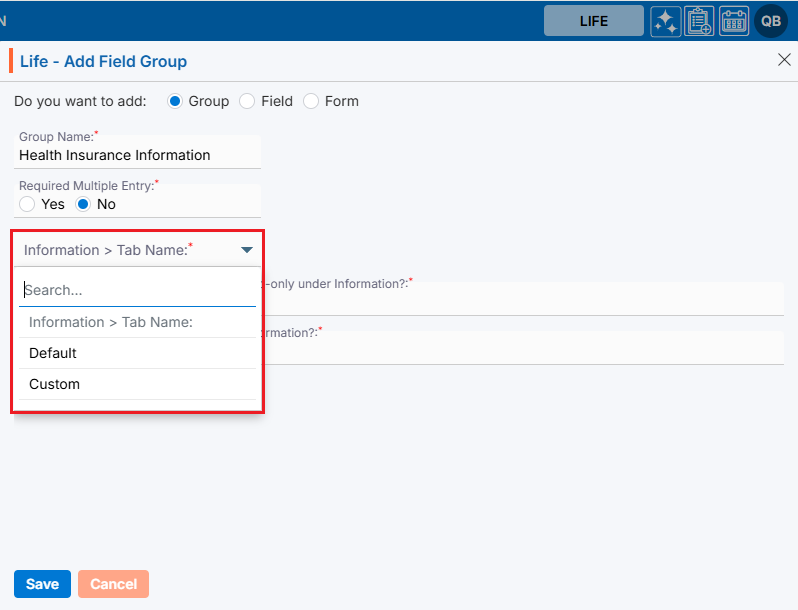
10. Select the page where the form should be displayed. You have two options: ‘Default’ and ‘Custom’.
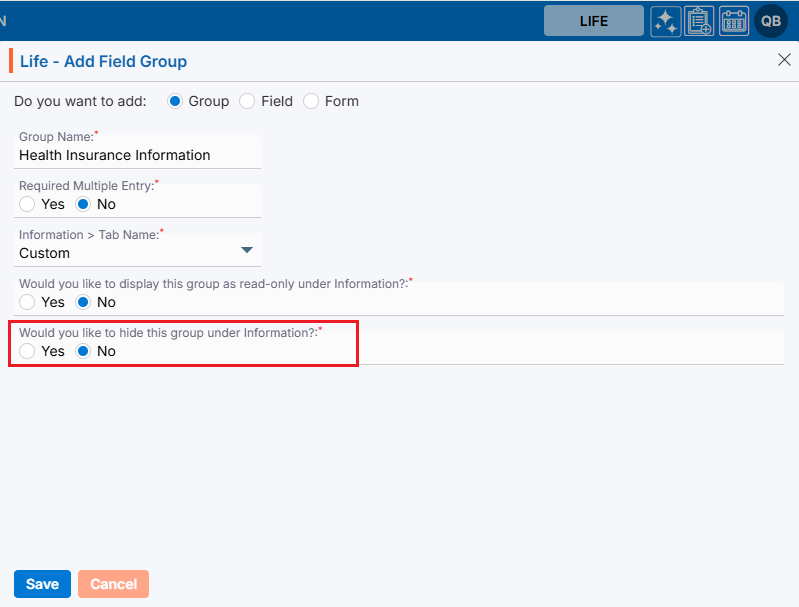
11. Select an option from ‘No’ for question ‘Would you like to display this group as read-only under information?’. Choose ‘Yes’, if this group need to be read-only.
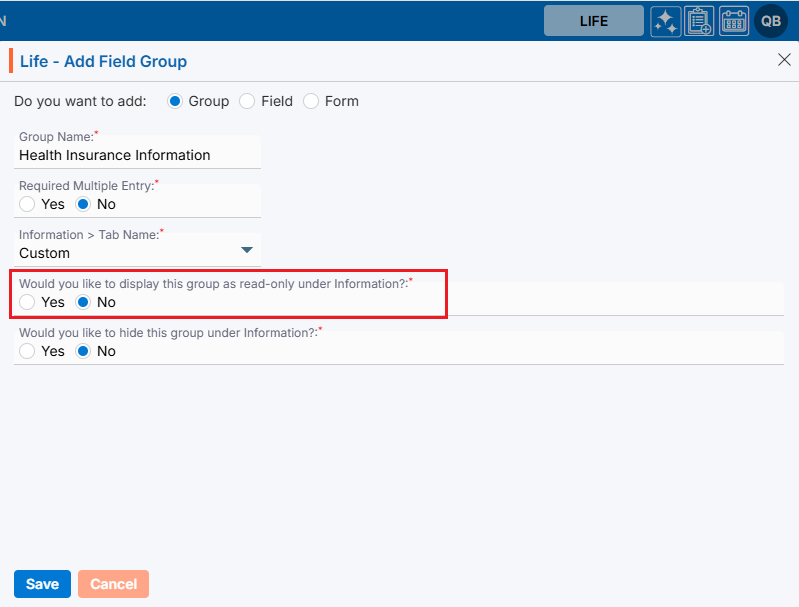
12. Select an option from ‘No’ for question ‘Would you like to hide this group under information?’. Choose ‘Yes’, if this group need to be hidden.
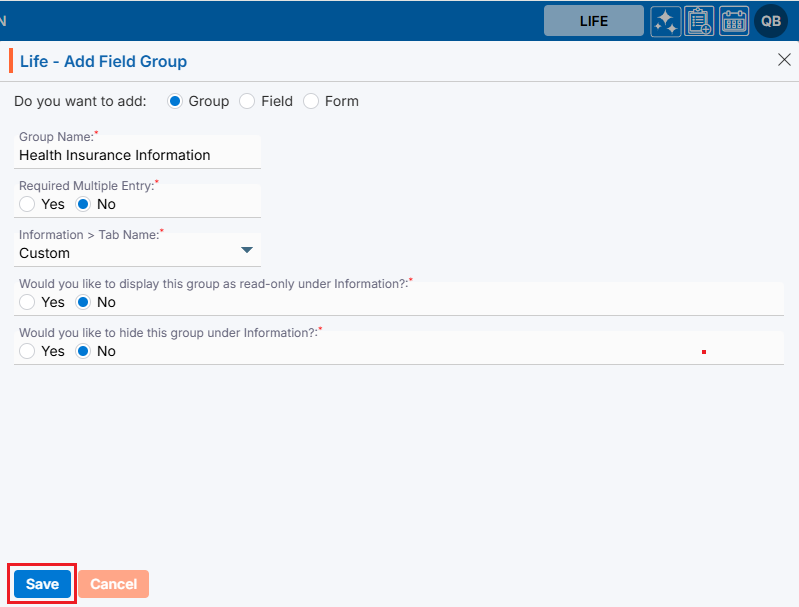
13. Once all the details are entered, click the ‘Save’ button.
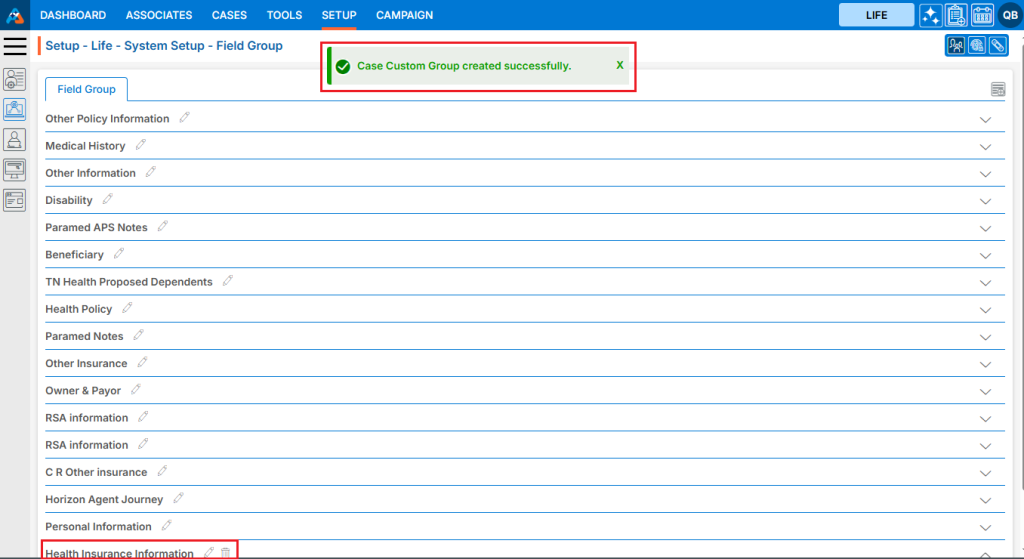
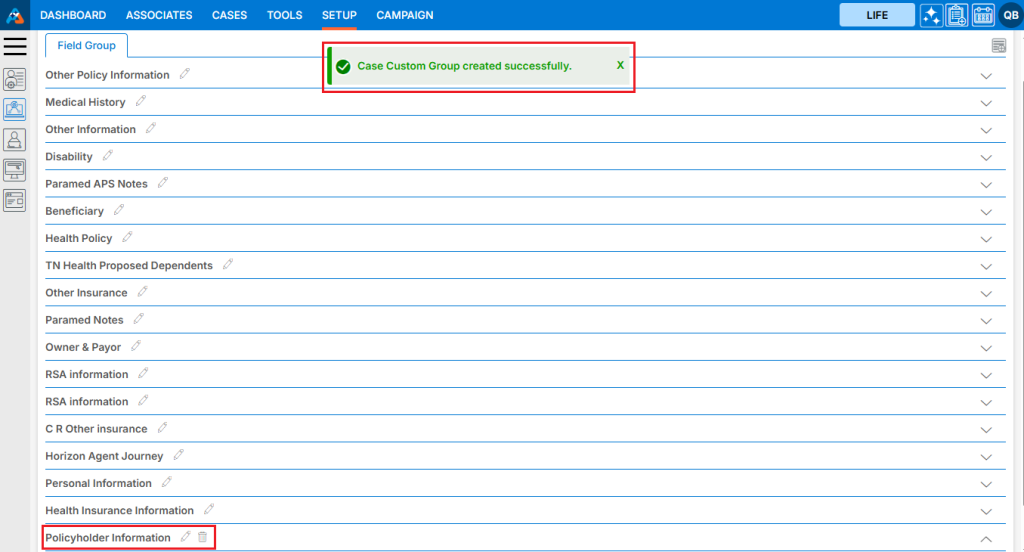
14. A confirmation message will appear, indicating that the custom group was created successfully, and the newly created Field Group will be displayed in the list.
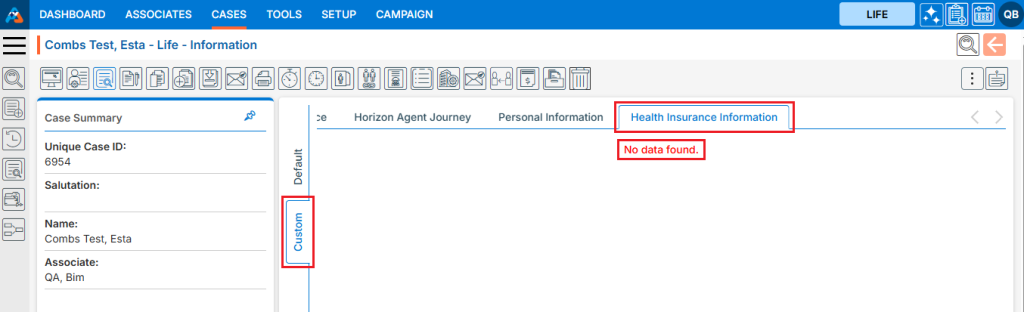
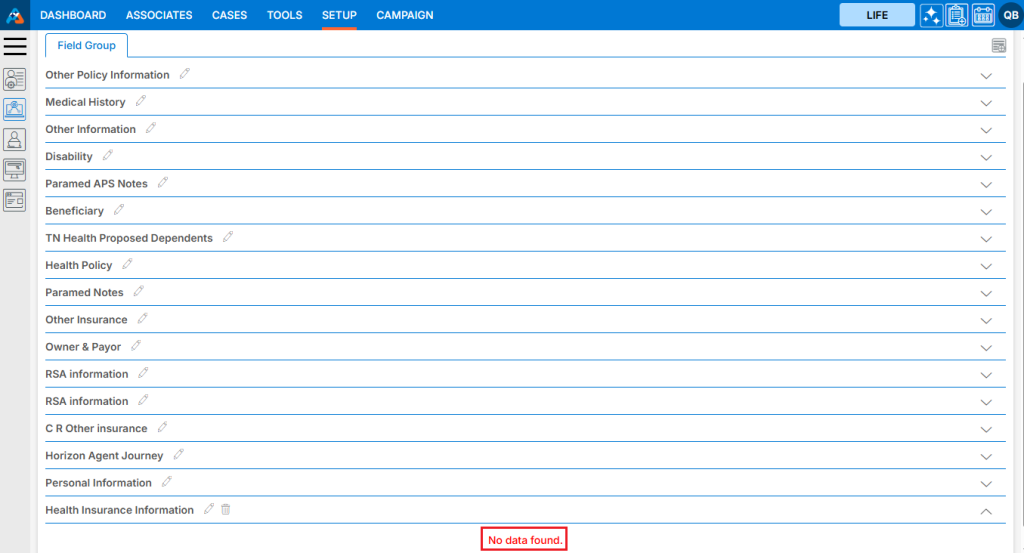
15. To view the newly created Custom Group, go to CASES > Recent Case > Information. Then, navigate to the Custom tab, where the Custom Group was created. Since no fields have been added yet, you will see ‘No data found’ in the Custom Group.
16. The newly created Field Group has two available options:
a. Edit
b. Delete

17. To edit a Field Group, click the ‘Edit’ icon.
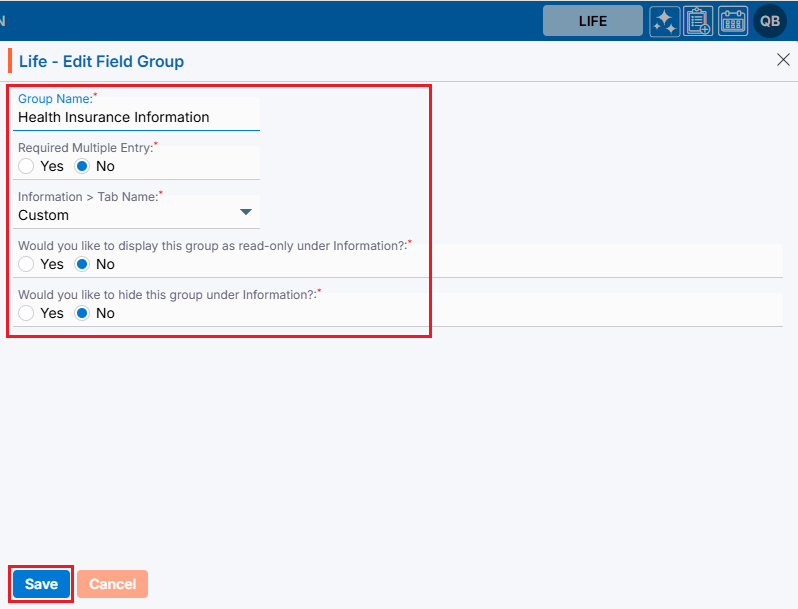
18. The Field Group will open in the edit pop-up page. After making the required changes, click the Save button. If no changes are needed, click the ‘Cancel’ button.
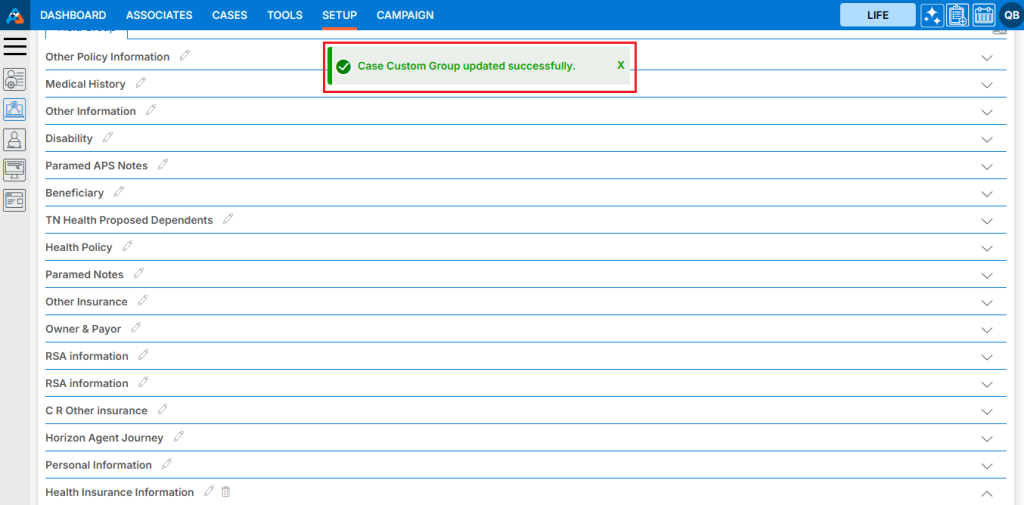
19. A confirmation message will appear, indicating that the Case Custom Group has been successfully updated.
20. If the Custom Group is no longer needed, it can be deleted using the delete functionality. The Delete button will only be available for Custom Groups that do not contain any fields. Once fields are added, the Custom Group cannot be deleted. In this case, only the newly created Custom Group will have the delete button, as it contains no fields. Click the Delete icon to remove the Custom Group.

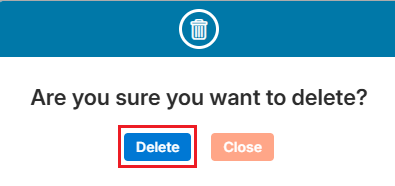
21. A confirmation prompt will appear asking, ‘Are you sure you want to delete?’ Click the Delete button to proceed.
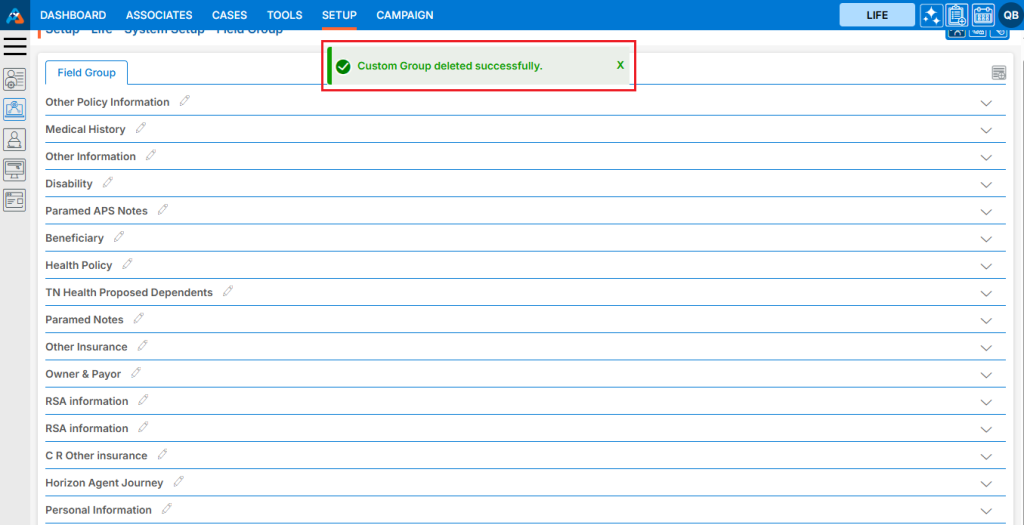
22. A confirmation message will appear, indicating that the Custom Group has been successfully deleted, and it will be removed from the list.
23. To view the custom fields in the Custom Group, click on the name of the Custom Group.

24. Since there are no fields in this Custom Group, a message saying ‘No data found’ will appear when you open it.
25. To create fields in the Custom Group, click on the ‘Add Field Group’ icon.
26. The ‘Add Field Group’ pop-up page will open with the ‘Group’ option selected by default. Select the ‘Field’ radio button.
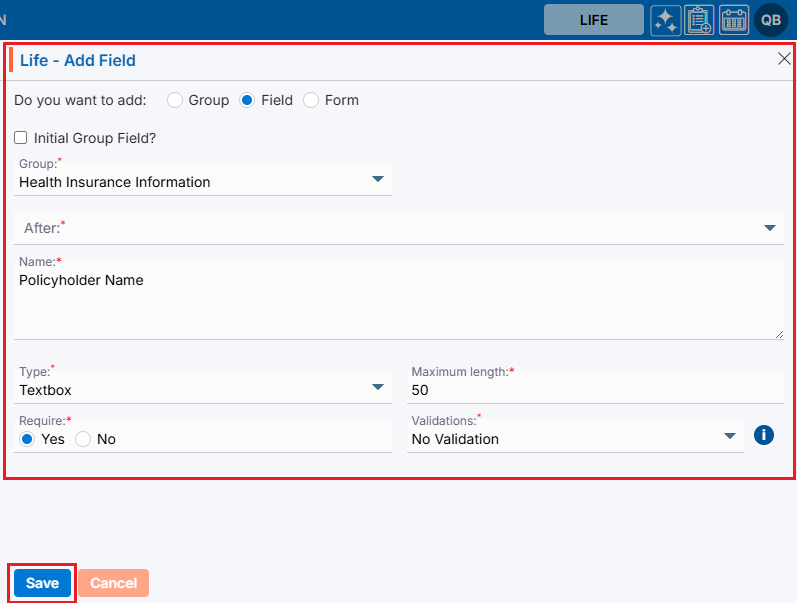
27. A new pop-up page will open to add a new Custom Field for the Custom Group, featuring a checkbox for ‘Initial Group Field’ and fields for ‘Group’, ‘After’, ‘Name’, ‘Type’, ‘Maximum Length’, and ‘Require’, along with ‘Save’ and ‘Cancel’ buttons at the bottom.

28. Fill in all the required information to create a new field and click the ‘Save’ button:
a. Initial Group Field Check box: If the field needs to be the first field of the group, select this checkbox.
b. Group: Select the group to which this field belongs.
c. After: Specify after which field this new field should appear. If the ‘Initial Group Field’ checkbox is selected, this option will be greyed out and unavailable.
d. Name: Enter the name of the field.
e. Type: Choose the type of field based on your needs (e.g., text box, text area, checkbox).
f. Maximum Length: Define the maximum length of text allowed in this field. This will change based on the field type. If the type is a checkbox, it will change to ‘Default Values Separated by commas.’
g. Require: Choose whether the field is a compulsory field in the group. Select ‘Yes’ if it is a required field, or ‘No’ if it is not.
h. Validation: Select the appropriate validation for the field (e.g., Alphanumeric, space, symbol (._’&), Alphabet, Dash, Underscores). If no validation is needed, select ‘No Validation’.
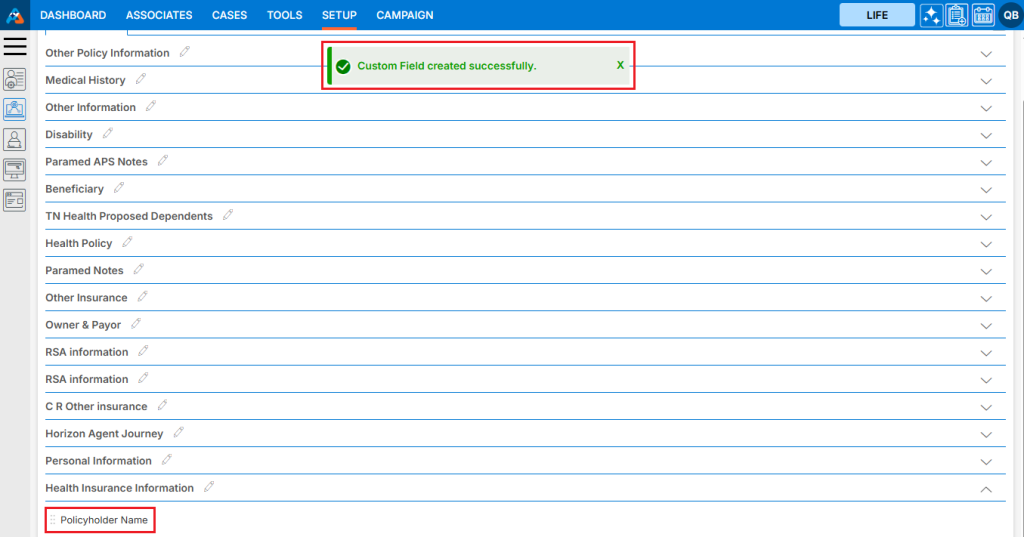
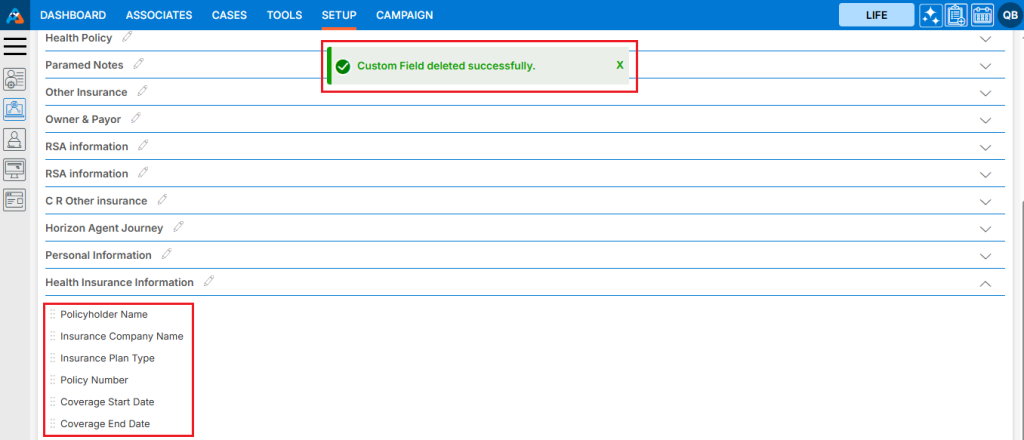
29. A confirmation message will appear saying, ‘Custom Field created successfully’, and the newly created Custom Field will be displayed under the Custom Group listing.
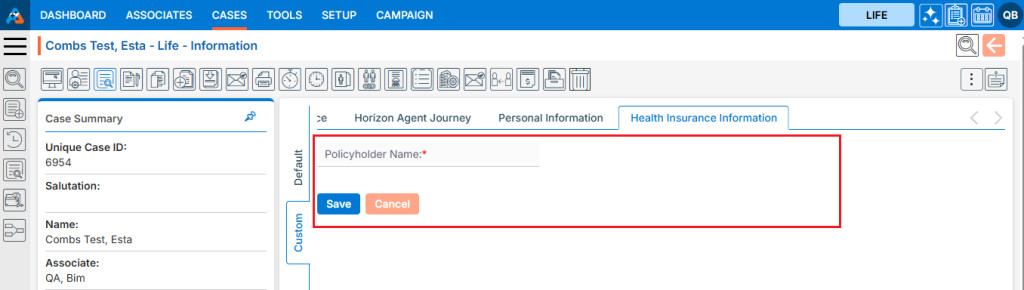
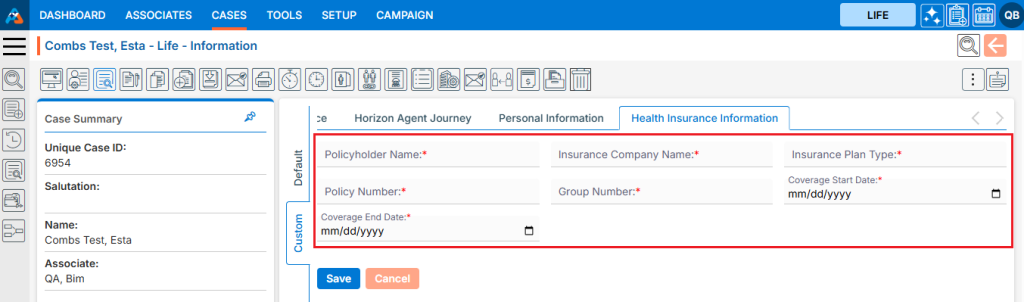
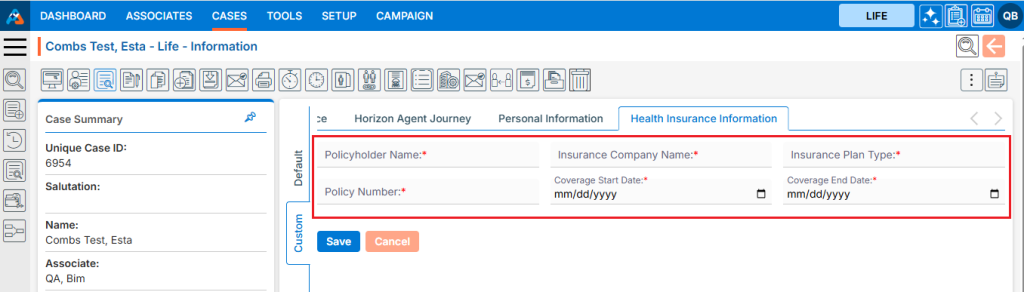
30. To view the Custom Field in the member’s profile that was just created, go to CASES > Recent Case > Information > Custom > Health Insurance Information.
31. Similarly, create other Custom Fields following the same process as outlined above.
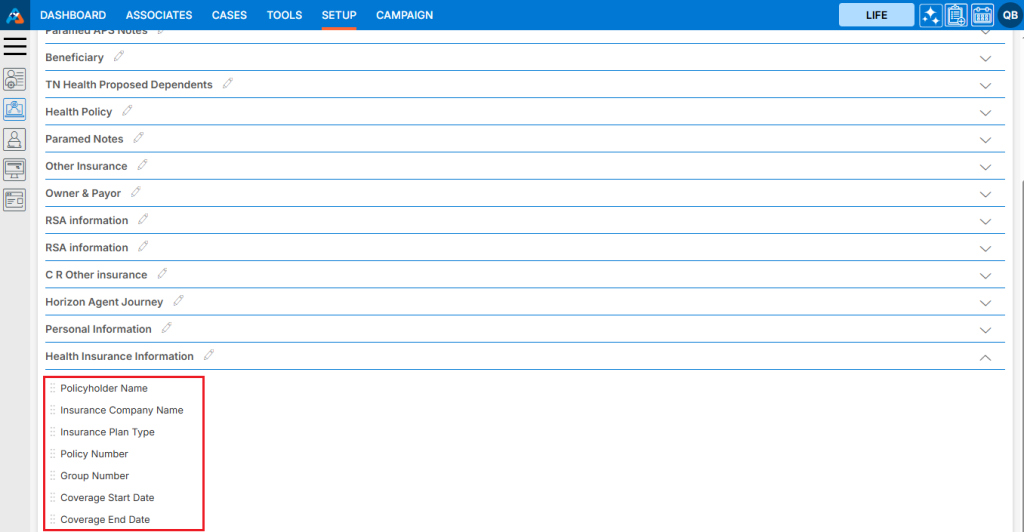
32. Check the Custom Group and its custom fields in the Recent Case to ensure they have been added correctly.
33. There are 3 options for the Custom Field that appear when the mouse hovers over the fields:
a. View
b. Edit
c. Delete
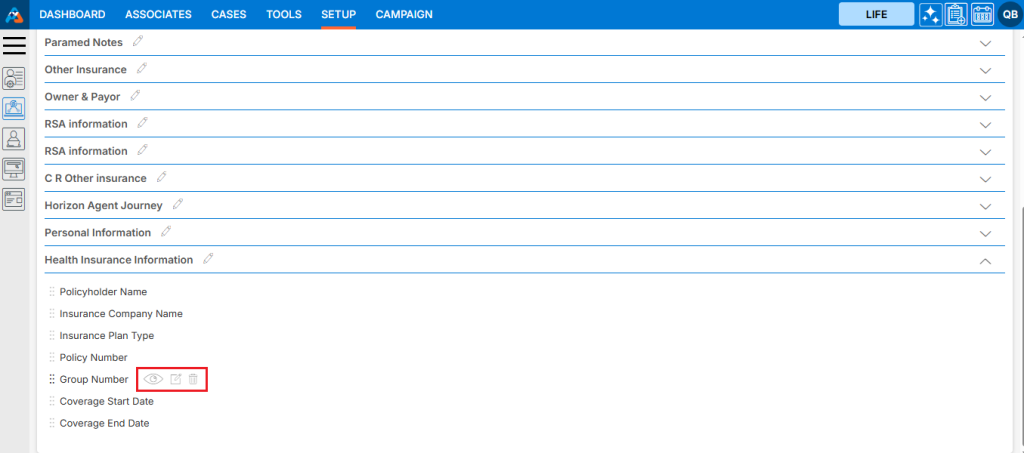
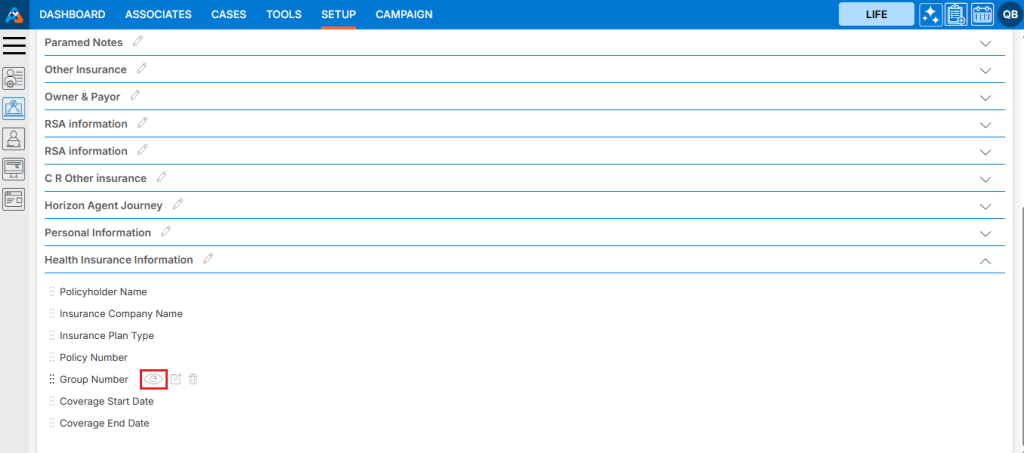
34. The Edit and Delete options will only be available for fields that do not have any data in them. If a member has data in the field, only the View button will be available, and the Edit and Delete options will be disabled.
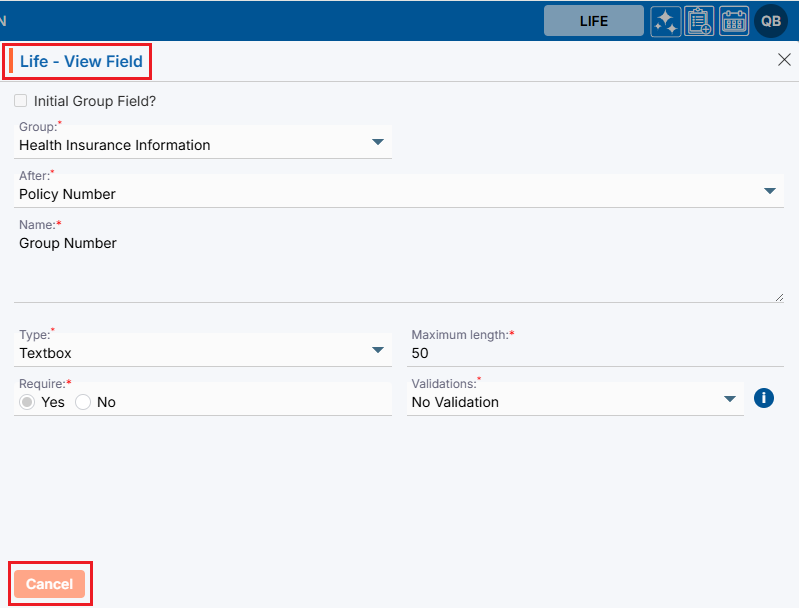
35. Using View functionality, the user can view the Custom Field. Simply click on the ‘View’ icon.
36. The Custom Field will open in view mode, and the user will not be able to make any changes, as the fields will be read-only. After viewing the field, click on the ‘Cancel’ button at the bottom to exit the popup.
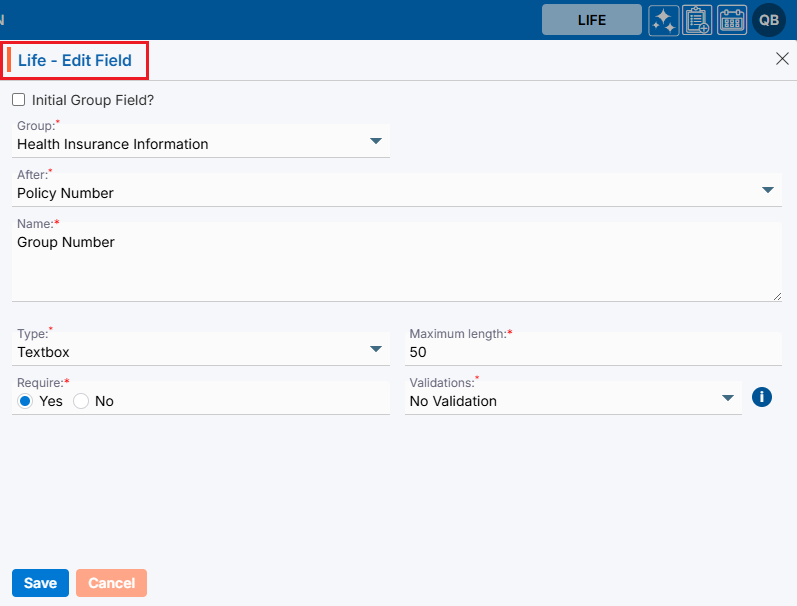
37. Using the Edit functionality, the user can modify the existing Custom Field. Click on the ‘Edit’ icon to begin.

38. The Custom Field will open in Edit mode, and all fields will be editable. Make the necessary changes and click the ‘Save’ button. If no changes are required, simply click the ‘Cancel’ button to exit this popup.
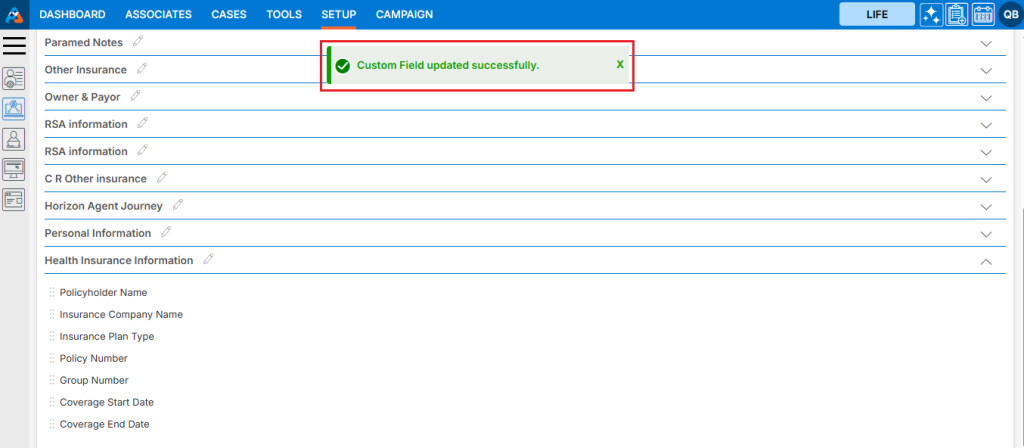
39. A confirmation message will appear saying, ‘Custom Field updated successfully’ once the changes are saved.
40. If the Custom Field is no longer needed, the user can remove it using Delete functionality. Click on the ‘Delete’ icon to remove the Custom Field from the form.

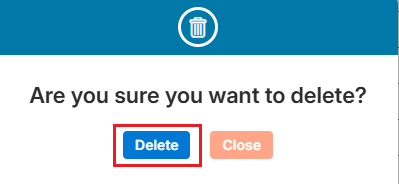
41. A confirmation prompt will appear with the message, ‘Are you sure you want to delete?’ Click on the ‘Delete’ option to confirm.
42. A confirmation message will appear saying, ‘Custom Field deleted successfully’, and the field will be removed from the list.
43. Check the member’s profile to ensure that the removed Custom Field is no longer available.
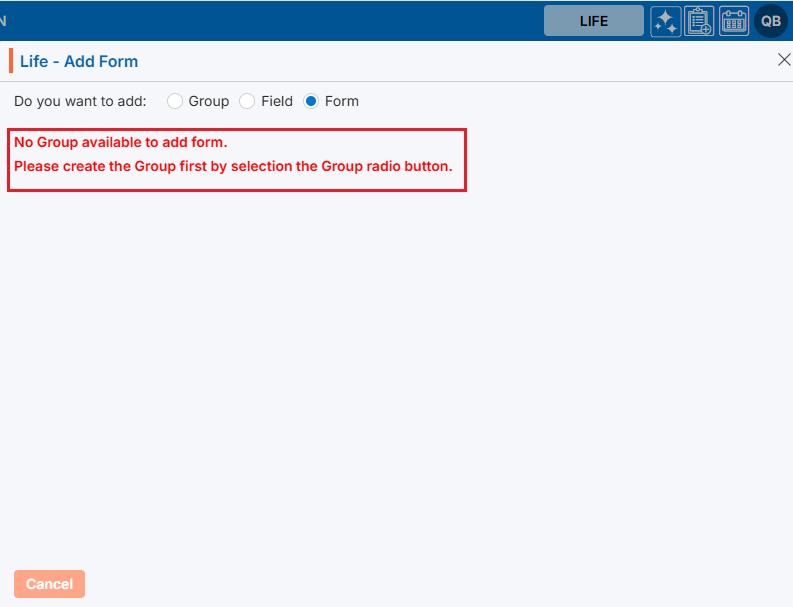
44. To create a Form, click on the ‘Add Field Group’ icon.

45. The ‘Group’ field will be selected by default. Select the ‘Form’ field radio button.

46. A new pop-up page will open for the Form field, displaying the message:
‘No Group available to add form.’
‘Please create the Group first by selecting the Group radio button.’
This message appears because there is no Custom Group available that doesn’t already have Custom Fields. To resolve this, we need to create a Custom Group without adding any fields to it, following the same steps as above.
47. To create a new Custom Group, click on the ‘Add Field Group’ icon again.

48. The ‘Group’ field will be selected by default.
49. Add all the necessary details for the new Custom Group and click the ‘Save’ button.
50. The new Custom Group is created successfully and will be available in the listing.
51. Once the Custom Group is created, click on ‘Add Field Group’ again.
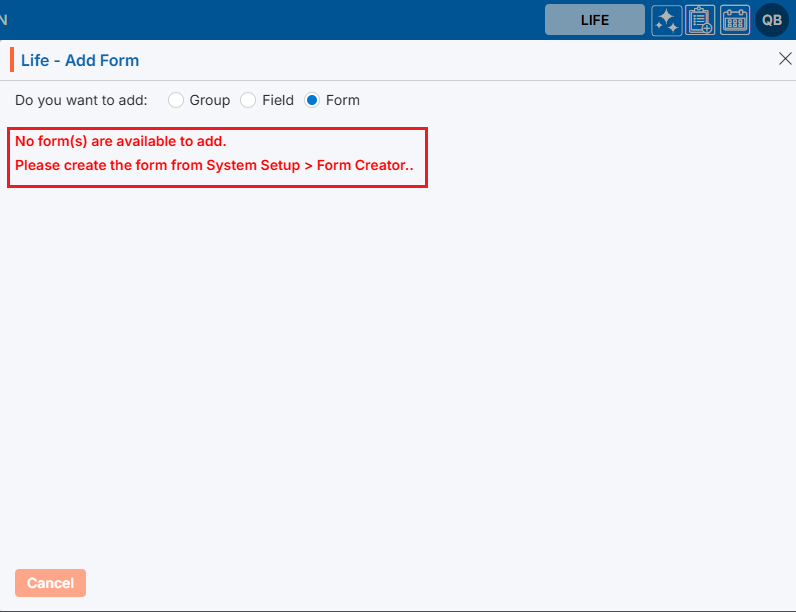
52. Select Form from the Add Field Group pop-up page. The message will now change to:
‘No Form(s) are available to add.’
‘Please create the form from System Setup > Form Creator.’
Since the Custom Group has been created but no form is available that hasn’t been used elsewhere, you will need to create a new form.
53. To create a new form, go to Setup > System Setup > Form Creator and click on Create Form.
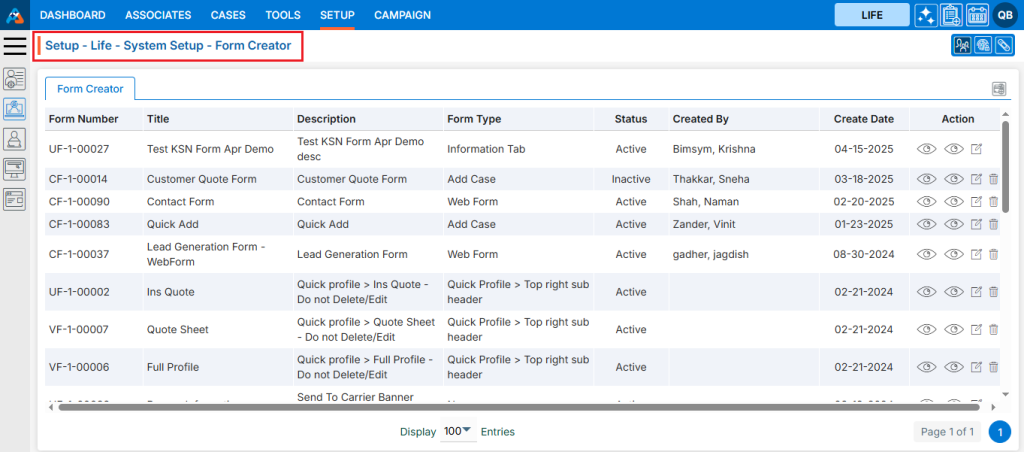
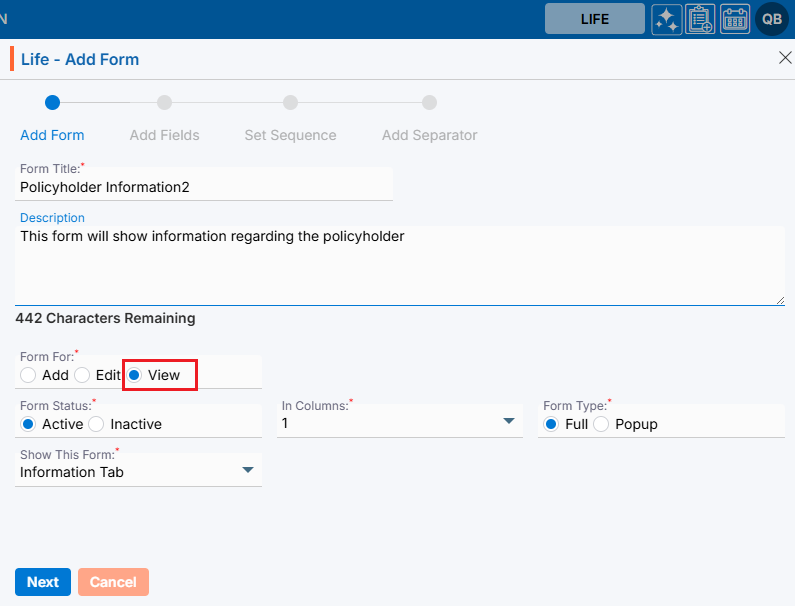
54. A new pop-up page will open, allowing you to add a new form to the system.
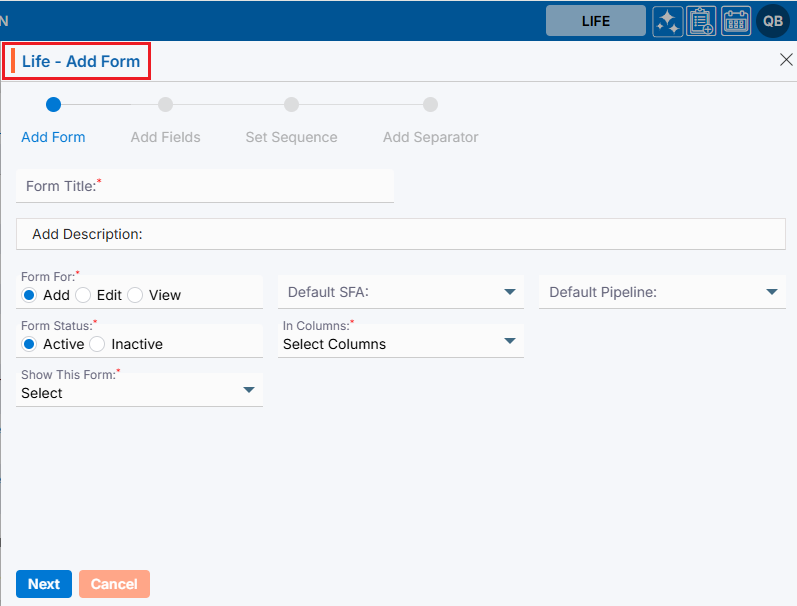
55. Add all the required information and Click on Next button:
• Form Title: Enter the title of the form in this field.
• Description: Add the description of the form in this field.
• From For: This field differentiates how the form will be used — add, edit, or view only. It has 3 options:
o Add
o Edit
o View
• (Select Edit, as “Add” forms are not available for Custom Fields. The user can use Edit and View options for custom fields.)
• Form Status: Indicates whether the form is active or inactive. (Select Active.)
• In Columns: Specify the number of columns in the form. You can add a minimum of 1 and a maximum of 3 columns. (Select 1.)
• Form Type: Select the type of form. There are 2 options:
o Full
o Popup
(Select Full.)
• Show This Form: Select the page where this form should appear. (Select Information.)

56. A confirmation message will appear saying, ‘Form created successfully’, and the newly created form will be displayed in the listing. Additionally, the next pop-up page will open.
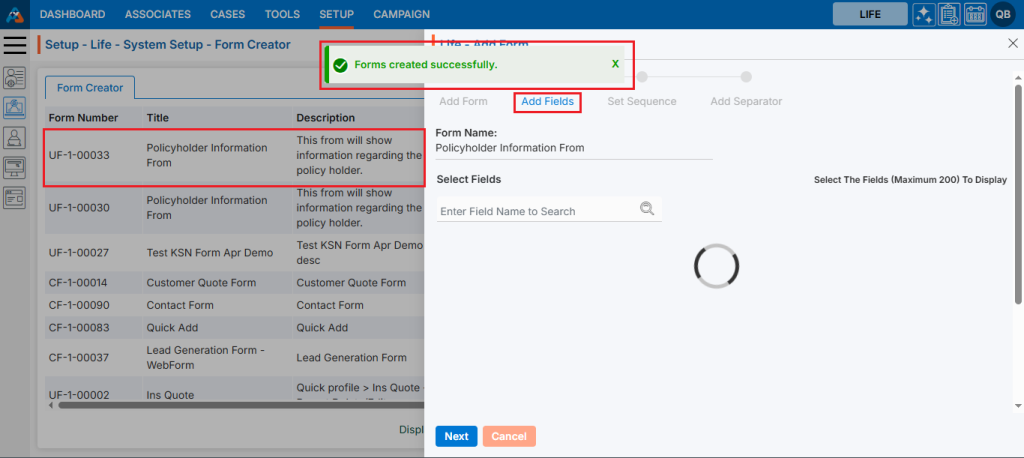
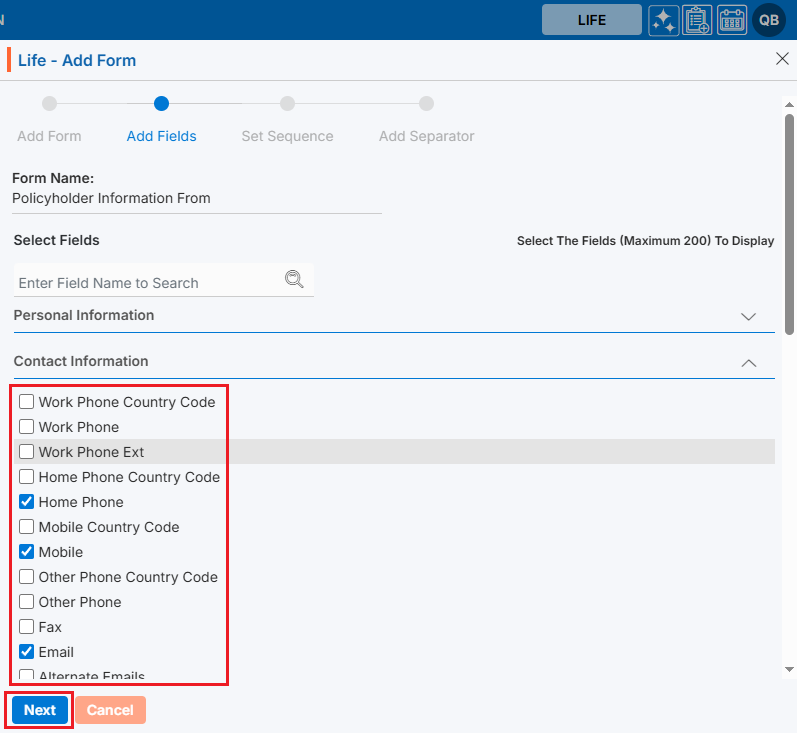
57. Select the required fields needed for the form and click on the ‘Next’ button.
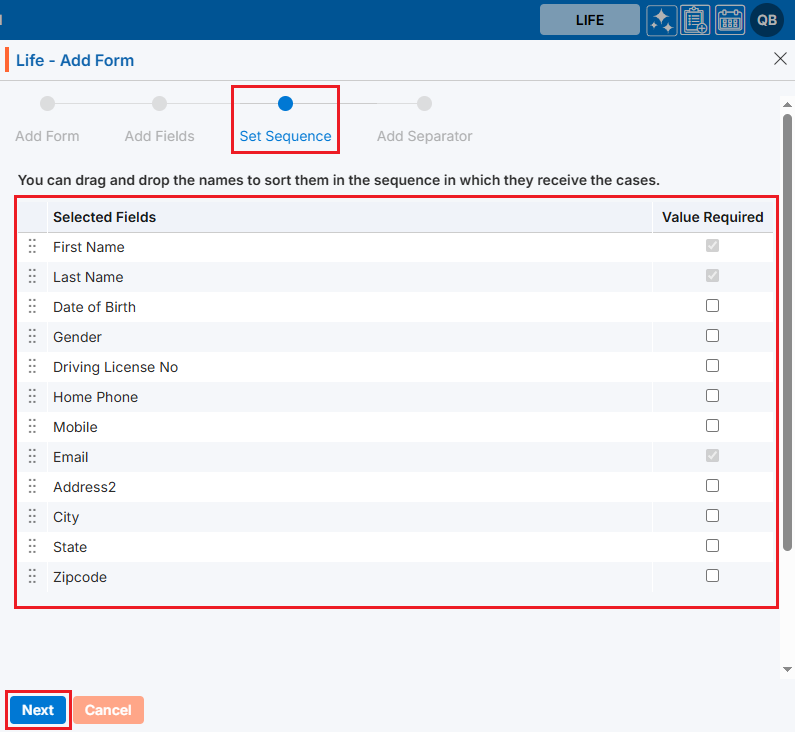
58. The next page, ‘Set Sequence’, will open. Adjust the sequence of the fields as needed, select the checkbox if the field is required to be a compulsory field, and click on the ‘Next’ button.
59. The last page, ‘Add Separator’, will open. Add the separator if required. Since we are not adding a separator for this form, click on the ‘Close’ button.

60. Once the form is created successfully, go to Setup > System Setup > Field Group and click on ‘Add Field Group’ again to create the Custom Form.
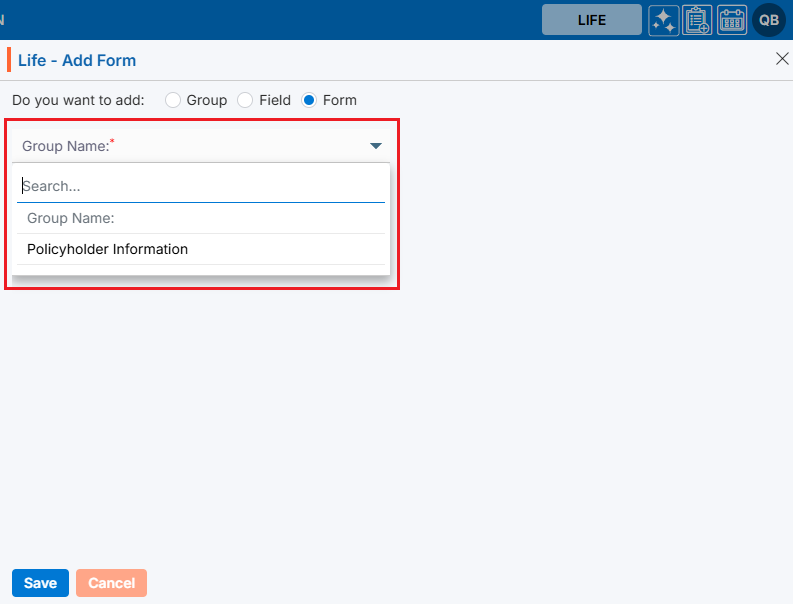
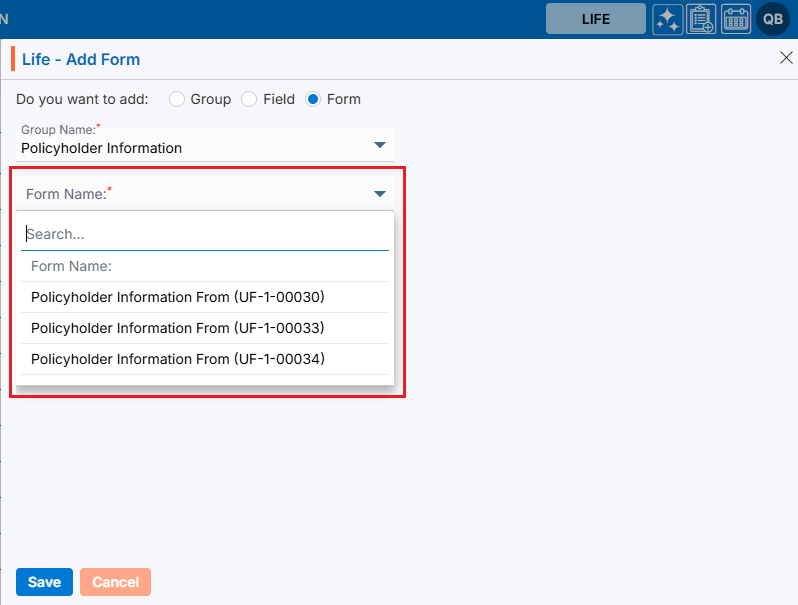
61. The ‘Group’ field will be selected by default. Select ‘Form’.
62. The Form pop-up will open.

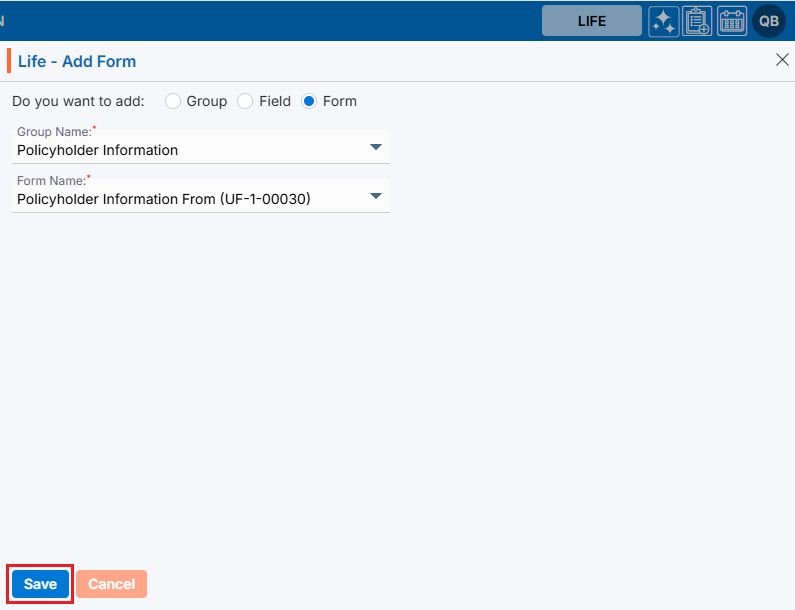
63. Select the Group Name from the dropdown that was created earlier.
64. Select the Form from the Form Name dropdown.
65. Click on the Save button.
66. A confirmation message will appear saying, ‘Form Module created successfully’.
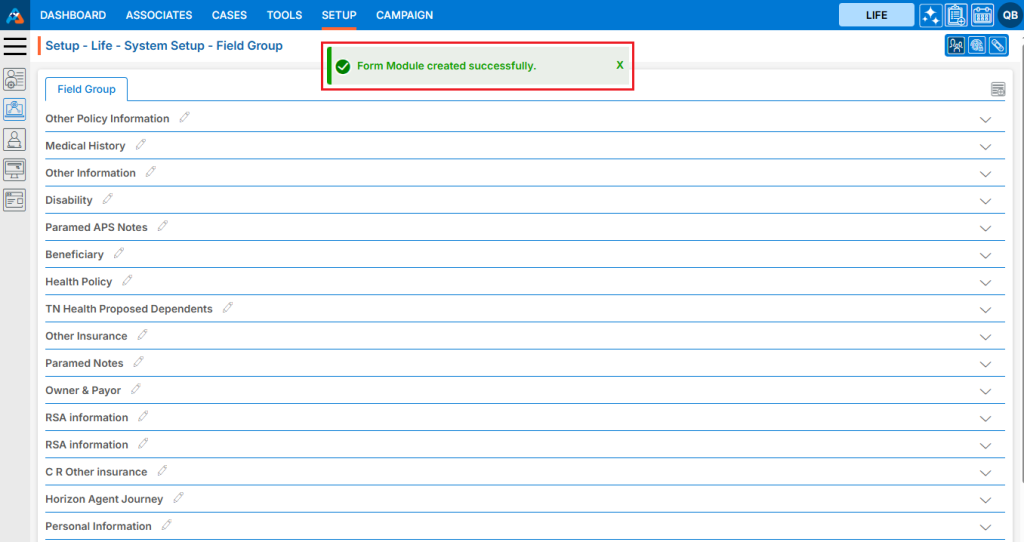
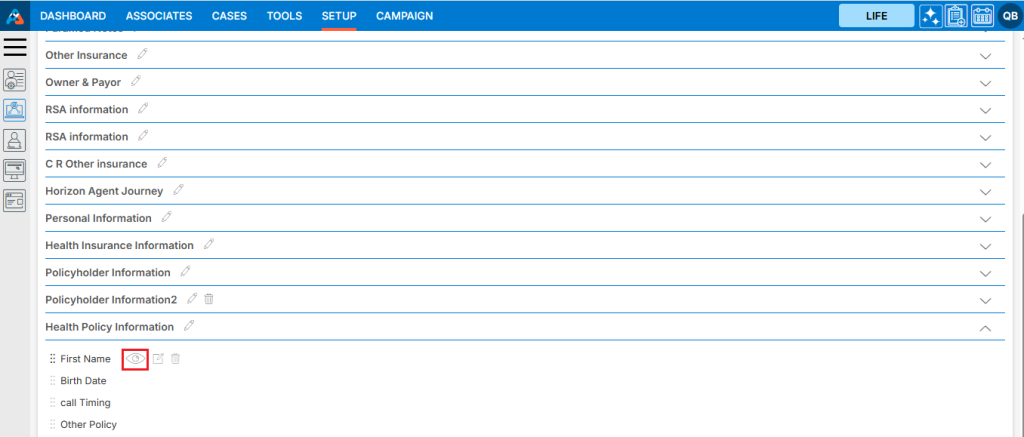
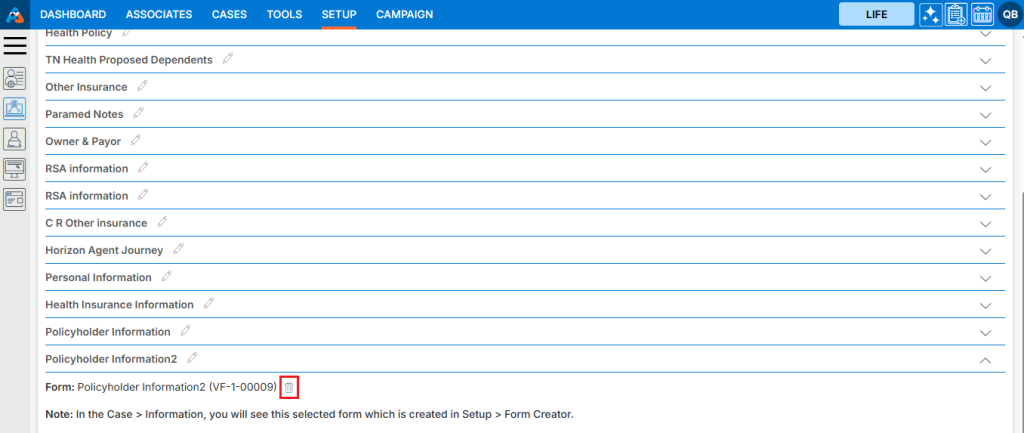
67. The form will be available under the Custom Group.
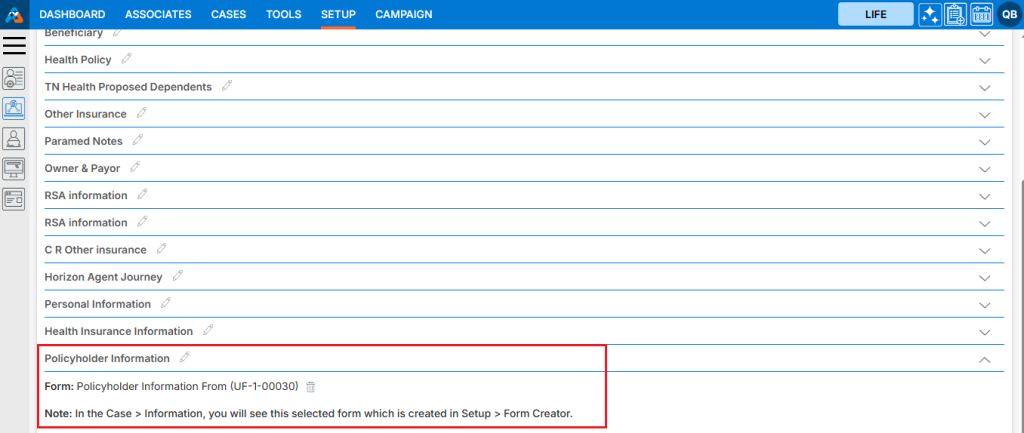
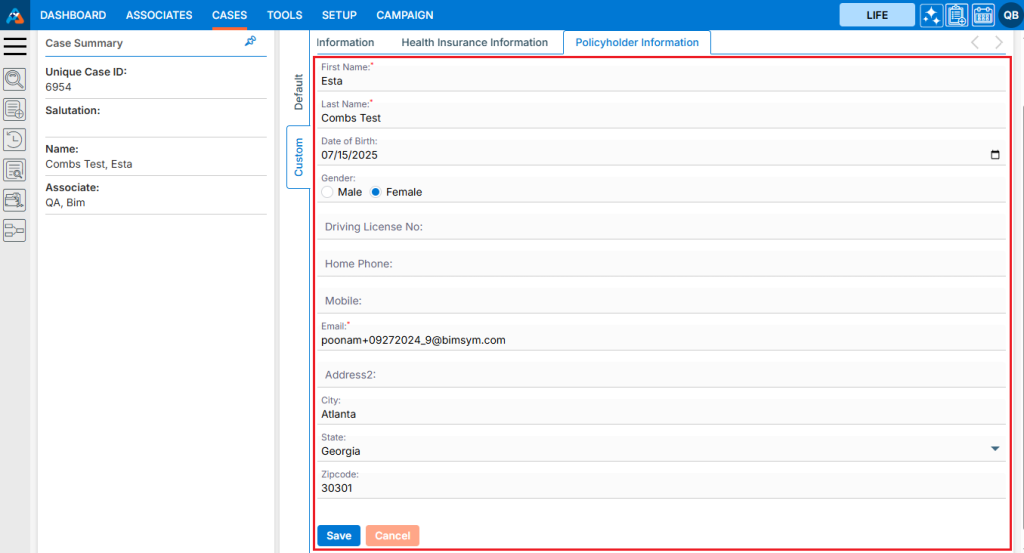
68. Go to Cases > Recent Case > Custom > Policyholder Information to view the newly created form in the member’s profile. The fields in this form will be editable, as we created the form with the ‘Edit’ option.

69. If the requirement is to view the form only, select ‘View’ from the Form For option while adding the form.
70. The form will be opened as a read-only type in member’s profile.
71. If the form is no more of use, the user can delete it with the help of delete icon. Click on ‘Delete’ icon to delete the form.
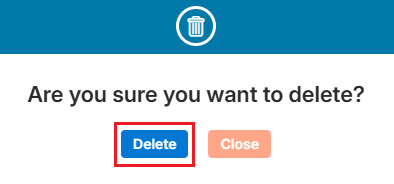
72. There will be a confirmation prompt asking – ‘Are you sure you want to delete?’ Select option ‘Delete’.
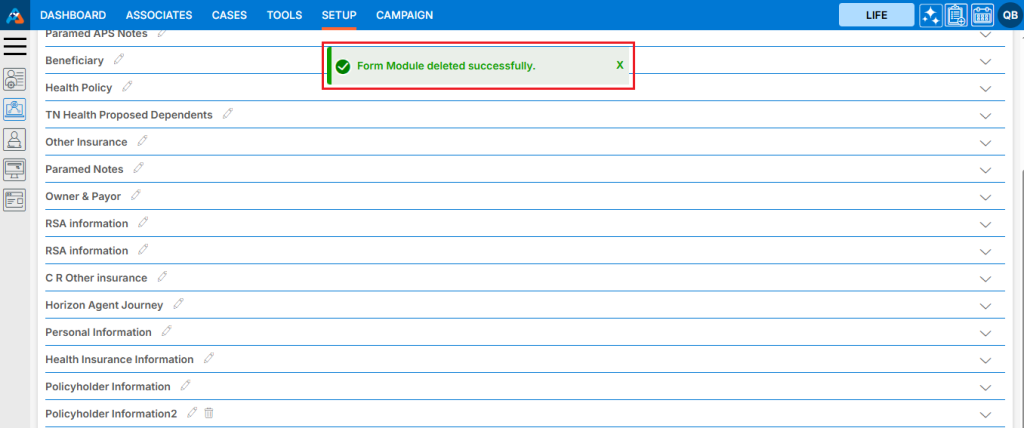
73. A confirmation message will appear saying, ‘Form Module deleted successfully.’, and the form will be removed from the list.