The Letter Template tool is used to create templates for quick letter sending.
The following are the steps for creating letter templates:
1. Navigate to the ‘TOOLS’ tab. The Tools tab will open with the ‘Template Creator’ tab displayed by default.  Click to Expand
2. The user will see the ‘Tools – Template Creator’ with four different tabs: Email, Letter, SMS, and WhatsApp.
3. The ‘Email’ tab opens by default in the Document Editor, displaying a list of existing email templates along with details.
4. Click on the ‘Letter’ tab. 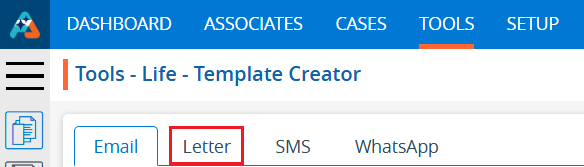 Click to Expand
5. By clicking on the ‘Letter’ tab, a new list will open and display a list of existing letter templates, with details including Template Name, Category, Usage, Created By, Created Date and Action.  Click to Expand
6. Click on the ‘Create Letter Template’ icon to create a new letter template.  Click to Expand
7. A pop-up window will open with fields for Template Name, Template Category, Subject, Usage (default selected as Public), Description and Content. 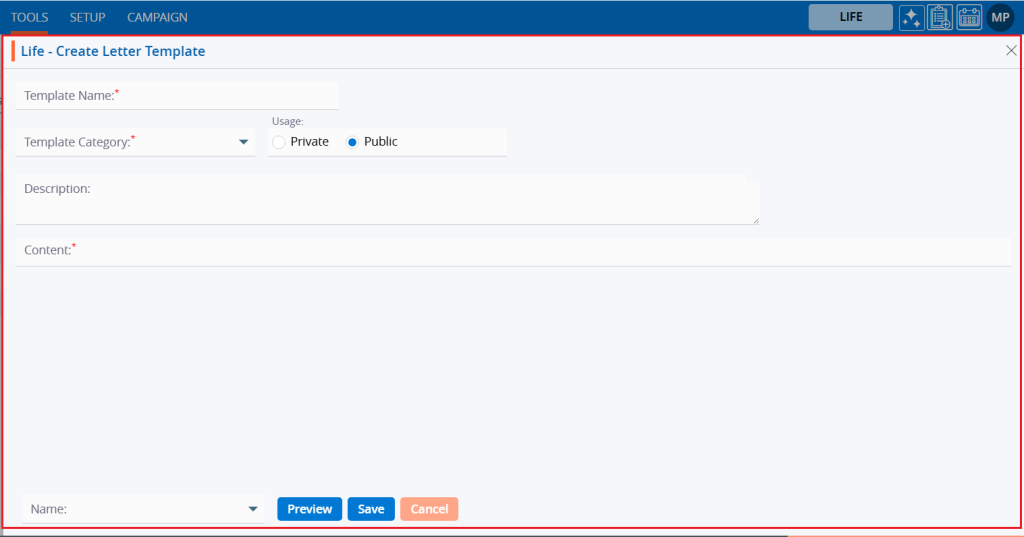 Click to Expand
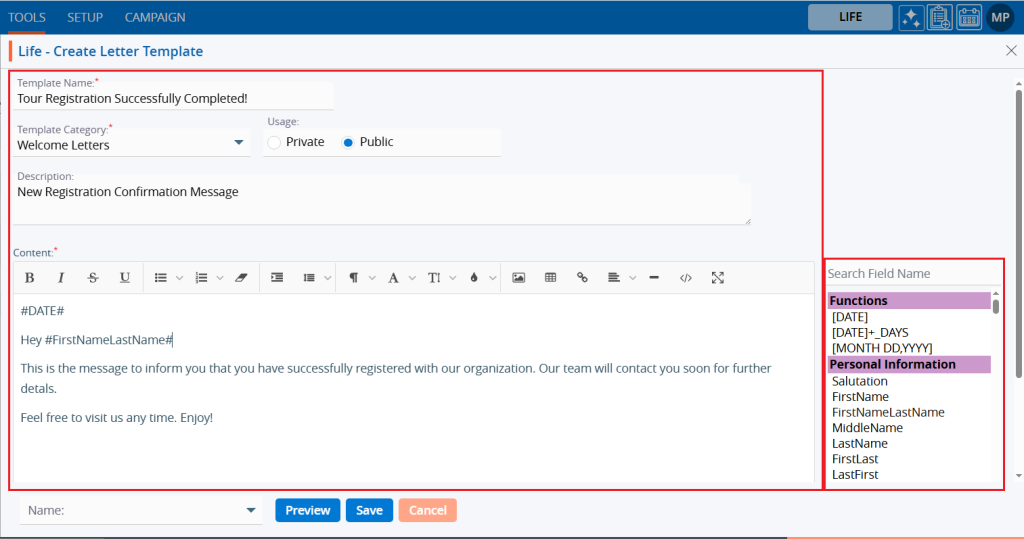
8. Fill in the fields to create an Letter template. Also, on the right-hand side, there is a list of fields that will fetch details for the message. Search for field names to use in the templates. Double-clicking on the field will add it to the content area. For example, users can include fields such as FirstNameLastName and Date. Click to Expand
9. At the bottom, there is a dropdown menu with the names of associates and three buttons: Preview, Save, and Cancel. 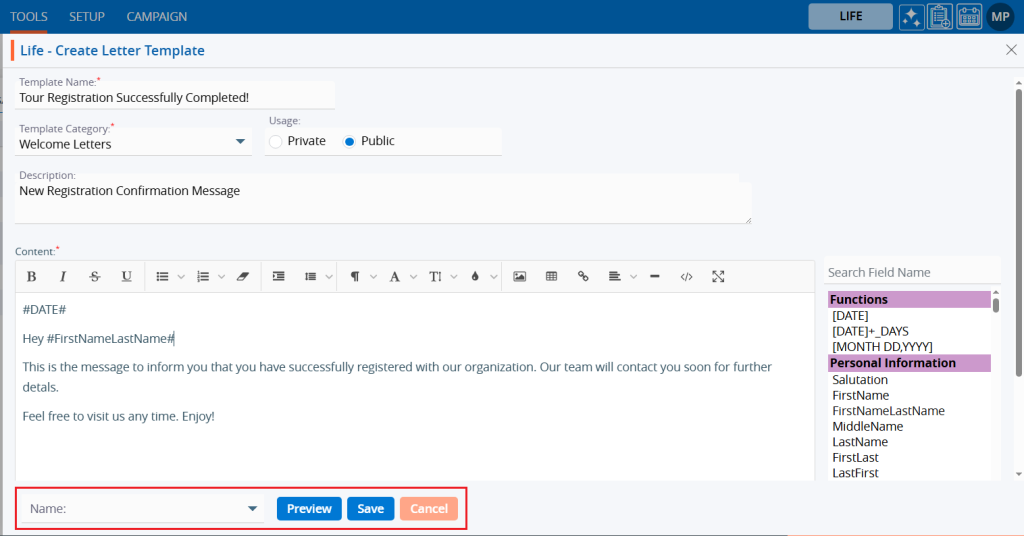 Click to Expand
10. Select an associate’s name from the dropdown menu. 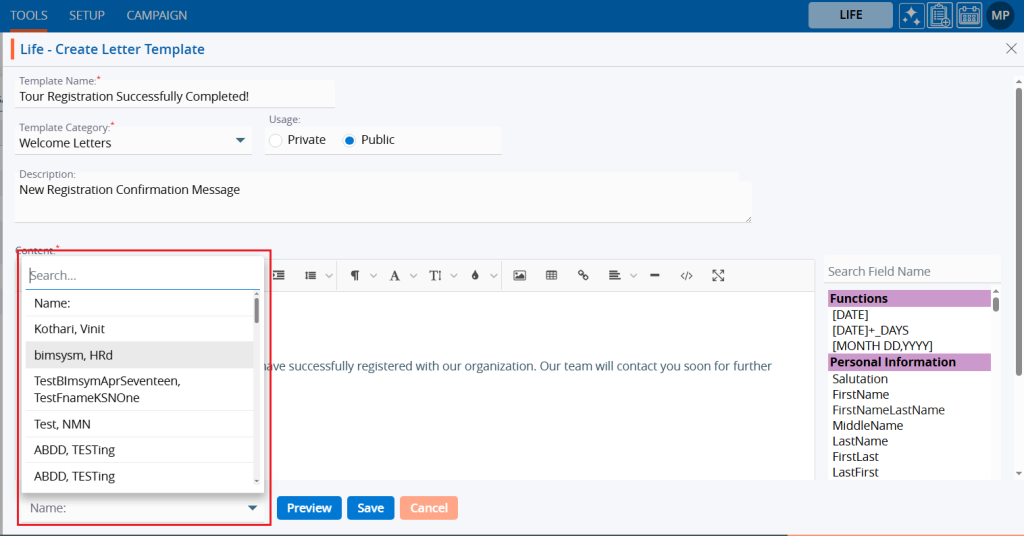 Click to Expand
11. Click on the ‘Preview’ button.  Click to Expand
12. A pop-up window will open, displaying the template details in preview mode. Click the ‘Cancel’ button to close it. 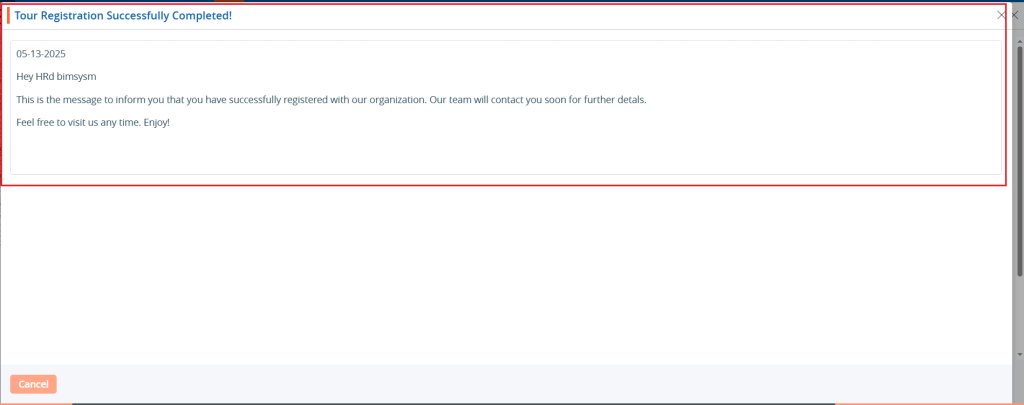 Click to Expand
13. Click the ‘Save’ button.  Click to Expand
14. A confirmation message will appear, and the user will find the newly created template in the list.  Click to Expand
15. Click the ‘Edit’ option to modify the created template.  Click to Expand
16. A pop-up window will open, allowing the user to update details of the template. 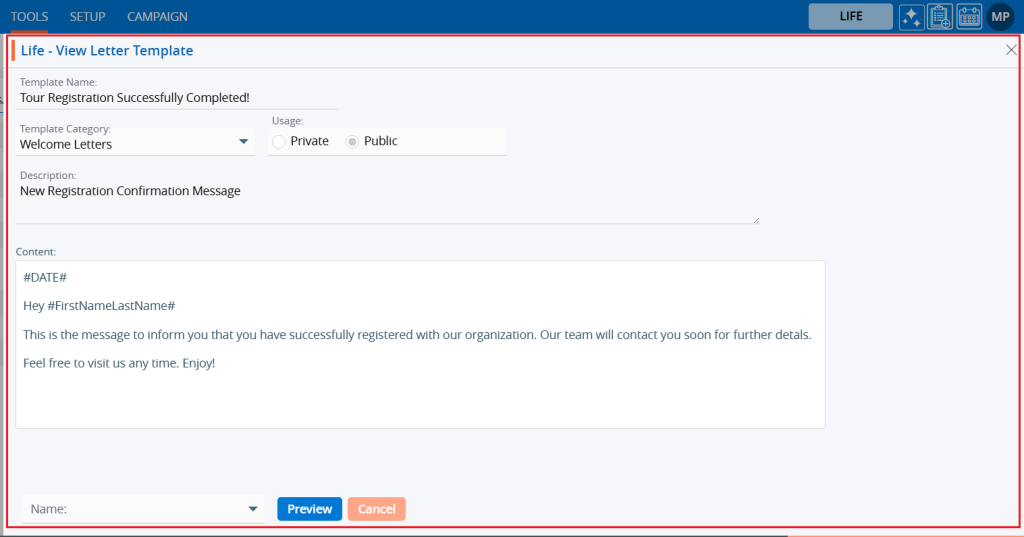 Click to Expand
17. Click the ‘Edit’ option to modify the created template.  Click to Expand
18. A pop-up window will open, allowing the user to update any details related to the template. 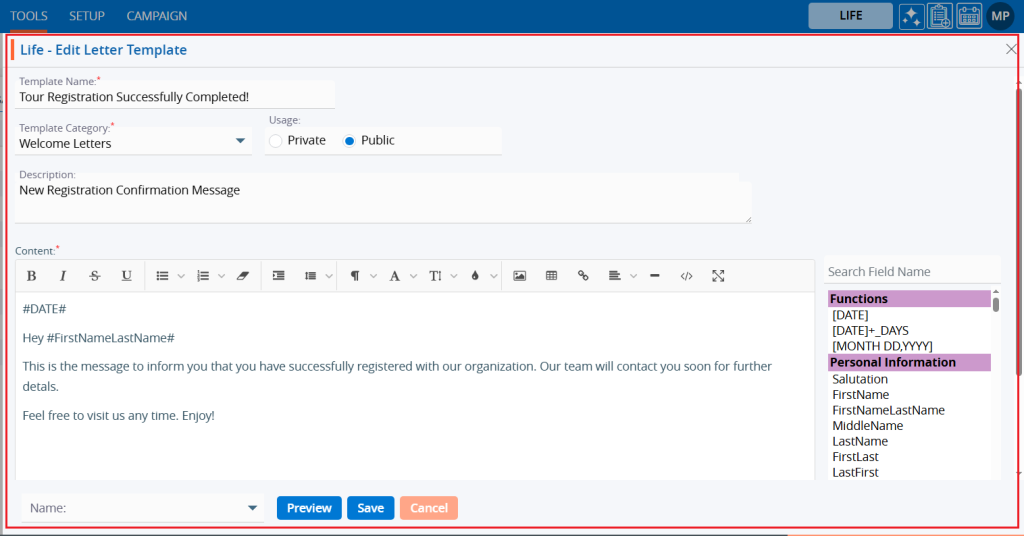 Click to Expand
19. Update details to edit the template. For example, we have added ‘Salutation’. Click on ‘Save’ button. 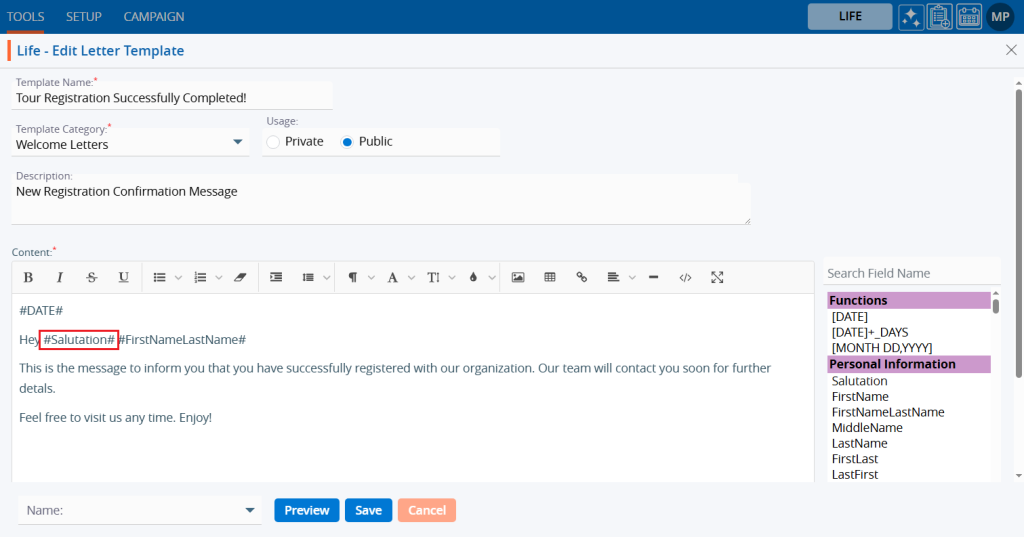 Click to Expand
20. A confirmation message will appear that the template has been updated, and the list will show the updated ‘Usage’ field value.  Click to Expand
21. Select the ‘Delete’ option to remove the template from the list if it is no longer needed.  Click to Expand
22. Select the ‘Delete’ option in the confirmation message to proceed with removing the template from the list. 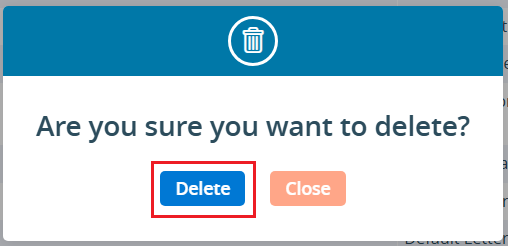 Click to Expand
23. After clicking on the Delete button, a confirmation message will appear, indicating that the template has been deleted and is no longer available in the list.  Click to Expand