The user can manage and update all company details within the system, including contact information, address, and any other data, ensuring that the information remains accurate and up-to-date for effective communication through the System Setup – Company page.
Company Setup
- Sign in to AgentFront CRM.
- From the top menu, choose SETUP.
- In the left-side panel, select System Setup.
- Under System Setup, click Company.
- Note: The user can also access this page by typing Company in the Enter Text to Search bar.
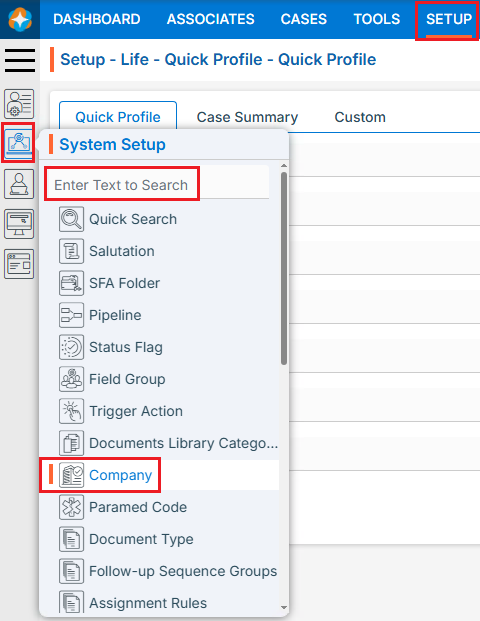
- Note: The user can also access this page by typing Company in the Enter Text to Search bar.
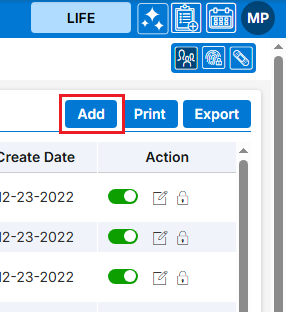
- The Company page will open, displaying existing Companies.
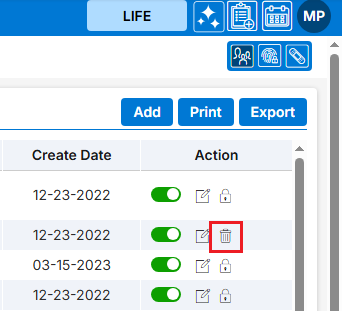
- There is an Add, Print and Export buttons above the Action Column on the right panel.
- There are options to Enable, Edit () and Delete (
 ) the existing Company under the Action column.
- Note: If any company is used or implemented, the deleting options will be locked for that company, meaning it cannot be deleted.

- Note: If any company is used or implemented, the deleting options will be locked for that company, meaning it cannot be deleted.
Add new Company
- Click on Add button to add new Company.
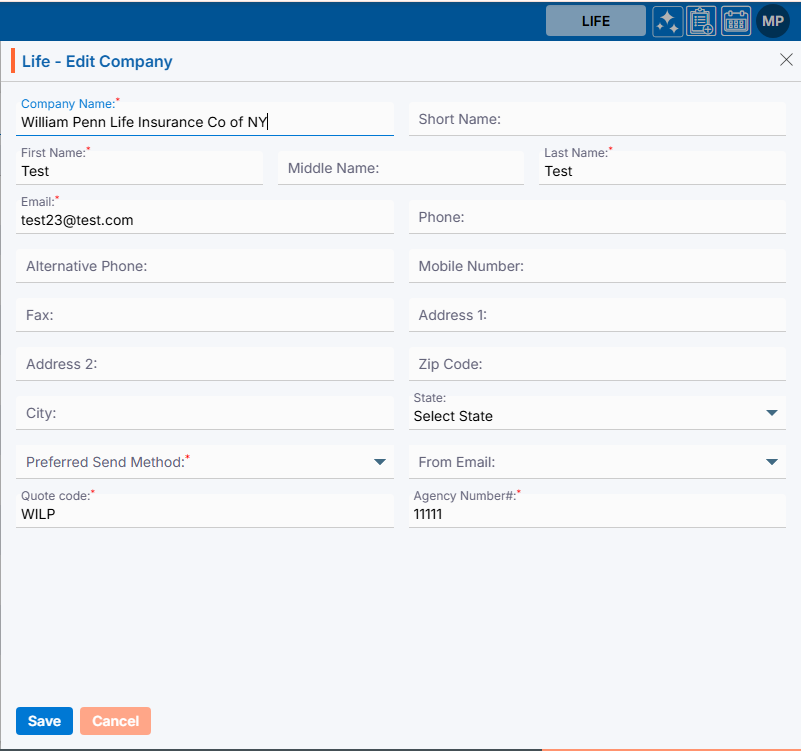
- The Add Company window will open, allowing the user to enter the required details to create a new Company.
- Company Name: Enter the clear, descriptive Company Name. This is what users will see on the Company Name. This is a mandatory field. Maximum length of this field is 100 characters.
- Short Name: Optional field for the company. This is not a mandatory field. Maximum length of this field is 100 characters.
- First Name: Enter the first name of the owner of the company. This is a mandatory field. Maximum length of this field is 30 characters.
- Middle Name: Enter the middle name of the owner of the company. This is a not mandatory field. Maximum length of this field is 30 characters
- Last Name: Enter the last name of the owner of the company. This is a mandatory field. Maximum length of this field is 30 characters.
- Email: Enter the email of the company. This is a mandatory field. Maximum length of this field is 50 characters.
- Phone: Enter the phone of the company. This is not a mandatory field.
- Alternative Phone: Enter alternative phone of the company. This is not a mandatory field
- Mobile Number: Enter Mobile Number of the company. This is not a mandatory field.
- Fax: Enter Fax of the company. This is not a mandatory field.
- Address1: Enter Address1 of the company. This is not a mandatory field.
- Address2: Enter Address2 of the company. This is not a mandatory field.
- Zip Code: Enter Zip Code of the company. This is not a mandatory field.
- City: Enter City of the company. This is not a mandatory field.
- State: Select State from the drop-down. This is not a mandatory field.
- Select Send Method: Select send method from the drop-down. This is a mandatory field.
- From Email: Enter from email. This is not a mandatory field.
- Quote Code: Enter Quote Code. This is a mandatory field.Agency Number: Enter Agency Number of the company. This is a mandatory field.
- Click on Save.
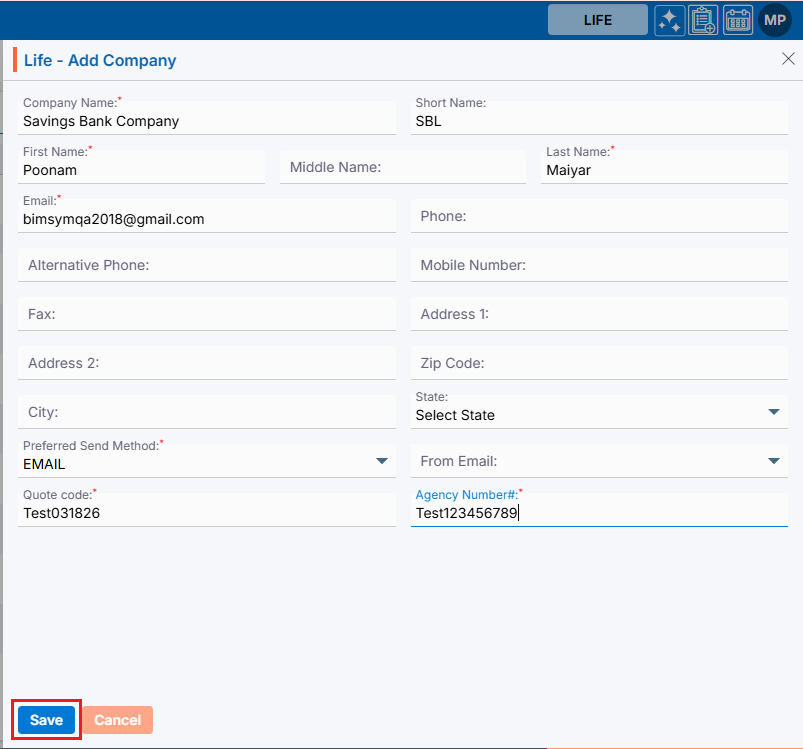
- The Company is now listed and ready for use.

Print Company
- Click the ‘Print’ button at the top right of the list to print the Company list.
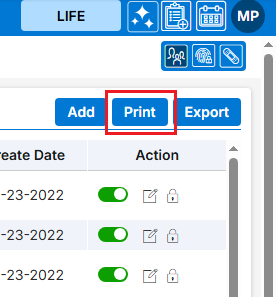
- Clicking on ‘Print’ will open a new page and allow the user to print the Company listing.

Export Company
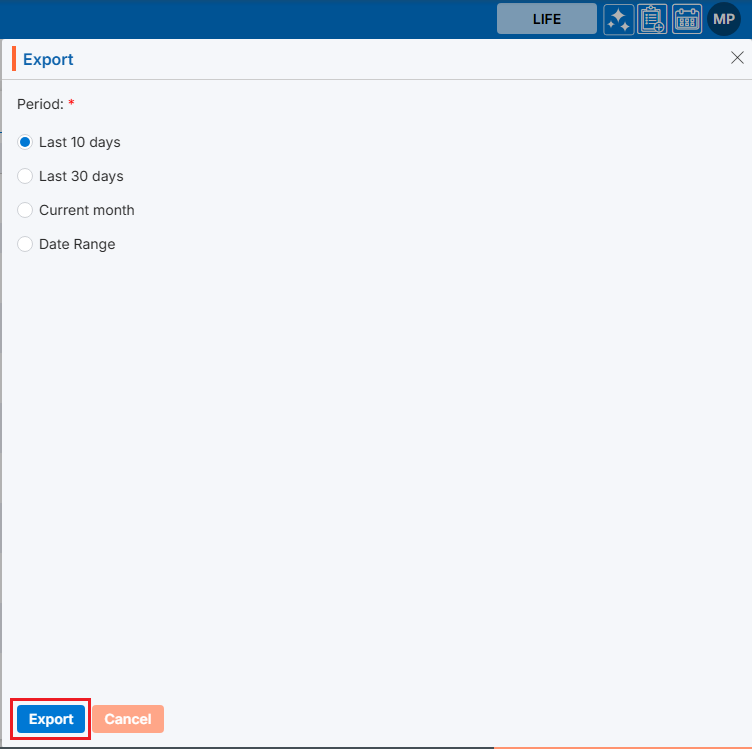
- Click the ‘Export’ button at the top right of the list to export the Company listing.
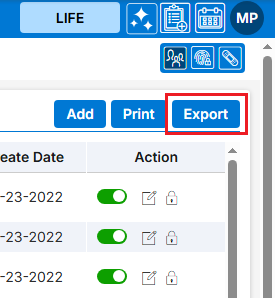
- Clicking on ‘Export‘ will open a new page and allow users to export the Company listing for the selected period
View Company in Cases tab
- Navigate to the Cases tab from the top menu.
- Cases List – All Cases page will open by default.
- Open any case from all cases lists.

- The dashboard for the selected case will open by default.
- Click the ‘Information’ tab from the dashboard.
- Navigate to the ‘Default’ tab under the ‘Life Policy’ tab to view the drop-down of available Company.
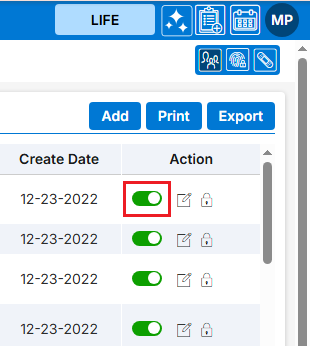
Enable/Disable Company
- To enable the existing Company from the available list, click on Enable icon from the Action Column for the Company you want to Enable/Disable.
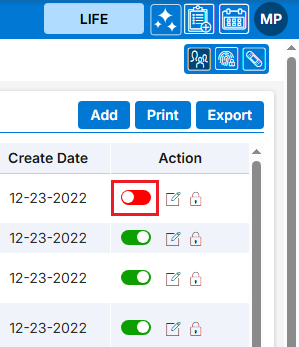
- It will ask for confirmation popup, click on Enable button to enable Company otherwise click on Close button.
- Color of the icon will be changed from red to green.
Update Company
- To update the existing Company from the available list, click on Edit (
 ) icon from the Action Column for the Company you want to edit/change.
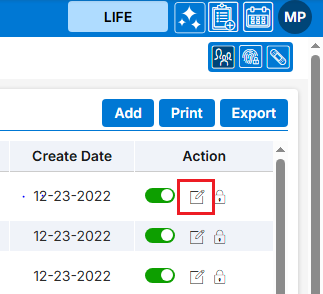
- Clicking the Edit () icon will open the selected Company in edit mode with title Edit Company.
- Update the required details and click Save.
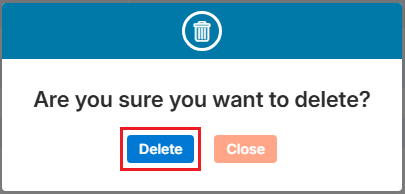
Delete Company
- To delete the existing Company from the available list, click on Delete (
 ) icon from the Action Column for the Company you want to delete.
- Note: Deletion is restricted if the Company is referenced elsewhere, until those references are removed.
- Note: Deletion is restricted if the Company is referenced elsewhere, until those references are removed.
- It will ask for confirmation popup, click on Deleted button to delete Company otherwise click on Close button.