The Filter feature is used to create a list of specific data. Users can set a maximum of five filters by selecting from the available fields and applying them to the listing as needed.
The following are steps to apply customize filter for Cases listing:
1. Navigate to the ‘CASES’ tab and click on the ‘Filter’ option.

2. Upon clicking ‘Filter’, a pop-up page will open to create a new filter.
a. Existing filters will be displayed under the ‘Saved Filters’ listing, if any are available.

3. Click on ‘Add Filter’ to create a new filter.
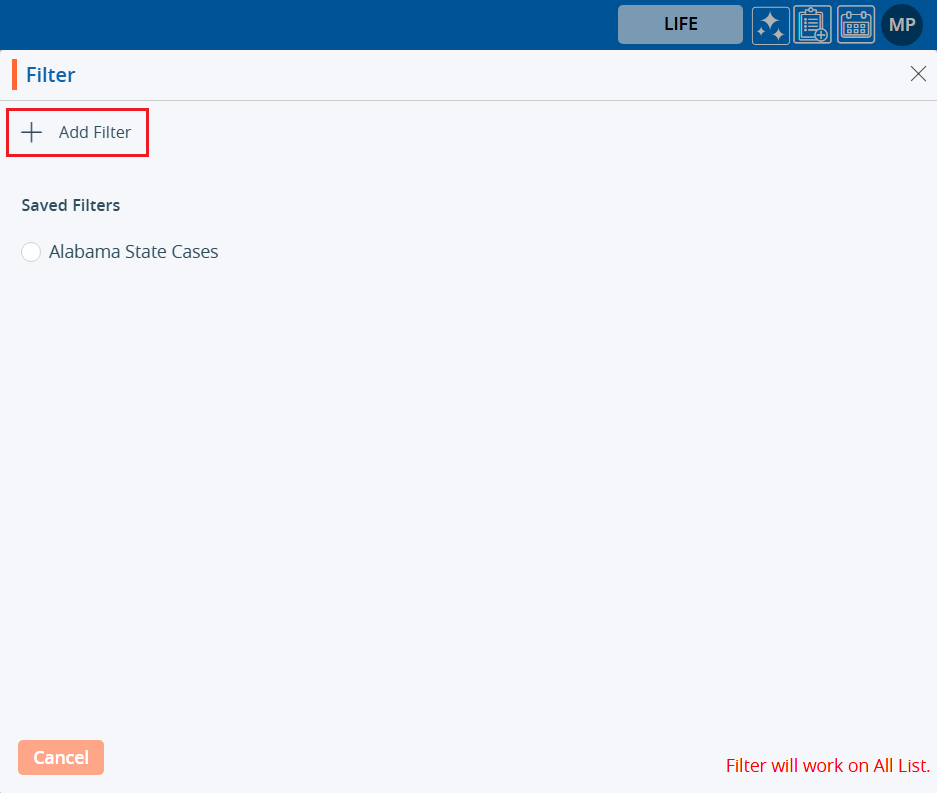
The following page will open:
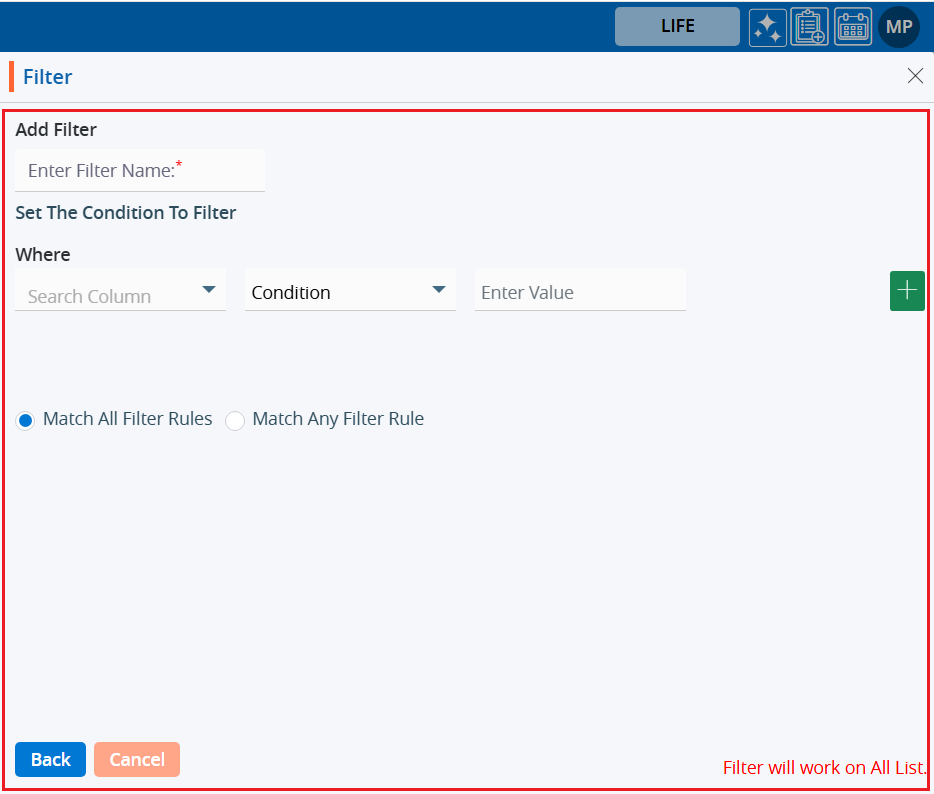
4. Enter a filter name.

5. Select the field from the dropdown where the filter should be applied.

6. Apply the condition to set the filter.

7. Enter the value to set for the filter.

8. Select either the ‘Match All Filter Rules’ or ‘Match Any Filter Rule’ option according to your requirements.
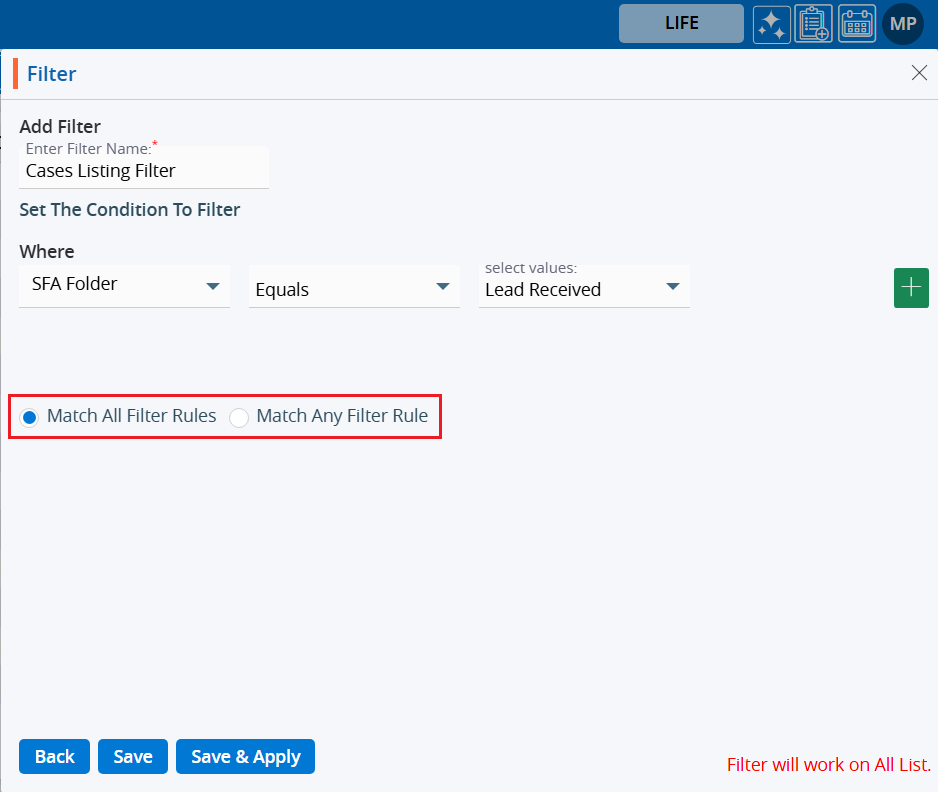
There are three options:
Back
Save
Save&Apply
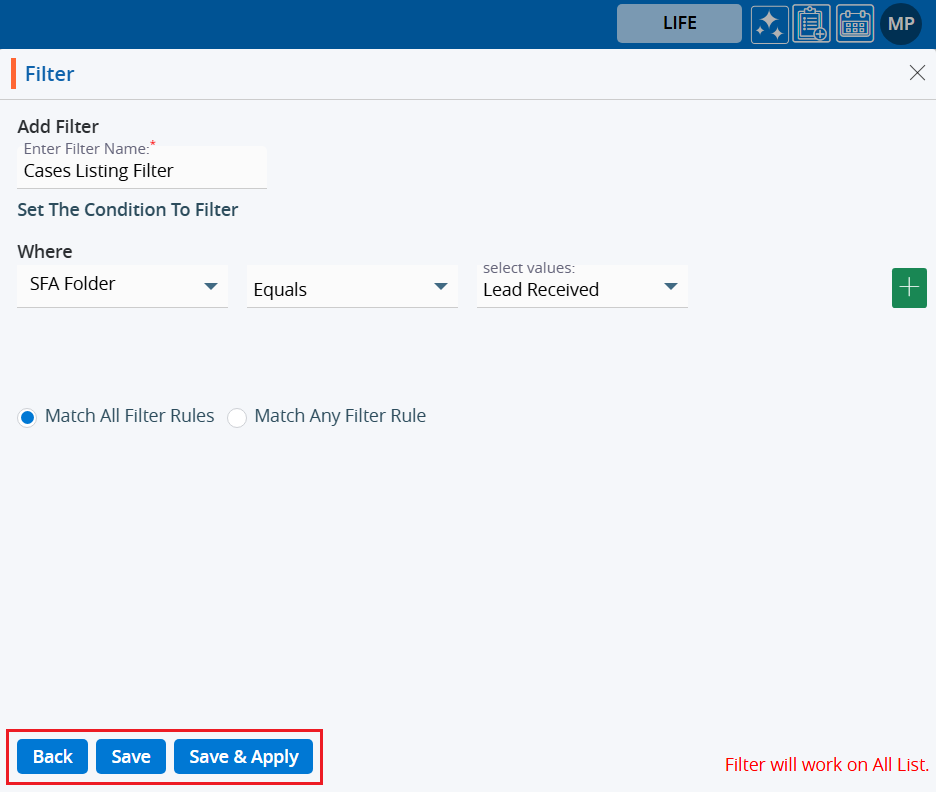
9. By clicking on ‘Back’, you will be redirected to the first page of the filter.

10. By clicking on ‘Save’, the filter will be saved but not be applied immediately. It will display in the filter listing.

11. The system will generate a confirmation message that the filter has been created.

12. By clicking on ‘Save & Apply’, the filter will be saved under the filter listing and applied to the Cases list.

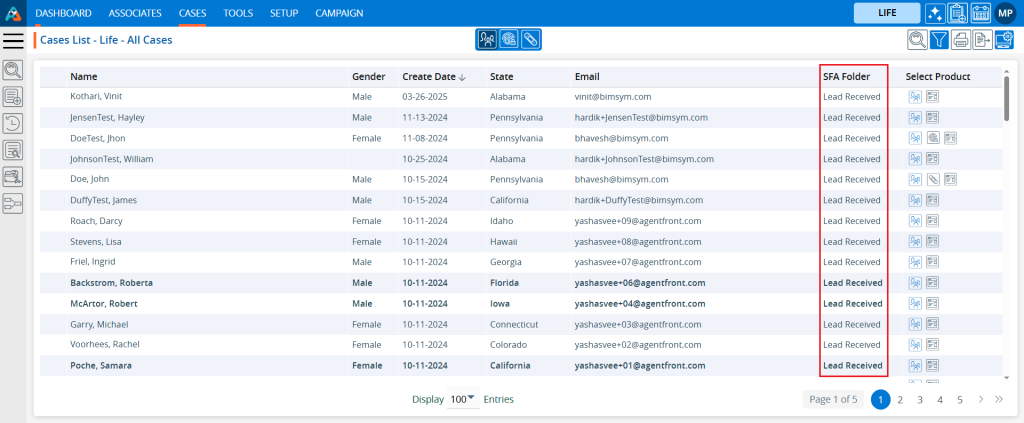
13. The system will generate a confirmation message, and the filter will be applied to the Cases list.

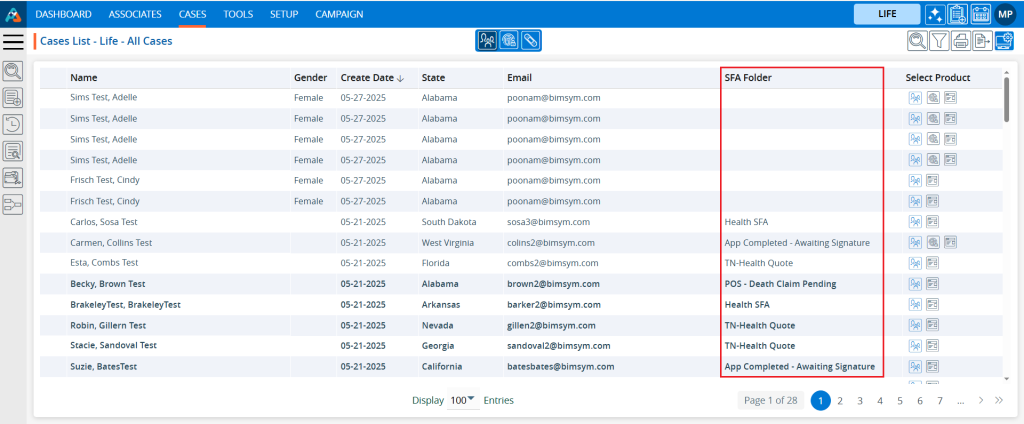
Below is the screen before the filter is applied.
Below is the screen after the filter has been applied.
14. Hovering over the filter icon will display the applied filter name.

15. User can view the filter criteria.
a. Click on the filter again and hover the mouse over the view icon.
b. Click on the ‘View Filter’ icon.

16. Filter criteria will be displayed.
a. Only the ‘Back’ button will be displayed.
b. The selection of fields and criteria will be greyed out and not editable.

17. User can edit the filter.
a. Click on the filter again and hover the mouse over the edit icon.
b. Click on the ‘Edit Filter’ icon.

18. The filter window will open with the existing criteria, allowing the user to modify the filter.

19. Users can apply multiple filter criteria simultaneously.
a. Apply additional filter criteria and click on ‘Save & Apply’.

20. An updated filter will be applied to the Cases listing.

21. User can delete the filter.
a. Click on the filter again and hover the mouse over the delete icon.
b. Click on ‘Delete Filter’.

22. The system will ask for confirmation.
a. Click on ‘Delete’.

23. The system will generate a confirmation message about the deletion of the filter.

24. Users can verify whether the filter has been deleted or not.
a. Click on the filter once more.
b. Check the listing; the deleted filter will no longer be available.

 - Knowledge Base