The ‘Manage Subscription for Email’ option allows users to control their email preferences, including subscribing to or unsubscribing from email notifications. This functionality is primarily used to manage email addresses on the unsubscribe list, ensuring that users no longer receive unwanted emails from the selected categories.
The following are the steps to manage the Email Subscriptions:
1. Navigate to the ‘TOOLS’ tab. Click on ‘Manage Subscriptions’ from the left side panel.

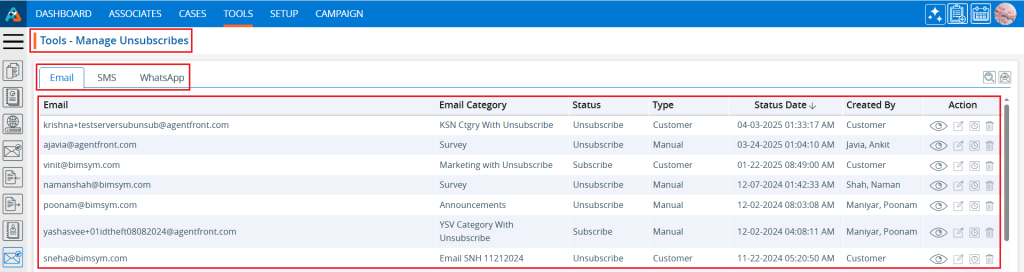
2. The user will be directed to the ‘Manage Subscriptions’ page, which includes three tabs: Email, SMS, and WhatsApp.
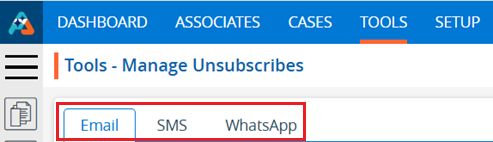
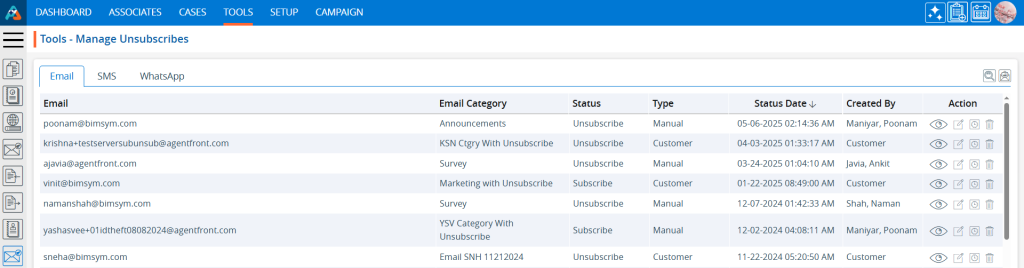
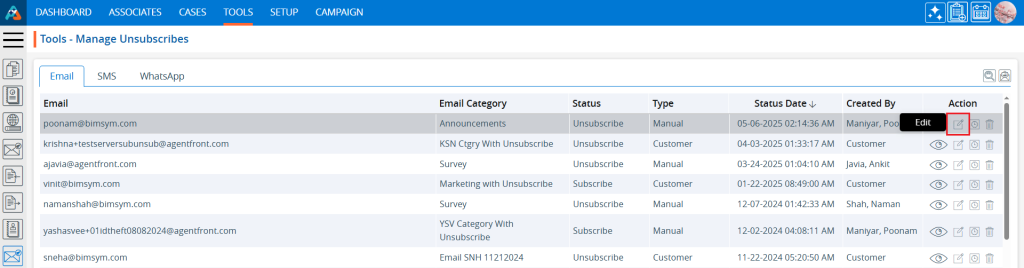
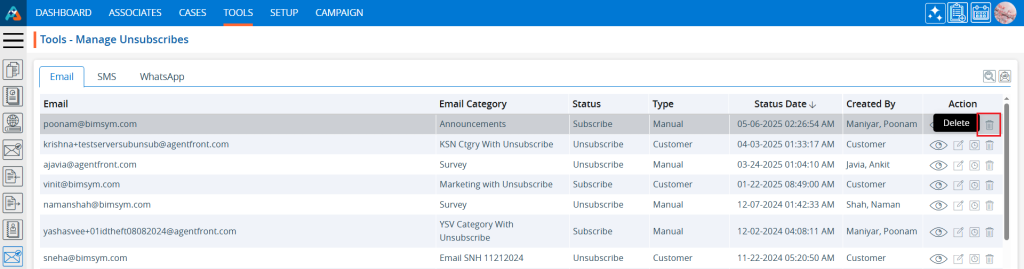
3. By default, the Manage Subscriptions page will open with the Email tab selected, displaying a list of existing Email Subscriptions, along with columns: Email, Email Category, Status, Type, Status Date, Created By, and Action.
4. There are four options in ‘Action’ for each subscription:
a. View
b. Edit
c. History
d. Delete
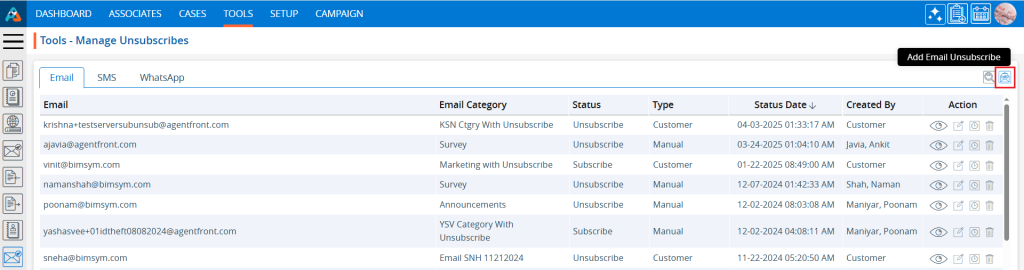
5. Click on the ‘Add Email Unsubscribe’ icon in the top-right corner to add a new email address to the subscription list.
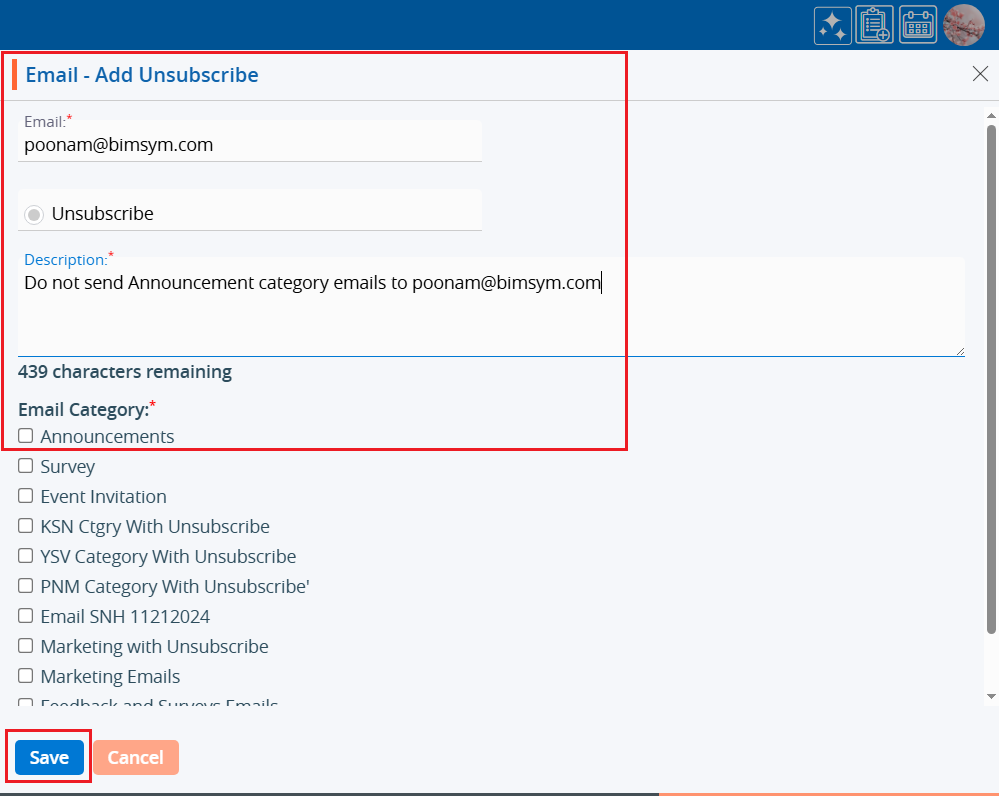
6. A pop-up window will open with fields for Email, Unsubscribe, Description, Email Category, and options Save and Cancel at the bottom.
7. Fields marked with an asterisk (*) are mandatory.
8. The user can enter up to 500 characters in the Description field.
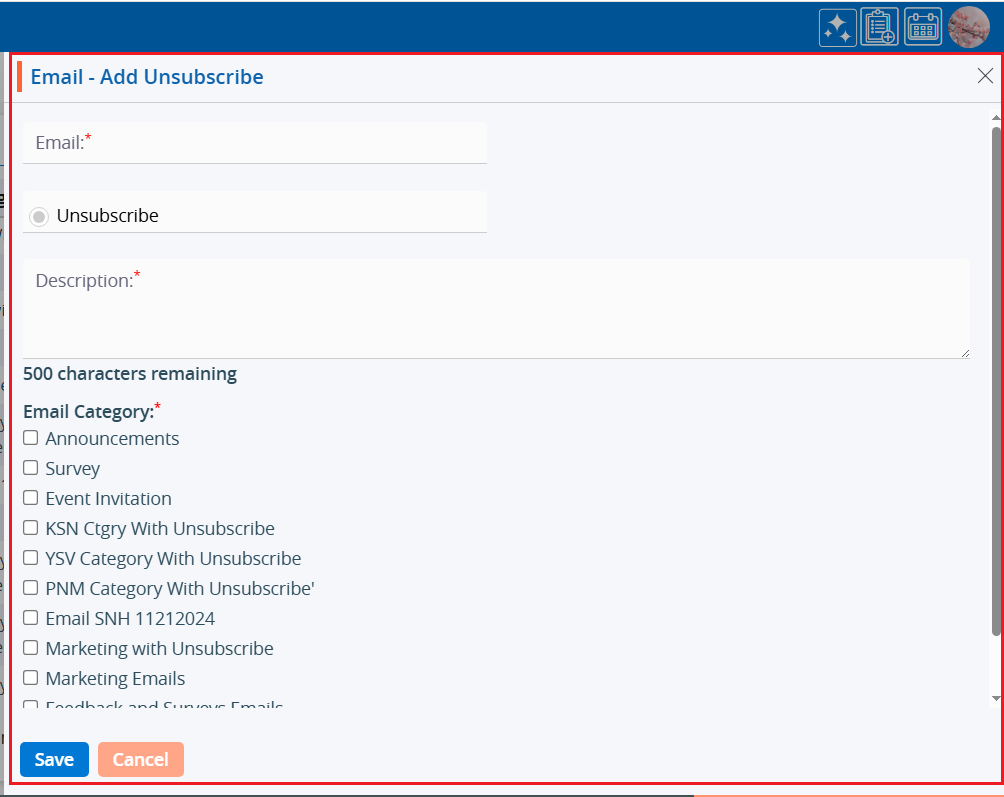
9. Fill in the fields and click the ‘Save’ button to add the required email to the unsubscribe list.
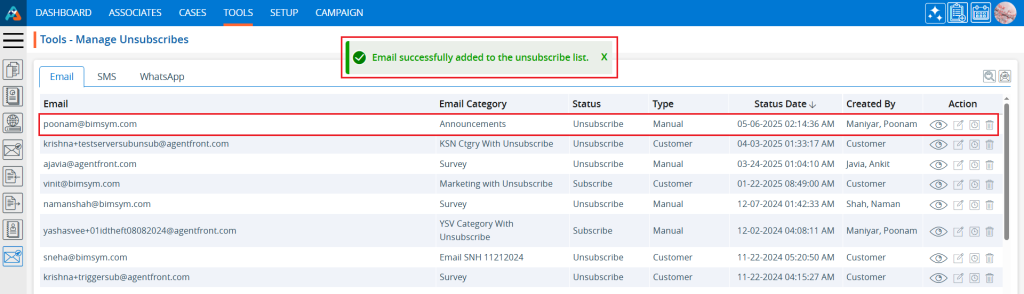
10. A confirmation message will appear and the newly added email address and its details will appear in the list.
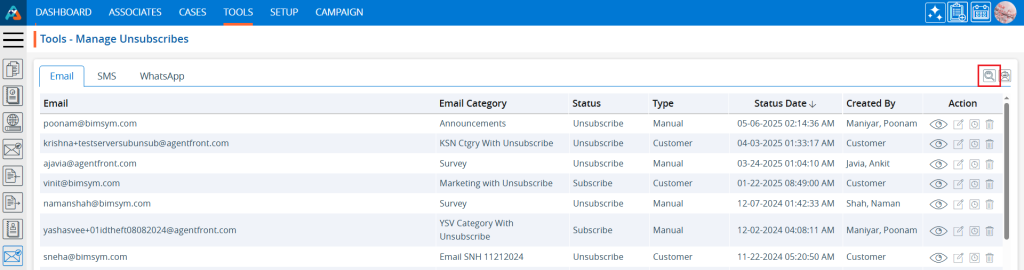
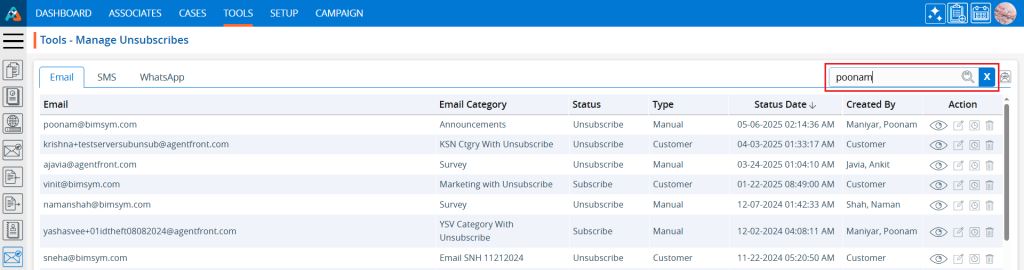
11. The user can find the subscription using the search functionality. Click on the second-to-last icon in the top-right corner.
12. Click the search icon to expand the search field. Enter the keyword and click the search icon again. For example, we are searching for the word ‘poonam’, which is in the email address.
• The user can use Email Address, Email Category, Status, and Type as keywords.
• A minimum of 3 characters is required to perform a search.
13. The search results will be displayed. Click the ‘Cancel’ button to restore the page to its original view.
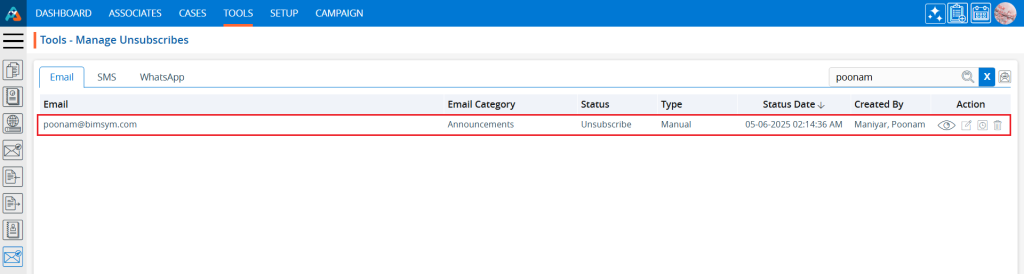
14. The page will return to its default state.
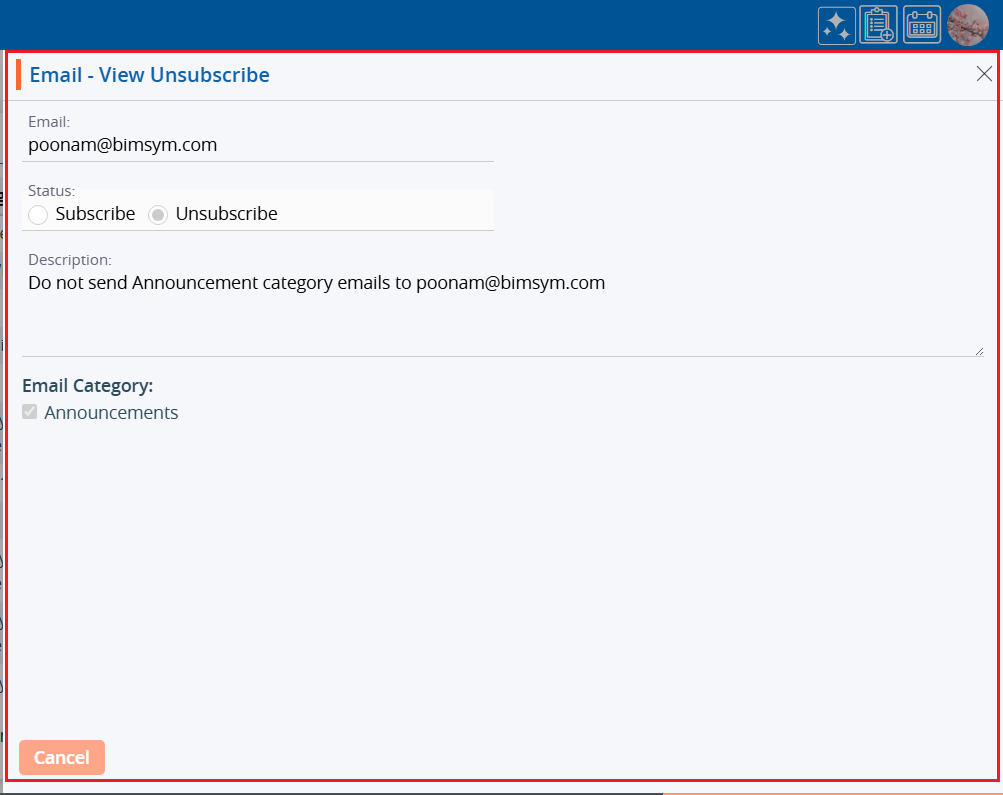
15. Click on the ‘View’ icon, in the first option in the Action column on the right side of the Subscription List, highlighted by a red box, to view the details of the unsubscribed email addresses.
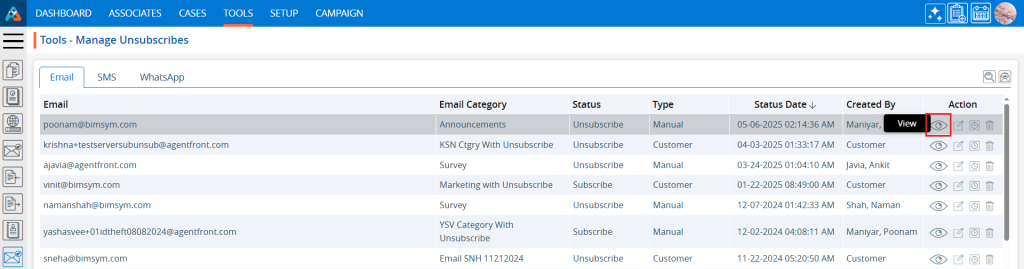
16. A pop-up window will appear where all the fields are read-only, and the user can view them without making any changes. After viewing the details, click the ‘Cancel’ button to close the pop-up.
17. Click on the ‘Edit’ icon, the second option in the Action column on the right side of the Subscription List, highlighted by a red box, to modify the unsubscribed details.
18. A pop-up window will open, allowing the user to update the status or Description of the unsubscribed email.
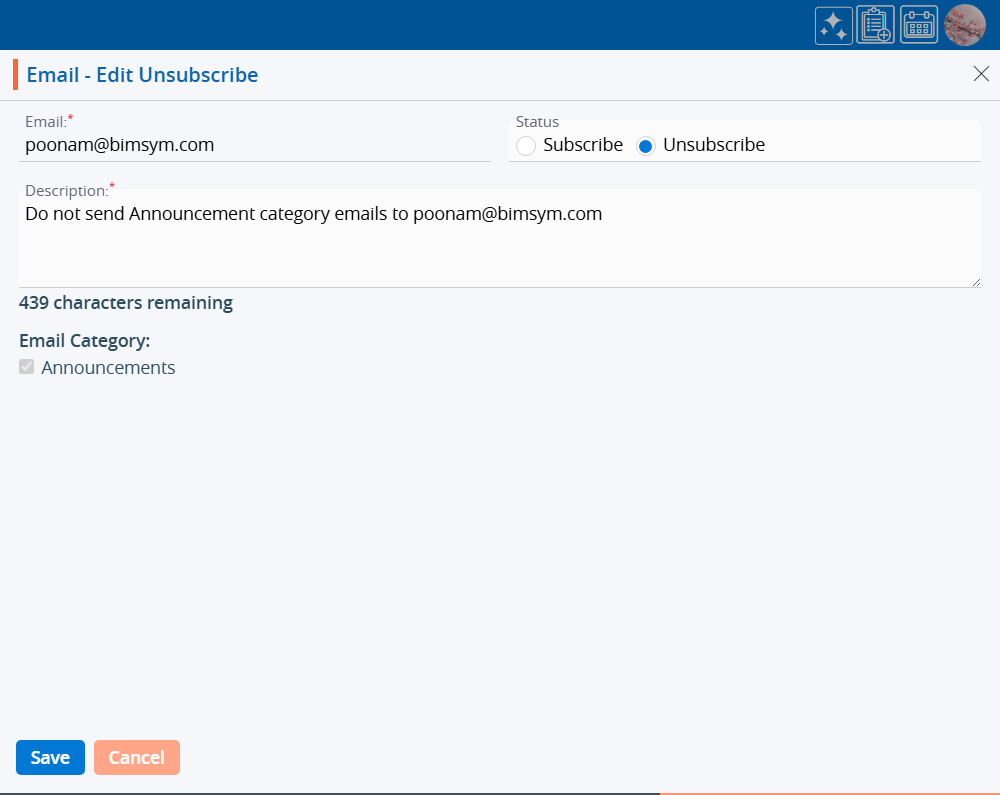
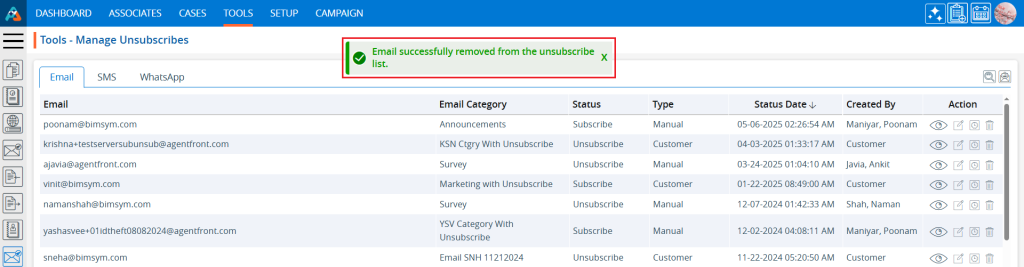
19. Update the details as needed. For example, we updated the status from ‘Unsubscribe’ to ‘Subscribe’. After making the changes, click the ‘Save’ button.
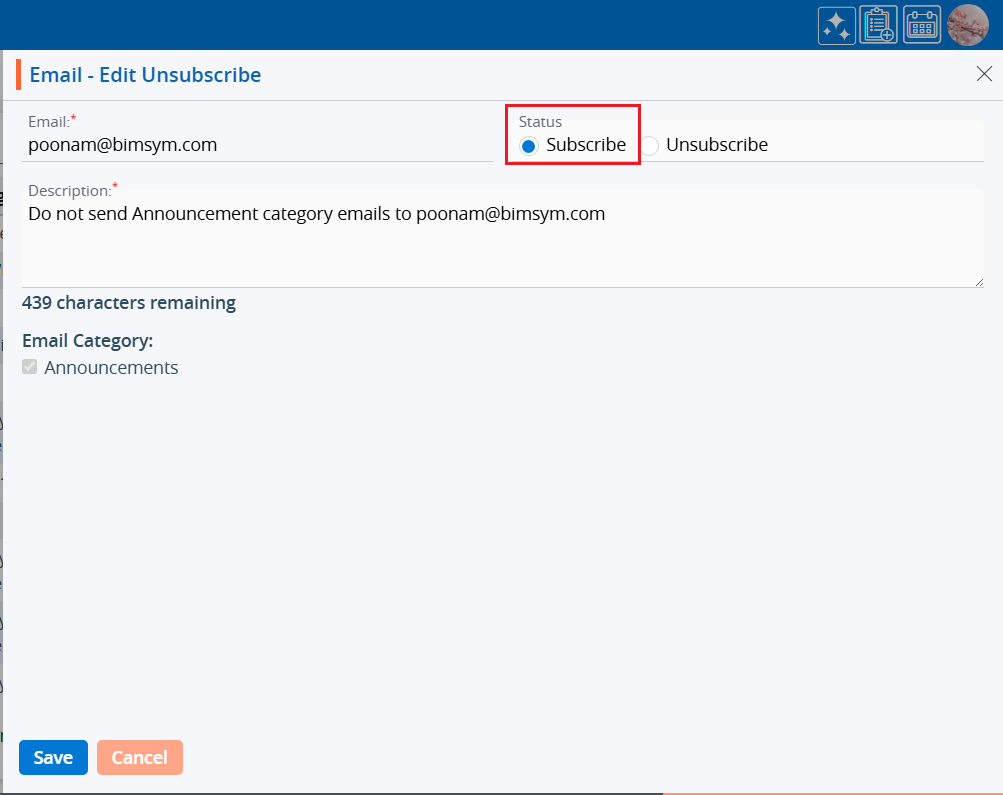
20. A confirmation message will appear and the email has been removed from the unsubscribed list.
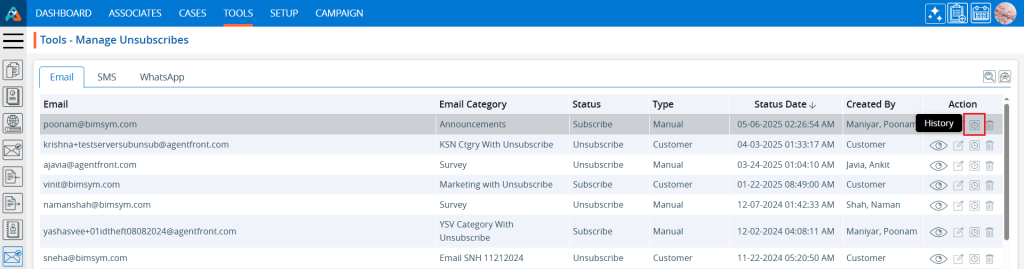
21. Click on the ‘History’ icon, the third option in the Action column on the right side of the Subscription List, highlighted by a red box, to view the history of the subscription.
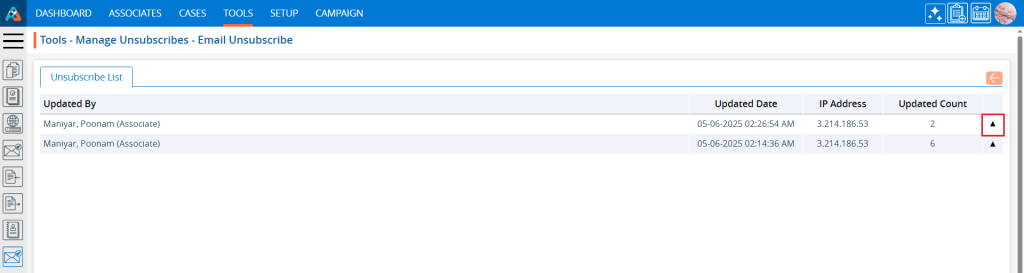
22. A new page will open with the history of the Unsubscribe List, showing the Updated By, Updated Date, IP Address, and Updated Count. Click the drop-down on the right side of the Unsubscribe List, highlighted by a red box, to view the detailed history.
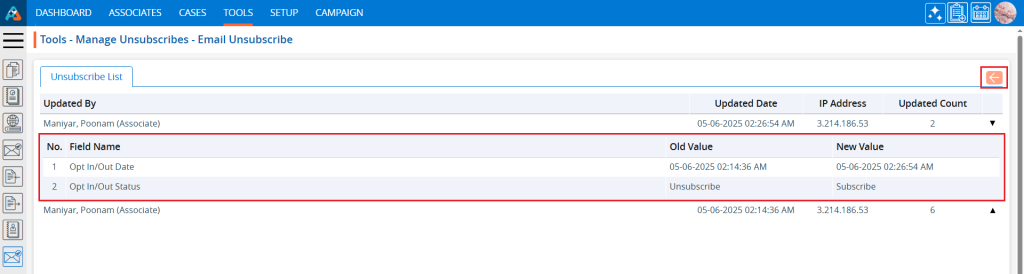
23. The detailed history will display fields such as No., Field Name, Old Value, and New Value. Click the back button on the right side at the top, highlighted by a red box, to return to the Manage Subscription page.
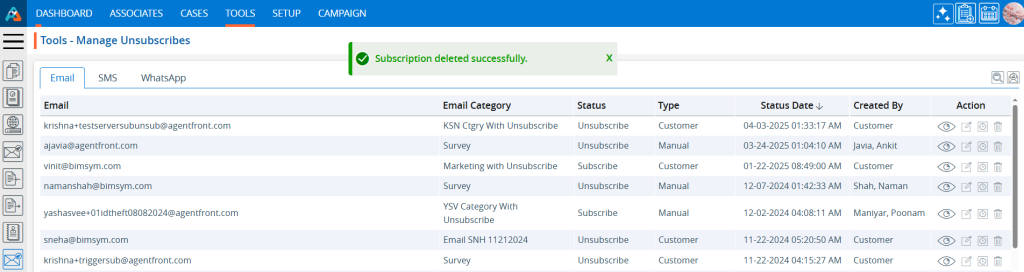
24. Click the ‘Delete’ icon, the last option in the Action column on the right side of the Subscription List, highlighted by a red box, to remove the subscription from the list if it is no longer needed.
25. Click the ‘Delete’ option in the confirmation message to proceed with removing the subscription from the list.
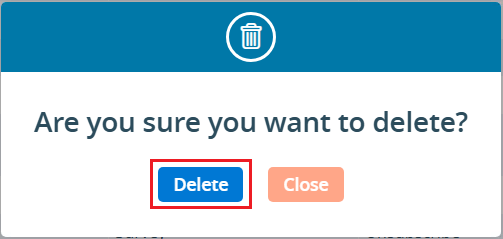
26. A confirmation message will appear and the subscription is no longer available on the list.