WhatsApp – The WhatsApp template creator streamlines and accelerates the process of sending WhatsApp messages using pre-designed templates. These templates can be easily accessed to send WhatsApp messages through the system.
The following are the steps for managing WhatsApp message template:
1. Navigate to the ‘TOOLS’ tab.

2. The Tools tab will open, displaying the ‘Tools – Life – Template Creator’ with four tabs: Email, Letter, SMS, and WhatsApp.

3. Click on the ‘WhatsApp’ tab, which will display a list of existing WhatsApp templates along with details such as Template Name, Category, Template ID, Language, Template Type, Approval Status, Usage, Created By, Create Date and Action.

4. Click on the ‘Create WhatsApp Template’ icon to begin creating a new WhatsApp template.

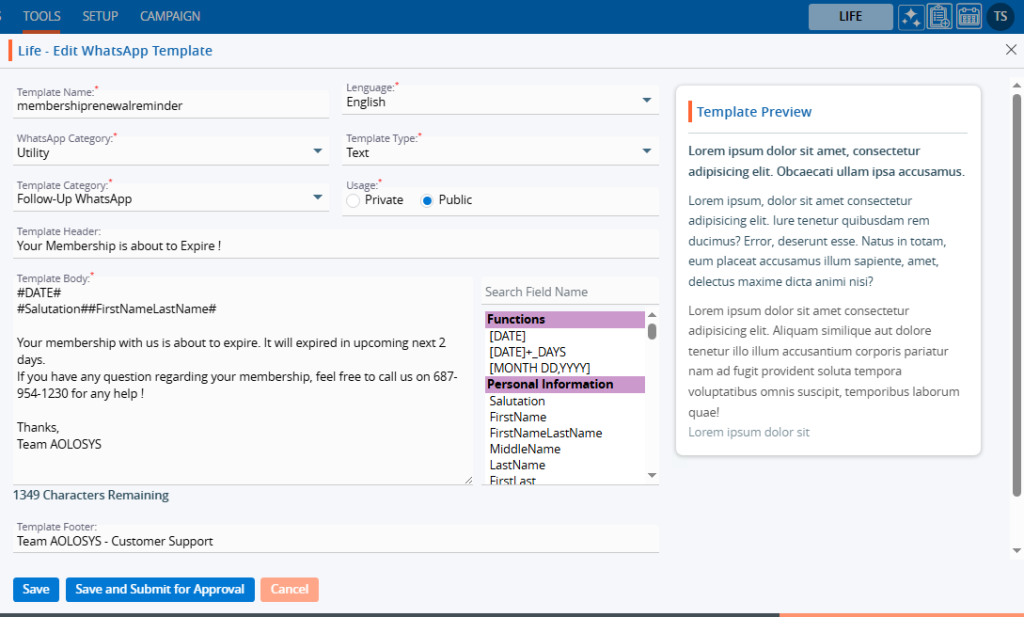
5. A pop-up window will appear with fields for Template Name, Language, WhatsApp Category, Template Type, Template Category, Usage (defaulted to ‘Public’), Template Header, Template Body and Template Footer. At the bottom, there will be options to Save, Save And Submit for Approval, and Cancel.
6. Fields marked with an asterisk (*) are mandatory.
7. The length of the Template Body is 1600 characters.
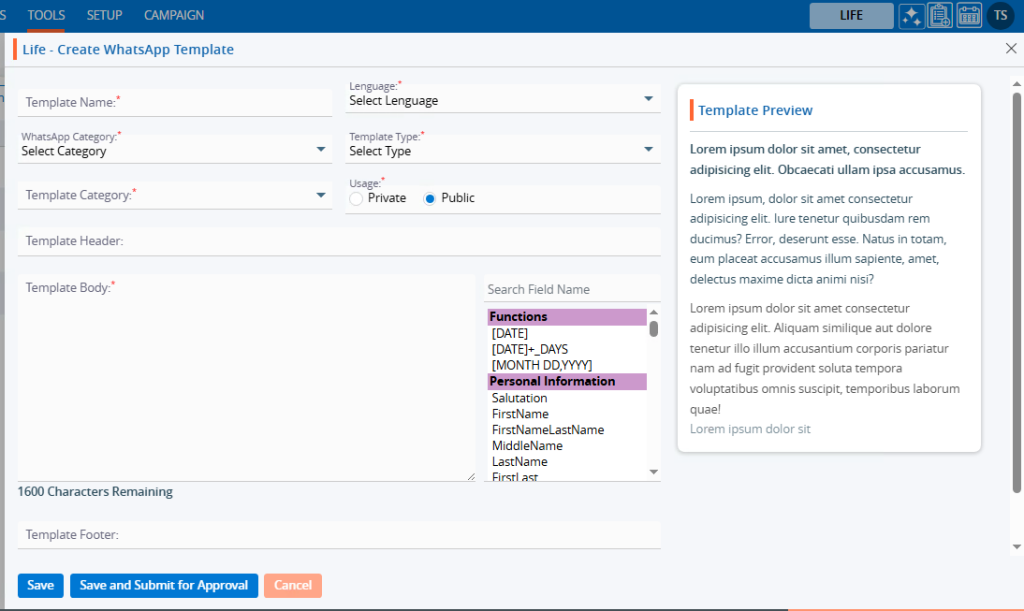
8. Fill in the fields.
9. On the right-hand side, there is a list of fields that will fetch details for the selected user.
10. Users can click on fields or search from the list to use in the template.
11. Double-clicking on the selected field will add them to the content area.
For example, users can include fields such as Date, Salutation, and FirstNameLastName.
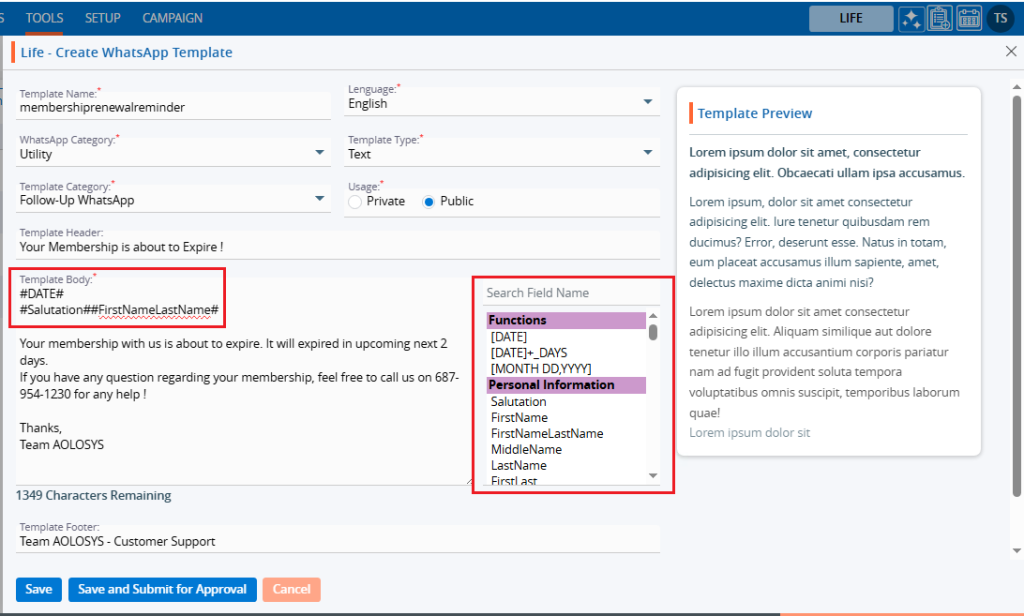
12. Click the ‘Save’ button to save the template.
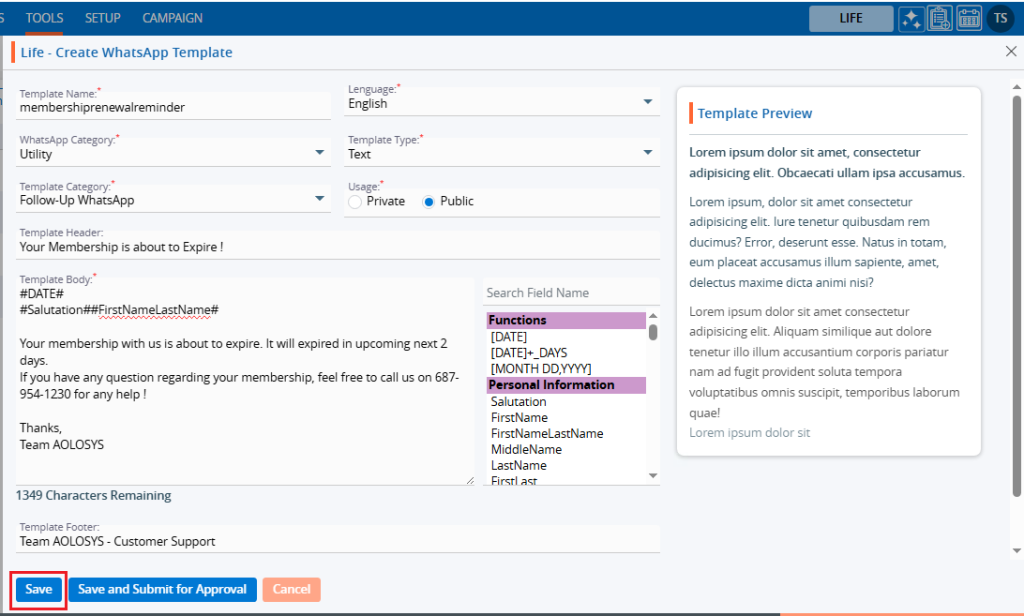
13. A confirmation message will appear once the template is created, and the user will find the newly created template and its details in the list.

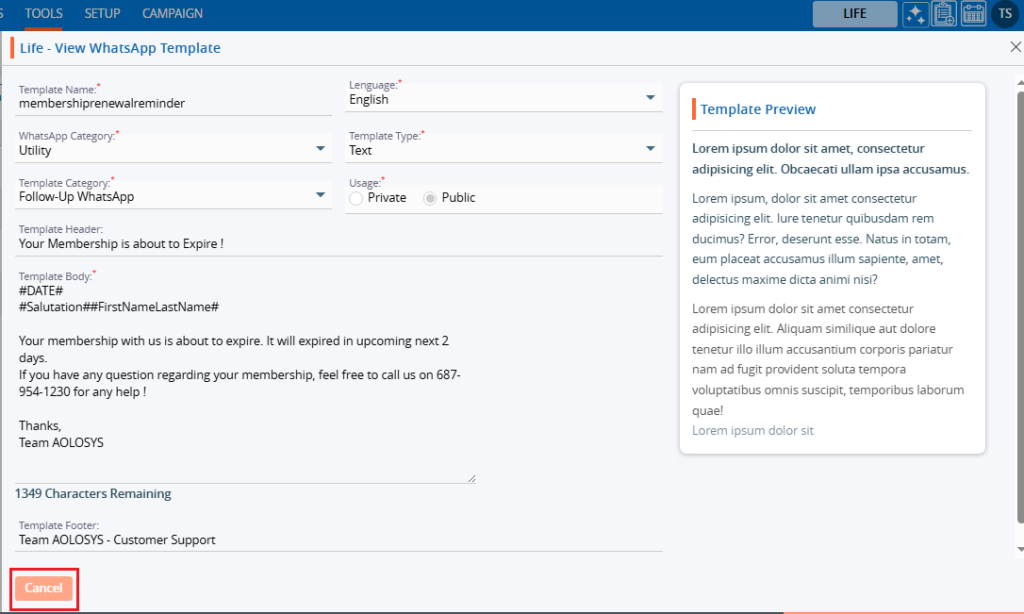
14. Click on the ‘View’ icon to view the existing Template.

15. A pop-up window will open, where the user can view the details of the template in read-only.
16. Click on the ‘Edit’ option to modify the template.

17. A pop-up window will appear, allowing the user to update details of the template.
18. After making the changes, click the ‘Save’ button.
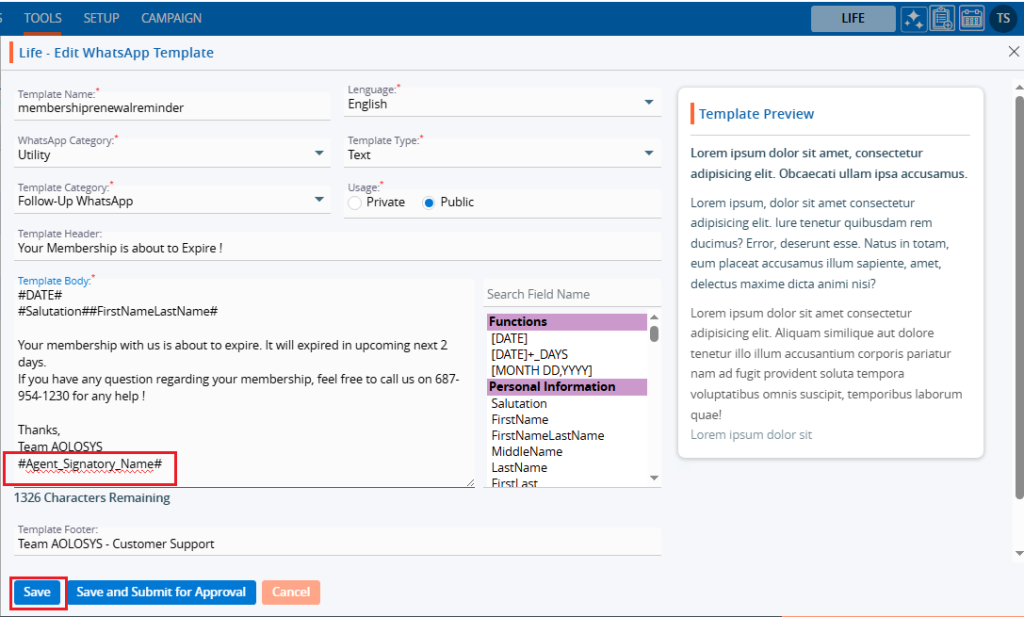
19. A confirmation message will appear indicating that the template has been updated.

20. Select the ‘Delete’ option to remove the template from the list if it is no longer needed.

21. Click the ‘Delete’ option in the confirmation message to proceed with removing the template from the list
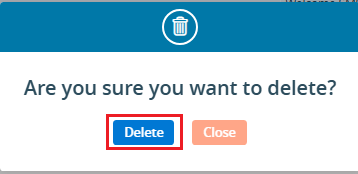
22. A confirmation message will appear, indicating that the template has been deleted and is no longer available.
